4
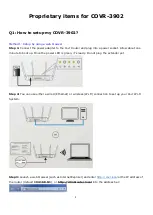
Step 4
: The first time you log in, the wizard will automatically start. If you are prompted to log in, enter
your password (blank by default) and click
Log in
. From the Home screen, hover over
Settings
at the top
and click
Wizard
. Click
Next
to continue.
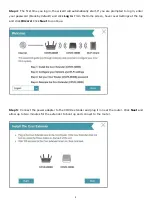
Step 5
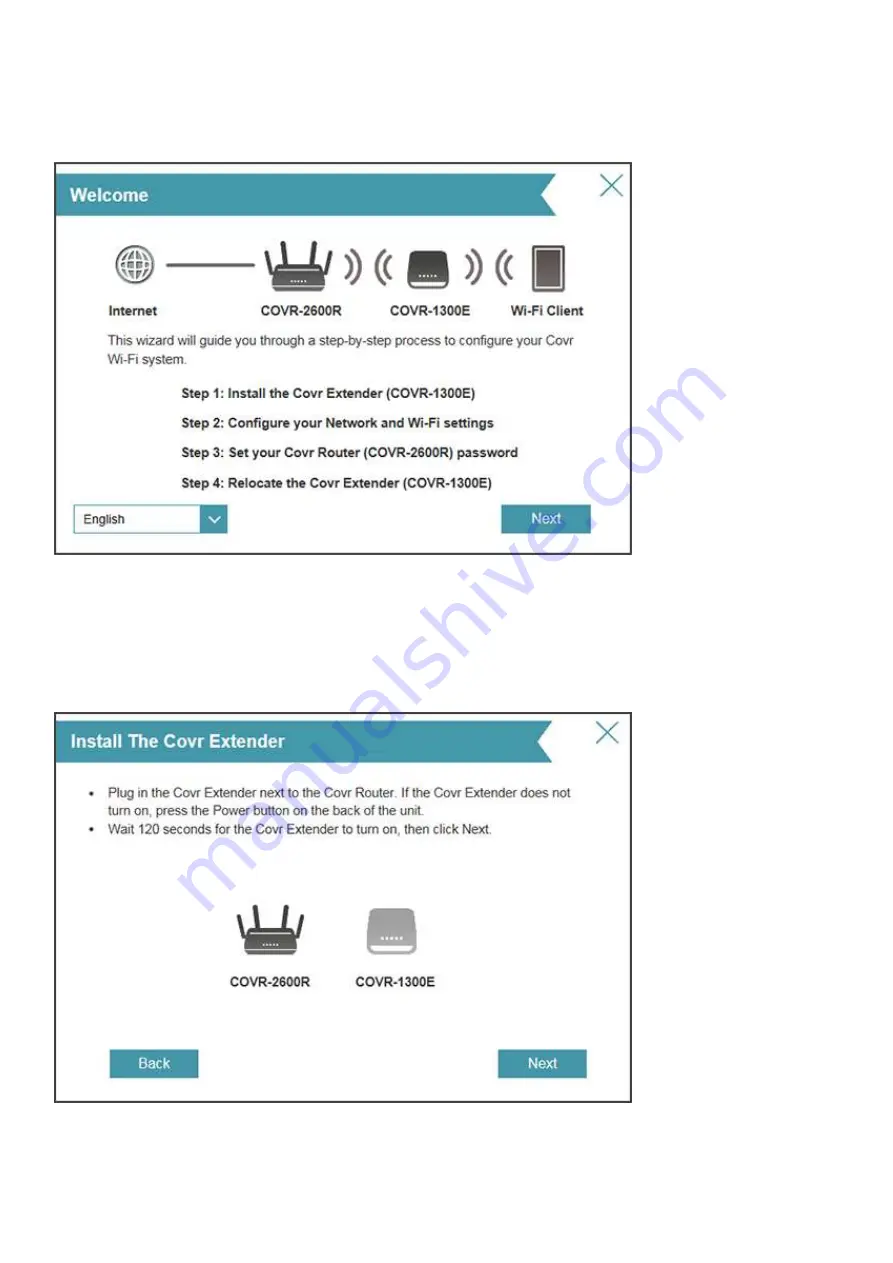
: Connect the power adapter to the COVR extender and plug it in near the router. Click
Next
and
allow up to two minutes for the extender to boot up and connect to the router.
Содержание COVR-3902
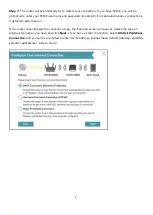
Страница 6: ...5 Step 6 Once the following screen appears click Next to continue ...
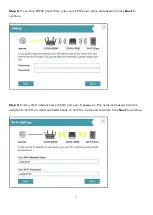
Страница 13: ...12 Step 6 Input the SSID and password you d like to set Step 7 Input the admin password you d like to set ...
Страница 26: ...25 Step 2 Click Advanced Setting ...
Страница 27: ...26 Step 3 Key in Mac address or select one Mac address from the drop down menu and click Save ...
Страница 29: ...28 Step 3 Click Reserve IP to enable the function Fill in the reserved IP address then click Save ...
Страница 31: ...30 Step 2 Click Advanced Settings and select Security Mode Step 3 Click Save to save your configuration ...
Страница 33: ...32 Step 2 Change the IP address as needed under Network Setting and click Save ...
Страница 35: ...34 You can find your WAN IP by clicking on the Home tab It will be displayed under the Internet Section ...
Страница 37: ...36 ...
Страница 39: ...38 Step 5 Select your desired Drive Letter and Click Finish ...
Страница 41: ...40 Q18 Does DIR 883 support VLAN No DIR 883 does not support VLAN feature ...
Страница 43: ...42 Step 2 Click Select File to browse for the firmware ...
Страница 44: ...43 Step 3 Click Upload Firmware you selected to upload ...
Страница 48: ...47 Step 3 Click Save to save the configuration to local hard drive ...
Страница 52: ...51 Step 3 Configure Guest Zone and click Save ...
Страница 57: ...56 Step 2 Then click Advanced Settings ...
Страница 58: ...57 Step 3 Then try to click SIP to disable SIP ALG and click Save ...
Страница 63: ...62 Step 4 Click Save after finish adding your rule ...
Страница 65: ...64 Step 3 Click Save after finish adding your rule ...
Страница 74: ...73 Step 4 You ll be able to check the log in Kiwi Syslog Service Manager as below ...
Страница 75: ...74 Method 2 E mail Settings Step 1 Setup the e mail information as below Step 2 You will receive the log email ...
Страница 76: ...75 Q34 How to check statistics for router Click Management Statistics ...
Страница 81: ...80 Step 2 Click to disable DNS Relay then click Save ...
Страница 92: ...91 Step 3 Select Connect to a workplace ...
Страница 99: ...98 Step 3 Fill in the WAN IP address Step 4 Fill in the Pre shared key ...
Страница 100: ...99 Step 5 Connect to your VPN server ...
Страница 101: ...100 Step 6 Make sure if you can ping your client under DUT ...
Страница 106: ...105 ...


