background image

88

Register your D-Link product online  at http://support.dlink.com/register/

 (10/07/04)

Registration

Содержание AirPlus DP-G321

Страница 1: ...Manual Building Networks for People Wireless Print Server D Link DP G321 AirPlus G ...

Страница 2: ...indows 2000 39 TCP IP Printing for Windows 98SE Me 49 Unix Linux Printing See PS Admin Manual on CD ROM 61 Setting up AppleTalk or LPR Printing in MAC OSX 62 Setting upAppleTalk Printing in MAC OS9 67 Printing from Mac OS Client Workstation 68 Networking Basics 70 Technical Specifications 82 FrequentlyAsked Questions 83 Contacting Technical Support 84 Warranty 85 Registration 88 Appendix DP G321 P...

Страница 3: ...ller System Requirements A computer with an installed Ethernet adapter for initial configuration purposes only Windows XP 2000 Me 98SE Mac OS withAppleTalk or Linux Internet Explorer 6 0 or Netscape Navigator version 6 0 or above with JavaScript enabled The printer must support the required Operating System Contents of Package A computer or a network of computers with wireless capability ...

Страница 4: ... 100BaseTX networks With two USB 2 0 ports and one standard parallel port the DP G321 is an ideal wireless high speed Print Server for a home or office that has multiple printers The DP G321 improves network printing services in the following ways The DP G321 delegates print jobs to the network printer This provides workload relief to your file servers and allows the file servers full capacity to ...

Страница 5: ...rk operating systems and protocols TCP IP UNIXlpr lpd Windows NT 2000 Windows 95 98SE Me Windows XP NetWare 5 x NDPS LPR Remote Printing NetBEUI Windows 2000 XP Windows 95 98SE Me Microsoft LAN Manager IBMLANServer AppleTalk MacOS EtherTalk Windows based setup and administration software PS Admin is supplied with the Print Server making configuration and management quick and easy The Print Server ...

Страница 6: ...ver is transferring print data to the USB1 printer port WLAN A steadily lit LED indicates a proper wireless network connection no lit LED indicates an unsuccessful wireless network connection A blinking LED indicates activity configuration or printing Link Activity A steadily lit LED indicates proper network connection no lit LED indicates an unsuccessful network connection A blinking LED indicate...

Страница 7: ...port supports the NWay protocol allowing the Print Server to automatically detect or negotiate the transmission speed of the network DC Power Connector The DC power input connector is located on the Print Server s rear panel and is labeled DC 5V RearPanelConnectors USB1 LAN Power Reset Antenna USB2 LPT ...

Страница 8: ...le use wireless LAN technology for many different purposes Mobility Productivity increases when people have access to data in any location within the operating range of the WLAN Management decisions based on real time information can significantly improve worker efficiency Low Implementation Costs WLANs are easy to set up manage change and relocate Networks that frequently change can benefit from ...

Страница 9: ...een the DP G321 and other network devices to a minimum each wall or ceiling can reduce your D Link wireless product s range from 3 90 feet 1 30 meters Position your devices so that the number of walls or ceilings is minimized 2 Be aware of the direct line between network devices Awall that is 1 5 feet thick 5 meters at a 45 degree angle appears to be almost 3 feet 1 meter thick At a 2 degree angle...

Страница 10: ... OFF 2 Confirm that your network is operating normally 3 Connect the DP G321 to your network using a straight through CAT5 cable 4 While the printer is powered OFF use the USB or parallel printer cable to con nect the DP G321 to your printer 5 Switch ON your USB or parallel printer 6 Plug the DC power adapter into the DC 5V power socket on the rear panel of the Print Server 7 Plug the power adapte...

Страница 11: ...lso automatically performs a Self Test on each of its major components The final result of the Self Test is signaled by the state of the USB LED indicator following the Self Test Preliminary to the actual component tests the LED indicators are tested to confirm their steady and flashing operation Power ON Self Test Every DP G321 has been factory tested to operate properly USB LED Faulty Component ...

Страница 12: ...thernet connection for the configuration of the DP G321 Using a CAT5 cable connect the DP G321 to the Ethernet adapter equipped computer in your network that you will be using for configuration Open your web browser and type http 192 168 0 10 in the address box and press Enter This set of numbers is the default IP Address of your Print Server Please note that the PC s IP Address must correspond wi...

Страница 13: ... status of your printing tasks etc Home Click on the Home tab from the tools bar of the main screen to display information about the DP G321 s System Status and Printer Status As shown here the System displays the status of your print server printer and network Clicking Refresh will update the information Home System Ethernet Status You can monitor the networking status in this field including the...

Страница 14: ...mn to display information about the wireless LAN Clicking Refresh will update the information Wireless Status The items in this field display information about the wireless LAN such as the connection mode Infrastructure or Ad Hoc SSID channel data transfer rate WEP encryption and the packets status ...

Страница 15: ... TCP IP including DHCP BOOTP UPnP and MAC Rendezvous The items in this field are configured in TCP IP Printing In this field you can monitor the status of your printing tasksthroughTCP IP Microsoft Network Printing In this field you can monitor the status of your printing tasks through Microsoft Network Mac AppleTalk Printing In this field you can monitor the status of your printing tasks through ...

Страница 16: ...umn to display the user s information Using the Web Configuration continued Home User Users Printing Log The items in this field display the user s information which include the user s Mac address IP address name and status of printing tasks ...

Страница 17: ...and Port Setting System Device and Port Setting This option will show you settings required to configure the DP G321 Print Server Consult your printers owner manual for the PJL Printer Job Language and print speed supported on your printer Click the Save button on the bottom of the configuration page to ensure the settings are updated and saved Using the Web Configuration continued ...

Страница 18: ...escription for the USB or printer ports It also allows you to select the PJL Printer setting Yes or No System Device In this field you can configure the basic information of your print server Password Enter the Administrator password 3 8 characters To set up the password please enter the password in the New Password box and then enter the same one again in the Confirm Again box NOTE PJL Print Job ...

Страница 19: ...you to configure the settings of data encryption Please remember that the WEP key must be set before the data encryption is enforced WEP Encryption This option allows you to select Disable 64 bit and 128 bit for encryption setting WEP Key Format You can decide the network key to be encoded byASCII ASCII characters or HEX hexadecimal digitals 64 bit WEP encryption uses a 10 hexadecimal character ke...

Страница 20: ...20 Using the Web Configuration continued Network ...

Страница 21: ... MAC Rendezvous This option allows you to enable or disable MAC Rendezvous mode WEP Encryption This option allows you to select Disable 64 bit and 128 bit for encryption setting Microsoft Network Enter the name of the Workgroup that you want the print server associated with in this field AppleTalk Enter theAppleTalk Zone name in the box In the following options enter the related configuration such...

Страница 22: ...g Control option Yes or No the user in the User List is permitted to access the print server or not Define Users You can add delete the user s to from the User List The User List at the bottom of the screen displays the current defined user and related information for the print server Click Apply to save the changes ...

Страница 23: ...gement SNMP Simple Network Management Protocol is a set of protocols for managing complex networks Community1 2 3 Enter a name in the Name box and configure the Access Right by selecting Read Only or Read Write from the pull down menu Click Apply if you have made changes ...

Страница 24: ...lick Test to print a test page from the selected USB or parallel port Click on the Tools link from the tools bar of the main screen to enter the Tools Page it provides the control options that include Print Test E mail Reset Upgrade and Backup Tools Print Test ...

Страница 25: ...count in the Print Server E mail Address box Incoming E mail POP3 Server Address Enter the server address that is used to receive your E mail in this box Outgoing E mail SMTP Server Address Enter the server address that is used to send your E mail in this box E mailAccount If your mail server needs to verify the user when sending E mail the DP G321 will apply the same Account Name and Password to ...

Страница 26: ...l Printing E mail Printing ASCII Text Only Select Enable to enable the E mail printing function Receive E mail Interval Enter the number in this box to set up the time in minutes to check receive E mail regularly Test E mail Account Click Test to send a test E mail to the given administrator s Email address Receive E mail Click Yes to immediately check and receive E mail and then print out the mai...

Страница 27: ...tinued Tools Upgrade Firmware Upgrade When a new version of firmware is available e g downloaded from the manufacturer s website you can upgrade the firmware of your print server Click Browse to locate the firmware file then click Apply ...

Страница 28: ...uration to File Click Apply to backup your current configuration of the print server to file and then save in the computer Restore Device Configuration from File You can reload a configuration that you saved before Click Browse to point to the backup file and then click Apply ...

Страница 29: ...e Help Page This page provides a link to D Link s support website D Link s support website will provide the most up to date information on your DP G321 Print Server Please check the website regularly for product and firmware updates Click on each topic for more information on any screen in the Web Configuration Utility ...

Страница 30: ... IP Address must be in the same subnet as the Print Server s IP Address for the two devices to communicate For example if your Print Server s IP Address is 192 168 0 10 with a subnet mask of 255 255 255 0 then your computer s IP Address should be 192 168 0 x where x is a value between 1 254 excluding 10 See Networking Basics Assigning a Static IP Address in this manual to find out how to change an...

Страница 31: ...31 TCP IP Printing for Windows XP continued At the Configuration window write down the Port Names for future reference You will need this information later in the configuration process ...

Страница 32: ...ndows XP continued Select your Connection Mode Enter the SSID of the remote access point or wireless router you wish to connect to If you would like to set WEP Encryption select the encryption level and the key here ClickApply ...

Страница 33: ...elect TCP IP Protocol at the Network window the screen below appears We recommend that you keep the default settings as shown If you need to make changes make sure to click Apply after you have made the changes You may wish to make a note of the IP address ...

Страница 34: ...34 Go to Start Settings Printers and Faxes Add a Printer Click Next TCP IP Printing for Windows XP continued ...

Страница 35: ...or Windows XP continued Select Local Printer Click Next Select Create a new port At the pull down menu highlight Standard TCP IP Port Click Next Click Next DeselectAutomatically detect and install my Plug and Play printer ...

Страница 36: ...e of the port being used by the printer Select LPR Select Custom Then click Settings TCP IP Printing for Windows XP continued Type in the IP address of the Print Server i e 192 168 0 10 The Port Name will automatically be filled in ...

Страница 37: ...g for Windows XP continued Click Next Highlight the printer as shown If the desired printer is not on the list click Have Disk and insert the printer driver disk that came with your printer to install the printer drivers Click Next ...

Страница 38: ...38 At this screen you can input a name for the printer Click Next Click Next TCP IP Printing for Windows XP continued Click Finish ...

Страница 39: ...dress field Press the Enter or Return Key Note The PC s IP Address must be in the same subnet as the Print Server s IP Address for the two devices to communicate For example if your Print Server s IP Address is 192 168 0 10 with a subnet mask of 255 255 255 0 then your computer s IP Address should be 192 168 0 x where x is a value between 1 254 excluding 10 ...

Страница 40: ...40 TCP IP Printing for Windows 2000 continued At the Configuration window write down the Port Names for future reference You will need this information later in the configuration process ...

Страница 41: ...s 2000 continued Select your Connection Mode Enter the SSID of the remote access point or wireless router to which you wish to connect If you would like to set WEP Encryption select the encryption level and the key here ClickApply ...

Страница 42: ...select TCP IP Protocol at the Network window the screen below appears We recommend that you keep the default settings as shown If you need to make changes make sure to click Apply after you have made the changes You may wish to make a note of the IP Address ...

Страница 43: ...43 Go to Start Settings Printers Double click on the Add Printer icon Click Next TCP IP Printing for Windows 2000 continued ...

Страница 44: ...44 TCP IP Printing for Windows 2000 continued Select Local Printer Click Next Select Create a new port at the pull down menu highlight Standard TCP IP Port Click Next ...

Страница 45: ...for Windows 2000 continued Click Next Click Next Type in the IP address of the Print Server in the Printer Name or IP Address field The Port Name field will automatically be filled in Select Custom Then click on Settings ...

Страница 46: ...46 TCP IP Printing for Windows 2000 continued Click Finish Click OK Input the port name of the port being used by the printer Select LPR Click Next ...

Страница 47: ...his screen you can input a name for the printer Click Next Click Next Highlight the printer as shown If the desired printer is not on the list click Have Disk and insert the printer driver disk that came with your printer to install the printer drivers ...

Страница 48: ... Finish The printer is now ready for printing with Windows 2000 on your network TCP IP Printing for Windows 2000 continued Click Next Select Do not share this printer Select Yes to print a test page Click Next ...

Страница 49: ...dress field Press the Enter or Return Key Note Your PC s IP Address must be in the same subnet as the Print Server s IP Address for the two devices to communicate For example if your Print Server s IP Address is 192 168 0 10 with a subnet mask of 255 255 255 0 then your computer s IP Address should be 192 168 0 x where x is a value between 1 254 excluding 10 ...

Страница 50: ...ng for Windows 98SE Me continued At the Configuration window write down the Port Names for future reference You will need this information later in the configuration process The Port Name shown here is only an example ...

Страница 51: ... 98SE Me continued Select your Connection Mode Enter the SSID of the remote access point or wireless router to which you wish to connect If you would like to set WEP Encryption select the encryption level and the key here ClickApply ...

Страница 52: ...elect TCP IP Protocol at the Network window the screen below will appear We recommend that you keep the default settings as shown If you need to make changes make sure to click Apply after you have made the changes You may wish to make a note of the IP address ...

Страница 53: ...53 TCP IP Printing for Windows 98SE Me continued ClickAdd Highlight Client ClickAdd Go to Start Settings Control Panel Double click on Network ...

Страница 54: ...ick OK to accept the location of the file 2 2 2 2 2 3 3 3 3 3 1 1 1 1 1 4 4 4 4 4 1 2 3 Highlightlpr inf 4 Click OK Insert the DP G321 CD ROM into your CD ROM drive Select the letter representing the CD ROM drive on your computer from the pull down menu Double click on the folder lpr ...

Страница 55: ...55 TCP IP Printing for Windows 98SE Me continued Click OK You should now be back to the Network Properties Page Highlight LPR for TCP IP Printing Click Properties ...

Страница 56: ...tinued The Port name and IP Address will be displayed The Port Name at right is just an example Click OK Type in the IPAddress of the DP G321 Make sure the Port Name is accu rate The Port Name at right is just an example Click OK Click Add Port ...

Страница 57: ...57 Click OK Windows will ask for a restart Click Yes TCP IP Printing for Windows 98SE Me continued ...

Страница 58: ...oted click on Start Settings Printers Add Printer When the Add Printer Wizard screen appears click Next Select Network Printer Click Next Type in the path if you know it or click Browse TCP IP Printing for Windows 98SE Me continued ...

Страница 59: ...specified type in the IPAddress of the DP G321 and the Port Name The Port Name shown at right is just an example Select Yes or No to answer the question Do you print from MS DOS based pro grams Click Next Click Next Click Next Highlight the printer as shown If your desired printer is not on the list click Have Disk and insert the printer driver disk that came with your printer to install the print...

Страница 60: ...60 TCP IP Printing for Windows 98SE Me continued Select Yes to print a test page Click Finish Go to Start Settings Printers Check to see that your printer is installed ...

Страница 61: ...61 Unix Linux Printing Please refer to the PS Admin Manual on the CD included with your purchase for information on setting up the Print Server in Unix Linux ...

Страница 62: ...ers using IP protocols for printing through Print Servers Follow the instructions below for setting up the Print Server After attaching the Print Server to your network using the directions provided in the Quick Installation Guide change the IP address of your Macintosh to access the Print Server s web configuration Note Mac OS printing with this print server is sup ported by PostScript printers o...

Страница 63: ...02 168 0 x where x is any number between 1 and 254 except 10 which is the IPAddress of the Print Server The IP Addresses and Subnet Mask shown here are examples only Setting up Apple Talk or LPR Printing in Mac OS X continued Select the AppleTalk tab in this window and check Make AppleTalk Active ...

Страница 64: ...64 Setting up Apple Talk or LPR Printing in Mac OS X continued To print open a document and select File Print from the menu Select Edit Printer List from the Printer dialogbox Click Add Printer ...

Страница 65: ...layed The Port Name shown here is an example only Click on the Port to which the PostScript printer is connected In this example AppleTalk has been selected PS 116688 U1 Laserwriter Then select the printer model from the dialog box displayed here Click Add Printer and the Printer Port configuration is complete Select the Printer Port just configured in the Print window Click Print to print your do...

Страница 66: ...nected to the Print Server The Port Name illustrated here is only an example Select the printer model from the dialog box In the Queue Name field type in the Port Name of the PostScript printer that is connected to the Print Server The Port Name illustrated here is only an example Select the printer model from the dialog box Click Add and the process is complete Close all Print Center windows sele...

Страница 67: ...inters in your AppleTalk zone The Port Names shown in this manual are examples only Setting up the Print Server for AppleTalk Printing To set up your Print Server so that it can be used forAppleTalk printing Note Mac OS printing with this print server sup ports PostScript printers only If your AppleTalk network is divided into AppleTalk zones you will have to specify which zone the Print Server sh...

Страница 68: ...ou are using the LaserWriter 8 To choose a printer connected to your Print Server as your Mac OS workstation s default printer Open the Chooser by selecting Chooser from the Apple menu Select the LaserWriter 8 icon on the left Make sure that AppleTalk is set to Active A list of all networked PostScript printers will be displayed Double click the name of the Printer Port you wish to use The Printer...

Страница 69: ...ect PPD If you wish to access this setting in the future you can use the Setup button in the Chooser window The selected printer will become your computer s default printer You may need to choose Page Setup in any applications you have open Select the appropriate printer description file for your printer Click Open If your printer is not listed click Generic to use a generic printer description ...

Страница 70: ...sh a network at home or work using Microsoft Windows XP Note Please refer to websites such as http www homenethelp com and http www microsoft com windows2000 for information about networking computers using Windows 2000 ME or 98SE Go to Start Control Panel Network Connections When this screen appears click Next ...

Страница 71: ...inued Please follow all the instructions in this window Click Next In this window select the best description of your computer If your computer connects to the Internet through a gateway router select the second option as shown ...

Страница 72: ...72 Networking Basics continued Enter a Computer description and a Computer name optional Click Next Enter a Workgroup name All computers on your network should have the same Workgroup name Click Next ...

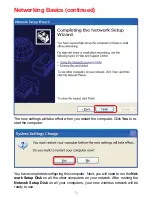
Страница 73: ...Basics continued Please wait while the Network Setup Wizard applies the changes When the changes are complete click Next Please wait while the Network Setup Wizard configures the computer This may take a few minutes ...

Страница 74: ...he best option In this example Create a Network Setup Disk has been selected You will run this disk on each of the computers on your network Insert a disk into the Floppy Disk Drive in this case drive A Format the disk if you wish and click Next Click Next ...

Страница 75: ...Wizard copies the files Please read the information under Here s how in the screen below After you complete the Network Setup Wizard you will use the Network Setup Disk to run the Network Setup Wizard once on each of the computers on your network To continue click Next ...

Страница 76: ...computer Click Yes to re start the computer You have completed configuring this computer Next you will need to run the Net work Setup Disk on all the other computers on your network After running the Network Setup Disk on all your computers your new wireless network will be ready to use ...

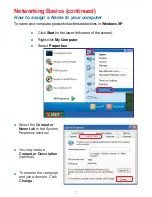
Страница 77: ...ase follow these directions in Windows XP Click Start in the lower left corner of the screen Right click My Computer Select Properties Select the Computer Name tab in the System Properties window You may enter a Computer Description optional To rename the computer and join a domain Click Change ...

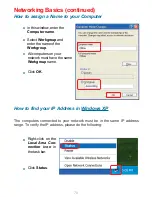
Страница 78: ... name of the Workgroup All computers on your network must have the same Workgroup name Click OK How to find your IP Address in Windows XP The computers connected to your network must be in the same IP address range To verify the IP address please do the following Right click on the Local Area Con nection icon in the task bar Click Status ...

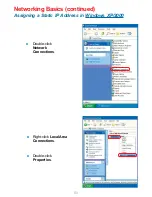
Страница 79: ... capable routers will automatically assign IP addresses to the com puters on the network using DHCP Dynamic Host Configuration Protocol technology If you are using a DHCP capable router you will not need to assign static IP addresses If you are not using a DHCP capable router or you need to assign a static IP address please follow these instructions Go to Start Double click Control Panel ...

Страница 80: ...80 Networking Basics continued Assigning a Static IP Address in Windows XP 2000 Double click Network Connections Double click Properties Right click LocalArea Connections ...

Страница 81: ... must be the same for all the computers on the network Networking Basics continued Assigning a Static IP Address in Windows XP 2000 Input your DNS server addresses Note If you are entering a DNS server you must enter the IP address of the Default Gateway The DNS server information will be supplied by your ISP Internet Service Provider Click OK Click Internet Protocol TCP IP Click Properties Select...

Страница 82: ...P NetBEUI AppleTalk EtherTalk LPR SMB TCP IP Protocols Supported BOOTP SNMP Telnet TFTP FTP LPD RARP DHCP IPP Management and Diagnostics Standard SNMP MIBs MIB II RFC1213 Diagnostic LED Indicators Power LAN USB WLAN Environmental and Physical Power Supply External power supply providing 5V 2 5ADC Dimensions 3 54 x 3 19 x 1 57 90mm x 81mm x 40mm Weight approx 5 19 oz 147g Operating Temperature 32 t...

Страница 83: ...ivers for your OS Q I have another manufacturer s wireless router and can not get the print server to connect A You will need to first change the IP address of your print server to match that IP address scheme of your wireless router Ex D Link uses 192 168 0 x for its default IP scheme Where x is a number between 2 to 254 Run PSAdmin from a Windows based PC This will allow you to connect to the pr...

Страница 84: ...e 877 453 5465 24 hours a day seven days a week D Link Technical Support over the Internet http support dlink com email support dlink com Tech Support for customers within Canada D Link Technical Support over the Telephone 800 361 5265 Monday to Friday 8 30am to 9 00pm EST D Link Technical Support over the Internet http support dlink ca email support dlink ca When contacting technical support plea...

Страница 85: ...nctional specifications for the Software as set forth in the applicable documentation from the date of original retail purchase of the Software for a period of ninety 90 days Warranty Period provided that the Software is properly installed on approved hardware and operated as contemplated in its documentation D Link further warrants that during the Warranty Period the magnetic media on which D Lin...

Страница 86: ...red tampered with defaced or removed Initial installation installation and removal of the product for repair and shipping costs Operational adjustments covered in the operating manual for the product and normal maintenance Damage that occurs in shipment due to act of God failures due to power surge and cosmetic damage Any hardware software firmware or other products or services provided by anyone ...

Страница 87: ...mful interference in a residential installation This equipment generates uses and can radiate radio frequency energy and if not installed and used in accordance with the instructions may cause harmful interference to radio communication However there is no guarantee that interference will not occur in a particular installation If this equipment does cause harmful interference to radio or televisio...

Страница 88: ...88 Register your D Link product online at http support dlink com register 10 07 04 Registration ...

Страница 89: ... Photo 900 Epson Stylus Photo 1280 1290 Epson Stylus C41UX C405 C42UX Epson Stylus C60 C61 C62 Epson Stylus C80 C82 Appendix The Lexmark Printer Lexmark Z13 Lexmark Z25 Lexmark Z33 Lexmark Z35 Lexmark Z43 Lexmark Z45 Lexmark Z53 The HP Printer HP DeskJet 640C 656C HP DeskJet 845C HP DeskJet 920C HP DeskJet 948C HP DeskJet 960C HP DeskJet 990Cxi 995C HP DeskJet 1125C 1180C HP DeskJet 1220C HP DeskJ...

Страница 90: ...ty list please visit http www support dlink com The Lexmark Printer Lexmark 4039 10R Lexmark 5700 Lexmark Optra Color 45 Lexmark Optra C710 Lexmark Optra E E E310 Lexmark Optra K1220 Lexmark Optra M410 M412 Lexmark Optra N Lexmark Optra R Lexmark Optra S1250 S1855 Lexmark Optra SC 1275 Lexmark Optra SE 3455 Lexmark Optra T614 Lexmark Optra W810 Lexmark Z53 ...

Отзывы: