10
5
IR IN:
Connect to the provided IR Extender to extend the IR control
range of remotely located devices. Ensure that the remote being used
is within direct line-of-sight of the IR Extender.
6
IR OUT:
Connect to the provided IR Blaster to transmit IR signals to
devices within direct line-of-sight of the IR Blaster.
7
CAT5e/6/7 OUT:
Connect to a compatible HDBaseT Receiver with a
single Cat.5e/6/7 cable for transmission of all data signals.
8
LAN:
Connect directly, or through a network switch, to your PC/
laptop to control the unit via Telnet/WebGUI and to extend the
network to both ends of the HDBaseT connection.
9
RS-232:
Connect directly to a PC, laptop or other serial control device
to send RS-232 commands to control the unit.
10
SERVICE:
This slot is reserved for firmware update use only.
11
DC 24V:
Plug the 24V DC power adapter into this port and connect it
to an AC wall outlet for power.
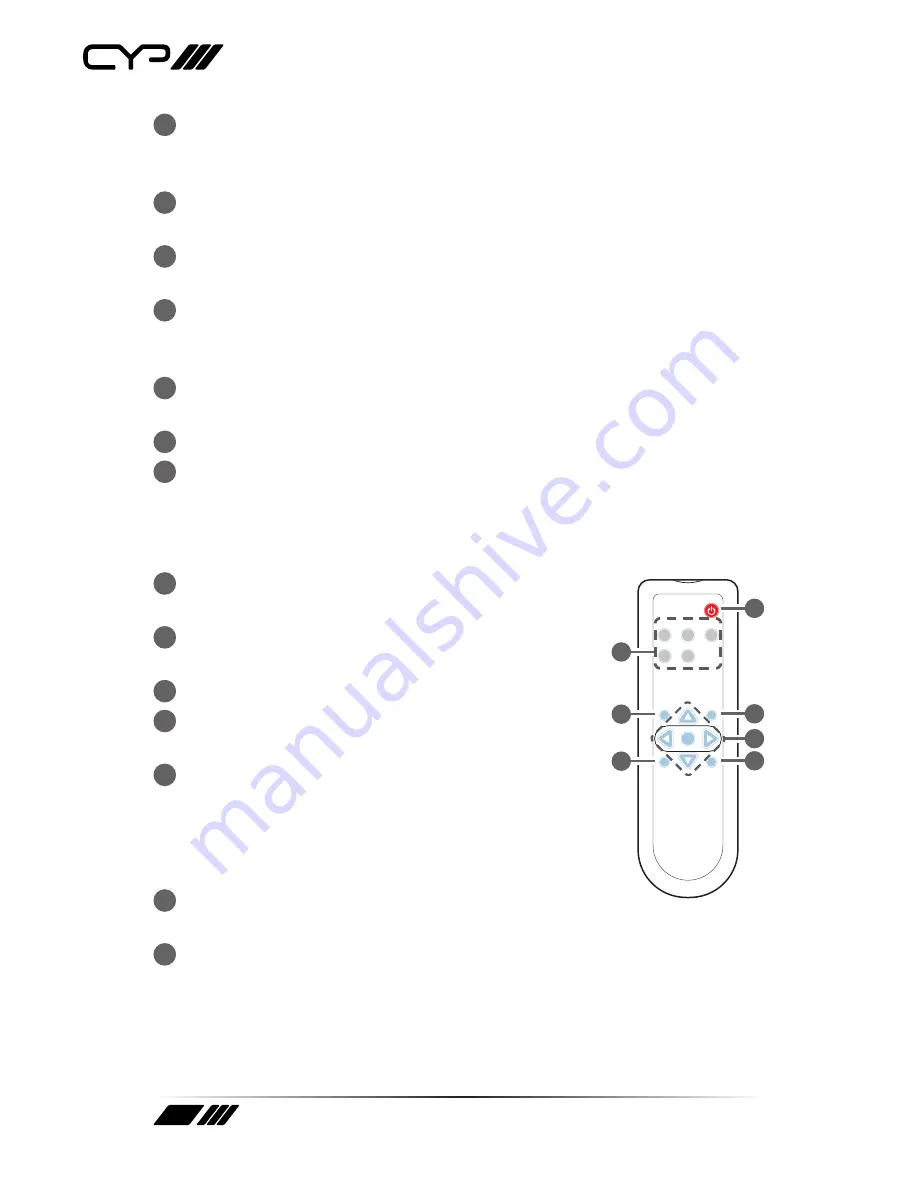
6.3 Remote Control
1
POWER:
Press this button to power the unit on or
place it into stand-by mode.
2
DP/HDMI 1~2/PC 1~2:
Press any of these buttons
to switch immediately to the corresponding input.
3
MENU:
Press this button to enter the OSD menu.
4
EXIT:
Press this button to exit the menu or the
current selection in the OSD menu.
5
OK/
/
/
/
& VOL/−/+:
Press OK to confirm the
selection or press the arrow buttons to navigate
the OSD menu. When the OSD menu is not active,
use the LEFT/RIGHT (
◄/►
) buttons to control the
volume level.
6
AUTO ADJUST:
Press this button to activate the
Auto Adjust function for VGA sources.
7
RESET:
Press this button to reset the device back to the default
settings.
CR-176
PC 1
PC 2
EXIT
+
POWER
OK
RESET
HDMI 1
HDMI 2
DP
-
MENU
VOL
AUTO
ADJUST
2
1
4
3
5
6
7


