background image

Introduction

ALWAYS OBSERVE POSTED SAFETY GUIDELINES

WHEN ASSEMBLING THIS PRODUCT.  ALWAYS WEAR SAFETY GLASSES

This ProPark Series Installation & Assembly Instruction will detail the tools
required, fasteners and components furnished, assembly steps, and optional
features, to successfully install the Upper Tier Cycle Safe ProPark Bicycle Locker
System

.

WARNING: Exterior storage on the ground under tarps do not adequately protect

the locker components. The packaging is not intended for extended storage in exterior
locations. Product assembled at a later date needs to be stored indoors or under cover in a

Please read the instructions completely before 

beginning.

Identify & inventory all parts using the packing list furnished with the shipment and the parts
list in this Installation Instruction. Some components may be found in the "Options" section.
Be sure to keep the hardware bags & contents separate from each other.

If you have difficulties or require further installation discussion, please contact our Customer 

Service Experts

Call - 616.954.9977

Toll Free - 888.950.6531

E-Mail:  [email protected]

Digital Copies of this Installation & Assembly Instruction may be found on our website:

www.cyclesafe.com/bike-lockers/propark/WI4.9.002 ProPark Assembly Guide

Carpentry or Assembly skills are strongly suggested

You will need skills at using powered hand tools, climbing ladders, and squaring the
assembled components. The recommended time budget for each 2-Door Locker is 1 to 2
man-hours.

NOTE:  

The heaviest part is 70lbs (31.8kg).

The Locker Site Must Be Prepared and Ready for 

Assembly Before Beginning.

Reference the ProPark System Planning Manual (WI4.9.028) for Site Preparation and the 

Propark Assembly Guide WI4.9.002 for Planning recommendations.

www.cyclesafe.com/home/bike-community-resources/ProPark System Planning Manual 

(WI4.9.028)

ProPark Series {Upper} Tier Installation Guide

Page 3 of 13

Содержание PROPARK

Страница 1: ...ROPARK OUTDOOR BICYCLE LOCKER SYSTEM INSTALLATION ASSEMBLY INSTRUCTIONS www cyclesafe com info cyclesafe com PH 616 954 9977 TF 888 950 6531 UPPER TIER LOCKER MOUNTING WI4 9 059 D Controlled Document...

Страница 2: ...ality 11 Contact Information 13 ALWAYS OBSERVE POSTED SAFETY GUIDELINES WHEN ASSEMBLING THIS PRODUCT ALWAYS WEAR SAFETY GLASSES Components Comments in BLACK are Instructions Comments in BLUE are Helpf...

Страница 3: ...n Be sure to keep the hardware bags contents separate from each other If you have difficulties or require further installation discussion please contact our Customer Service Experts Call 616 954 9977...

Страница 4: ...must be taken ot record the corresponding Key with Locker Door A Assemble anchor and level the entire lower tier locker row B Pre Assemble Riser Blocks with nuts and bolts C Attach Riser Blocks D Pre...

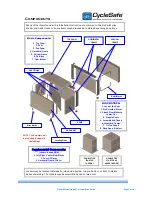
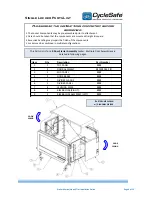
Страница 5: ...op Panels 8 Hang Doors Adjust DOUBLE TIER STARTER 4 DOOR DOUBLE TIER STARTER w ADDER 8 DOOR Basic Components 1 Top Panel 2 Door 3 End Panel 4 Horizontal Frame 5 Vertical Frame 6 Partition 7 Door Brace...

Страница 6: ...mbly Locker Multiple Door Assemblies are detailed in following pages Please read the instructions completely before beginning The Locker Components may be pre assembled prior to attachment Care should...

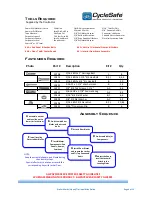
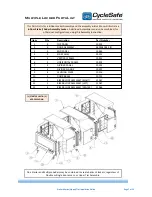
Страница 7: ...R 10301 10960 11066 10216 10755 11067 11067 10101 10201 10202 10101 10207 This Parts List is for a 6 Door Locker Assembly and the assembly instructions will illustrate a 6 Door Starter Adder Assembly...

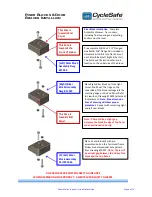
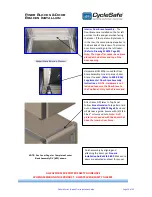
Страница 8: ...he underside of the block rests against the matching ridge on the End Panel Refer to View B on Drawing 10074 attached for placement Note Blue dimension lines of drawing will show proper placement Repe...

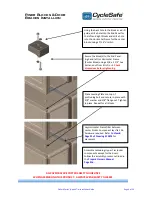
Страница 9: ...Frame Center Block using a 3 8 x 2 1 2 hex bolt and nut from Kits D or E Check dimensions before tightening Place Leveling Plates on top of protruding bolt and secure in place with 3 8 washer and 3 8...

Страница 10: ...at the bottom and top of the door opening Hardware Kit 10756 is used for Door Brace Assembly One kit per each door brace If needed Refer to WI4 9 026 Supplemental Door Brace Assembly Instructions NOT...

Страница 11: ...ue to accidents vandalism or defects caused by products that are tampered with altered modified or repaired are not covered by this warranty This warranty stated above is only valid if product is inst...

Страница 12: ...mal key wear Any repair or replacement outside the scope of this warranty shall be at ABLOY s rates and terms then in effect This warranty is valid only on Products supplied by ABLOY Security Inc Irvi...

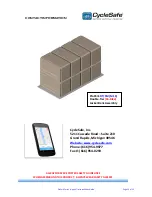
Страница 13: ...49546 Website www cyclesafe com Phone 616 954 9977 Fax 616 954 0290 ALWAYS OBSERVE POSTED SAFETY GUIDELINES WHEN ASSEMBLING THIS PRODUCT ALWAYS WEAR SAFETY GLASSES ProPark DT SM M16 Double Tier 16 Bi...

Страница 14: ......

Страница 15: ......

Отзывы: