


CPS1100AVR
Guaranteed Uninterruptible Power System
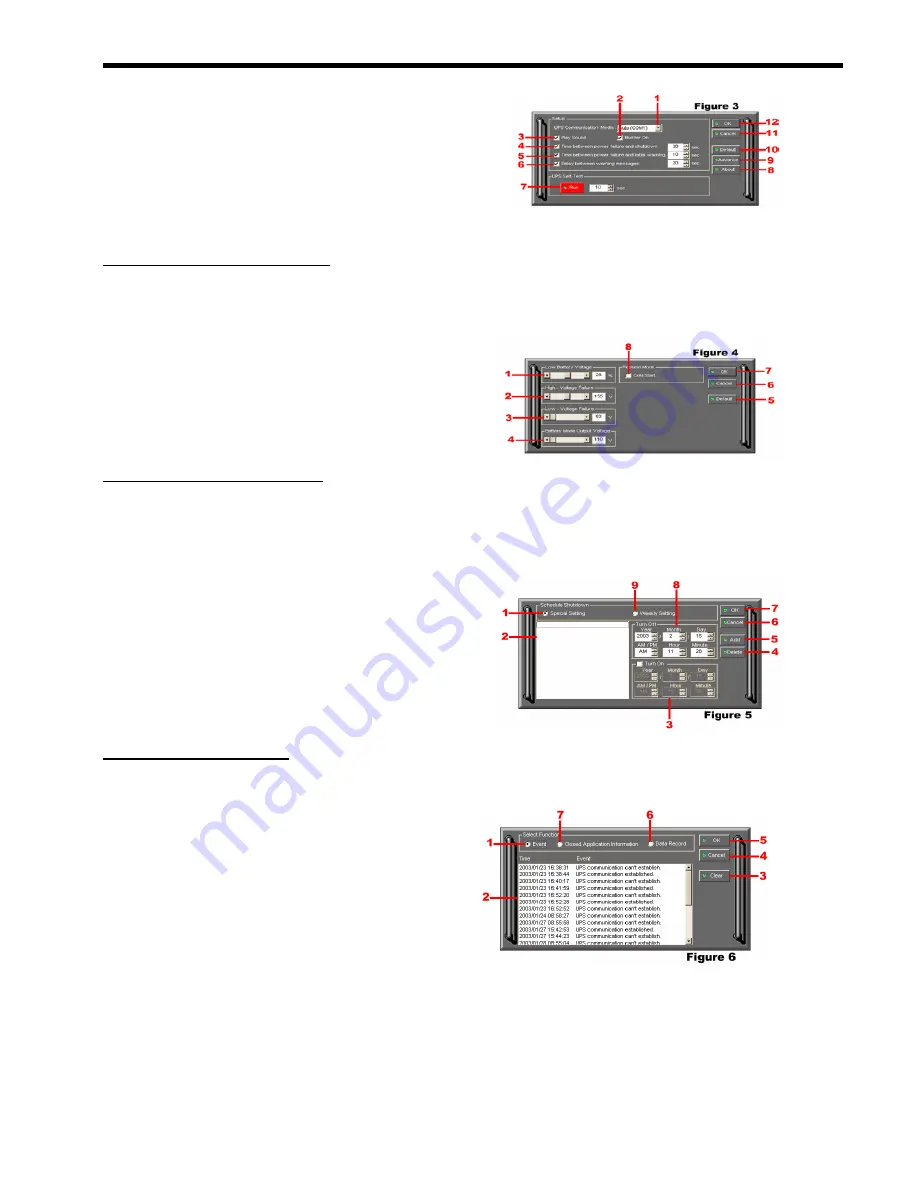
8.
About:
This button will display information about
the software, as well as contact information.
9. Advance:
This button opens the
Advanced Setup
Window
.
10. Default:
Click this button to return the software to
original factory settings.
11. Cancel:
This button exits the window
without
saving changes
.
12. OK:
This button exits the window
and
saves
changes
.
PowerPanel Plus™ Advanced Setup (See Figure 4 )
1. Low Battery Voltage:
This sets the low battery
cut-off level. The user can slightly extend the UPS
run time by adjusting this setting.
2. High-Voltage Failure:
Sets the upper level where
the UPS will switch to battery.
3. Low-Voltage
Failure:
Sets the lower level where the
UPS will switch to battery.
4. Battery-Mode
Output
Voltage:
Sets the voltage that
the unit will output when running on battery.
5. Default:
Restores the settings to the factory defaults.
6. Cancel:
Exits the window
without saving changes
.
7. OK:
Exits the windows
and saves changes
.
8. Cold
Start:
When enabled, the UPS can start in the
absence of AC power. To maximize battery life, it is
recommended to keep this disabled.
PowerPanel Plus™ Schedule Menu (See Figure 5 )
1. Special
Setting:
This setting allows you to schedule
a one-time startup/shutdown.
2. Schedule Display:
This area displays the
days/dates and times of any scheduled startups and
shutdowns.
3. Turn
On:
Select the day/date and time that you want
the computer system to restart. Can only be used in
conjunction with a scheduled shutdown.
4. Delete:
Delete the selected item from the schedule.
5. Add:
Adds an item to the schedule.
6. Cancel:
This button is used to exit the log window
without saving any changes
.
7. OK:
This button is used to exit the shutdown window
and save any changes
.
Please note
: You must click
Add
to add the
item to the schedule.
8. Turn
Off:
Select the day/date and time that you want
the system to shutdown. This is optional to use and
has no effect on whether your computer will shut down
during a power failure.
9. Weekly Setting:
Allow you to schedule a
shutdown/startup based on the day of the week.
PowerPanel Plus™ Log Menu (See Figure 6 )
1. Event Option Button:
When this option is selected,
the log will display different PowerPanel Plus™ events,
such as power failure, program start, and program end.
2. Log
Display:
This area displays the information as
selected by the
Event
,
Closed Application
Information
, or
Data Record
option button.
3. Clear:
Clears the selected log.
4. Cancel:
Exits the screen
without saving any
changes
.
5. OK:
Exits the screen
and saves any changes
.
6. Data
Record
Option Button:
When selected, the
log will display a record of the items that are shown in
the main window, such as input/output voltage and
temperature.
7.
.
Closed Application Information Option Button:
When this option is selected, the log will display the
names and locations of any files that were auto-saved
by the software
6


