background image


39 

© 2014 Maka Technologies Group. All Rights Reserved. 

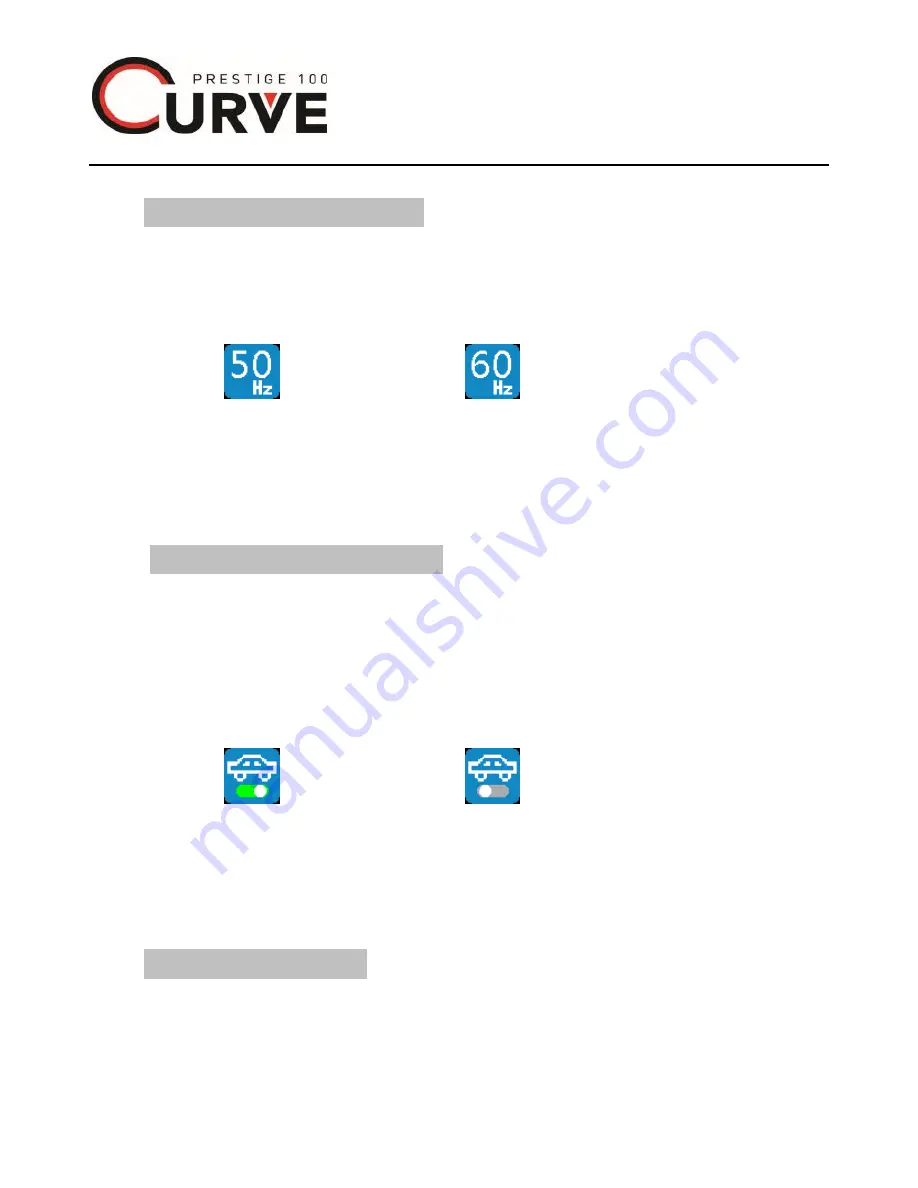
Light frequency setting 

11.3.16 Press 

MENU button

 to select light frequency icon 

once get into system setting interface. 
11.3.17 Press 

Shooting button

 to select light frequency 

data 


    50HZ   


60HZ     

11.3.18  When  setting  finished,  press  Menu  button  to  go  to 
next  icon  or  mode  button  to  exit  and  return  to the  previous 
menu interface. 


Vehicle-Mounted setting 
 

11.3.19 Press 

MENU button

 to select vehicle-mounted 

mode once get into system setting interface. 
 
11.3.20 Press 

Shooting button

 to select vehicle-mounted 

mode 


      On 


  Off 

11.3.21  When  setting  finished,  press  Menu  button  to  go  to 
next  icon  or  mode  button  to  exit  and  return  to the  previous 
menu interface. 


Formatting setting 


11.3.22 Press 

MENU button

 to select formatting icon 

Содержание Prestige100

Страница 1: ...trademarks or registered trademarks of Maka GPS Technologies Group In association with Maka GPS Technologies Private Limited Singapore Maka GPS Technologies Sdn Bhd Malaysia Maka Technologies Group H K Limited and Maka Corporation USA Inc The information in this manual is subject to change without notice www makagps com 6 2014 R1 1 ...

Страница 2: ...lugs or loose electrical sockets Unsecured connections can cause electric shock or fire Do not touch the car charger with wet hands or disconnect the charger by pulling the cord Doing so may result in electrocution Do not bend or damage the car charger Doing so may cause electric shock or fire Do not use your device while it is charging or touch your device with wet hands Doing so may cause electr...

Страница 3: ... Do not drop or cause an impact to the charger or the device Handle and dispose of the device and charger with care Never dispose of the battery or device in a fire Never place the battery or device on or in heating devices such as microwave ovens stoves or radiators The device may explode when overheated Follow all local regulations when disposing of used battery or device Never crush or puncture...

Страница 4: ...er or battery Do not bite or suck the device or the battery Doing so may damage the device or result in an explosion or fire Children or animals can choke on small parts If children use the device make sure that they use the device properly Do not handle a damaged or leaking Lithium Ion Li Ion battery For safe disposal of your Li Ion battery contact your nearest authorised service centre ...

Страница 5: ...ay cause your device to malfunction If you notice strange smells or sounds coming from your device or the battery or if you see smoke or liquids leaking from the device or battery stop using the device immediately and take it to a Maka Service Centre Failure to do so may result in fire or explosion For your own safety do not operate the controls of the product while driving Two window mounts are n...

Страница 6: ... devices and equipment with caution Ensure that any mobile devices or related equipment installed in your vehicle are securely mounted Avoid placing your device and accessories near or in an airbag deployment area Improperly installed wired equipment can cause serious injury when airbags inflate rapidly Do not drop your device or cause impacts to your device Your device may be damaged or may malfu...

Страница 7: ...ice Centre and Manufacturer Authorised Service Personnel MASP Do not disassemble or puncture the battery as this can cause explosion or fire Turn off the device before removing the battery If you remove the battery with the device turned on it may cause the device to malfunction When cleaning your device mind the following Wipe your device or charger with a towel or an eraser Do not use chemicals ...

Страница 8: ...onment or human health from uncontrolled waste disposal please separate these items from other types of waste and recycle them responsibly to promote the sustainable reuse of material resources Household users should contact either the retailer where they purchased this product or their local government office for details of where and how they can take these items for environmentally safe recyclin...

Страница 9: ...ugh this device THIRD PARTY CONTENT AND SERVICES ARE PROVIDED AS IS MAKA GPS TECHNOLOGIES GROUP DOES NOT WARRANT CONTENT OR SERVICES SO PROVIDED EITHER EXPRESSLY OR IMPLIEDLY FOR ANY PURPOSE MAKA EXPRESSLY DISCLAIMS ANY IMPLIED WARRANTIES INCLUDING BUT NOT LIMITED TO WARRANTIES OF MERCHANTABILITY OR FITNESS FOR A PARTICULAR PURPOSE MAKA GPS TECHNOLOGIES GROUP DOES NOT GUARANTEE THE ACCURACY VALIDI...

Страница 10: ...acilities over which Maka GPS Technologies Group has no control Without limiting the generality of this disclaimer Maka GPS Technologies Group expressly disclaims any responsibility or liability for any interruption or suspension of any content or service made available through this device Maka GPS Technologies Group is neither responsible nor liable for customer service related to the content and...

Страница 11: ...ebsite at www makagps com Available features and additional services may vary by device software Applications and their functions may vary by country region or hardware specifications Maka is not liable for performance issues caused by applications from any provider other than Maka Maka is not liable for performance issues or incompatibilities caused by not installing the device as stated in this ...

Страница 12: ...rd installation 23 25 7 Camera Start up Shut Down 25 8 Battery Installation 26 9 Battery charge 26 10 Mode Switch 26 11 Mode Settings 27 42 11 1 Video Mode Setting 27 32 11 2 Photo Mode Setting 32 36 11 3 System Setting 36 40 11 4 Playback Mode Setting 41 42 12 Recording Function 42 43 13 Photography Function 43 14 Video Review 43 15 Troubleshooting 44 45 16 List for Menu Icon 46 49 ...

Страница 13: ...ata Cable For Charging and Data Transfer HDMI Cable Operating Manual Quick Release Buckle Curved Adhesive Mount Flat Adhesive Mount Long Connector Short Connector 1 Long Screw 1 Short Screw Bike Roll Bar Mount include fixing screw Waterproof Housing with Device Battery 950mAh ...

Страница 14: ...14 2014 Maka Technologies Group All Rights Reserved Optional List Standard Frame Mount Car charger for batteries Head Strap Mount Handlebar Seat post Pole Mount Tripod Mount Flexible Mount ...

Страница 15: ... or knock the machine intensely Rough handling will cause damage to the product components MicroSD Card Using of specific MicroSD Card provided Other types of SD card used cannot be guaranteed to be normal operation of the camera Do not store MicroSD card in or near to any intense magnetic place in case of the storage data loss Inserting other small object into the SD card slot could cause malfunc...

Страница 16: ...battery unplug the USB cable and inform your distributor for advised Safe storage Do not keep the camera near extreme temperatures or expose to direct sunlight Please keep it in a cool dry environment for storage Keep away from magnetic fields Do not place the camera near anything having strong magnetic such as magnets and motors Also avoid using the camera near anything emitting strong radio wave...

Страница 17: ...water Ultra high definition display can show clear photo effect in video or playback Battery removable makes it easy to replace and prolong usage life 170 degrees A grade high resolution wide angle lens and HDMI high definition output function Supports up to 32G memory card Support recording video with different resolution format like 1080P 960P 720P and WVGA and photograph mode like single shot c...

Страница 18: ...o Format MOV with H 264 codec Video compression formats H 264 Photo resolution 16M 12M 8M 5M 3M Memory Card Micro SD 32GB Class 6 an above Photo mode single shot continuous shooting autodyne and timing photography Light frequency 50Hz 60Hz USB USB2 0 3 0 Power supply 5V recommended charging power supply of 1A during operating mode Battery capacity 950MAH Charging time shutdown status 3 5H 5V0 5A O...

Страница 19: ... button to stop playing 5 In the Menu interface press this button to confirm 6 In the time setting press this button to adjust time 2 Indicator light on the top 1 Red light shown when power on 2 Continuous flashing shown during recording 3 Light blink once during photo taking process per shots 4 Charging with continuous flashing indicator when camera off mode and goes off when battery is fully cha...

Страница 20: ... 1 Screen capture during recording and photography Always keep the lens clean for clear quality 6 Indicator light on the front 1 Red light shown when power on 2 Red light continuous flashing during recording 3 Light flashing during photo taking process 4 Continuous flashing in charging when camera power off and go out when battery is full 7 Power menu button 1 Switch on off long press for 3 to 5 s...

Страница 21: ... Display the mode status when camera power on 2 Display the operation process of the camera 3 USB socket 1 Insert USB cable into the socket for charging by connecting with computer or power source 2 Check video and photo file by connecting directly with computer 4 HDMI socket 1 Using an HDMI cable can transmit uncompressed audio and video signals ensuring high quality audio and video signal transm...

Страница 22: ...g Photo mode Photo taking 2 Resolution video resolution 1080P full HD mode make video more clear photo resolution Higher resolution more clear photo 3 Current date time date time display Display the current date time 4 Capacity photo capacity Numbers shown are the total quantity of photo taken Video capacity Time shown are remaining time for photography 2 6 4 6 5 5 4 3 3 2 1 1 ...

Страница 23: ... memory cards may not be compatible with your device Some memory cards may not be fully compatible with the device Using an incompatible card may damage the device or the memory card or corrupt the data stored in it Use caution to insert the memory card right side up as shown in the image below It is recommended to reformat a memory card every time images are transferred from it to a computer or a...

Страница 24: ...card while the device is transferring or accessing information Doing so can cause data to be lost or corrupted or damage to the memory card or device Maka GPS Technologies Group is not responsible for losses that result from the misuse of damaged memory cards including the loss of data Formatting the memory card You may choose to format your memory card on a computer or on the device On the device...

Страница 25: ...rom user actions 7 Camera start up and shut down Press and hold the Power button for a few seconds 3 5 sec to turn on the device A welcome message will be displayed on screen as shown in the image below To turn off the device press and hold the Power button for a few seconds 3 5 sec again to turn off the device A goodbye message will be displayed on screen as shown in the image below Curve Prestig...

Страница 26: ...ery out 9 Battery charging a Install the battery into the camera b Connect the camera with computer through data cable c Connect the camera with the power adapter by getting through power supply a Long press the power button for 3 5 seconds for startup b Long press the power button for 3 5 seconds for shutdown c Indicator lights and LCD screen on means cameras are power on and also get directly in...

Страница 27: ...oto Setting System Setting Press Shooting button to get into current mode setting interface The text reflected on the top of interface is the current selection 11 1 Video mode setting Resolution setting 11 1 1 Press MENU button to select video resolution once get into video setting interface 11 1 2 Press Shooting button to select and confirm the video resolution 11 1 3 When setting finished press ...

Страница 28: ...1 6 When setting finished press Mode button to exit and return to the previous menu interface Audio Setting 11 1 7 Press MENU button to select audio icon once get into video setting interface 11 1 8 Press Shooting button to select audio on or Mute unMute 11 1 9 When setting finished press Mode button to exit and return to the previous menu interface Date Setting 11 1 10 Press MENU button to select...

Страница 29: ...yback It is always recommended to set as Auto The lower the FPS the recording will be playback in high speed 11 1 13 Press MENU button to select time lapse photography icon once get into video setting interface 11 1 14 Press Shooting button to select the frequency needed Off 1FPS 5FPS 10FPS 11 1 15 When setting finished press mode button to exit and return to the previous menu interface Timing pho...

Страница 30: ... setting interface 11 1 17 Press Shooting button to select photography time interval off 10s 20s 30s 60s 11 1 18 When setting finished press mode button to exit and return to the previous menu interface White balance setting 11 1 19 Press MENU button to select white balance icon once get into video setting interface 11 1 20 Press Shooting button to select white balance effect auto cloudy sunny tun...

Страница 31: ... the color needed Red Blue 11 1 24 Press Shooting button to adjust the parameters of selected color 11 1 25 When setting finished press Mode button to exit and return to the previous menu interface Exposure Compensation 11 1 26 Press MENU button to select exposure compensation icon once getting into video setting interface 11 1 27 Press Shooting button to confirm the exposure compensation data 11 ...

Страница 32: ...r setting 11 1 32 Press power button to select G Sensor icon once get into video setting interface 11 1 33 Press shooting button to select G sensor Off Low sensitivity Middle sensitivity High Sensitivity 11 1 33 When setting finished press Mode button to exit and return to the previous menu interface once setting completed for video setting 11 2 Photo Setting Photo resolution 11 2 1 On the main in...

Страница 33: ... and return to the previous menu interface Date Stamp setting 11 2 6 Press MENU button to select date icon in photo setting interface 11 2 7 Press Shooting button to select date stamp On Off 11 2 8 When setting finished press Menu button to go to next icon or mode button to exit and return to the previous menu interface Timing photography 11 2 9 Press MENU button to select timing photography icon ...

Страница 34: ... photo setting interface 11 2 13 Press Shooting button to select and confirm the mode Single Shoot Off Mutiple Shoots On 11 2 14 When setting finished press Menu button to go to next icon or mode button to exit and return to the previous menu interface Color effects setting 11 2 15 Press MENU button to select color effects icon once get into photo setting interface 11 2 16 Press Shooting button to...

Страница 35: ...Press shooting button to select white balance effect Auto Cloudy Day Light Tungsten Fluorescent Blue Light blue Red Pink Custom white balance Custom white balance setting 11 2 20 Press MENU button to select Custom White balance icon if you have selected custom setting for white balance for color adjustment 11 2 21 Press Shooting button to confirm getting into setting interface 11 2 22 Press MENU b...

Страница 36: ...erface 11 2 26 Press Shooting button to confirm the exposure compensation data Darker Normal Brighter 11 2 27 When setting finished press Menu button to go to next icon or mode button to exit and return to the previous menu interface 11 3 System setting Time setting 11 3 1 Press MENU button to select time setting icon once get into system setting interface and press Shooting button to get into tim...

Страница 37: ... Shooting button to confirm the language Simplified Chinese Traditional Chinese English 11 3 7 When setting finished press Menu button to go to next icon or mode button to exit and return to the previous menu interface Inverted image setting 11 3 8 Press MENU button to select inverted image function once get into system setting interface 11 3 9 Press Shooting button to select inverted image functi...

Страница 38: ...enu button to go to next icon or mode button to exit and return to the previous menu interface Automatic shutdown setting 11 3 14 Press MENU button to select automatic shutdown icon once get into system setting interface 11 3 15 Press Shooting button to select the automatic shutdown time Shutdown will only activated when device is not in the recording mode Off 1min 3min 5min 11 3 15 When setting f...

Страница 39: ...u button to go to next icon or mode button to exit and return to the previous menu interface Vehicle Mounted setting 11 3 19 Press MENU button to select vehicle mounted mode once get into system setting interface 11 3 20 Press Shooting button to select vehicle mounted mode On Off 11 3 21 When setting finished press Menu button to go to next icon or mode button to exit and return to the previous me...

Страница 40: ...get into system setting interface 11 3 27 Press Shooting button to get into default setting interface 11 3 28 Press MENU button to select confirm or cancel 11 3 29 Press Shooting button to confirm and exit and then return to the previous menu interface Software version checking 11 3 30 Press MENU button to select software version icon once get into system setting interface 11 3 31 Press Shooting b...

Страница 41: ...s delete 11 4 5 Press MENU button to select the delete icon when entering into file playback setting 11 4 6 Press Shooting button to get into the delete interface 11 4 7 Press MENU button to confirm erase one file or cancel 11 4 8 Press Shooting button to confirm the current operation and exit and then return to the previous menu interface Lock unlock files 11 4 9 Press MENU button to select to lo...

Страница 42: ...e icon for slide play 11 4 14 Press Shooting button to select slide play Off On 11 4 15 Press mode button to exit to file preview interface 11 4 16 This function auto slide recorded or photo file Press Shooting to stop the slide for your playback or view 12 Recording function a Recording mode shown instantly once camera power on b Press shooting buttons all LED lights continuous flashing means the...

Страница 43: ...e button to switch to photo mode b When press shooting buttons photography process finishes if all LED lights flashes one time 14 Video and photo checking View video and photo by connecting camera with computer and TV a Connect the camera with computer via USB cable b Connect the camera with TV via HDMI cable ...

Страница 44: ...ge Device might be loaded with battery or charging connector might be faulty Device might have low battery with loaded battery Make sure battery is loaded and if after charging immediate shut down happen battery or connector might be faulty Charge the Battery Screen Auto power off Screen Saver function is enabled Low Battery Press on any button disable the screen saver mode Charge the battery Unab...

Страница 45: ... card If issue still persist replace a new memory card No image is displayed on a high definition TV screen Cable plug might not be plugged in properly Wrong TV Input mode Ensure AV HDMI cable is plug into the TV properly Refer to the back panel of your TV to track the correct TV input Make sure you have selected the correct input Hazy Images Lens might be dirty Check if there are fingerprints or ...

Страница 46: ...olution 1920 1080 30fbs seconds Loop recording Loop recording off 2 minutes loop recording Recording Audio Recording audio on Recording audio off Date label Date lable on Date label off Time lapse photography Time lapse photography function off 1fbs second for recording Timing photography Timing photography off Photo taking per time by interval of 10 seconds when recording ...

Страница 47: ... dark environment Sunny set when record under the sun Tungsten set when record in the light bulb lighting Fluorescent set when record in fluorescent lighting environment White Balance blue white balance for blue setting Custom white balance setting Custom white balance setting Custom white balance Custom white balance adjustment Custom white balance setting Red Custom white balance red color data ...

Страница 48: ...seconds delay for one shooting in photo taking Continuous shooting setting Continuous shooting setting off Continuous shooting setting on Color effects White balance Photo exposure data Normal color photos effect White and black photos effect Nostalgia photos effect System setting Setting for the camera function Time setting Setting for the date and time of the camera System language Language set ...

Страница 49: ...cy Light frequency 50Hz Vehicle Mounted setting Vehicle mounted mode on Vehicle mounted mode off Formatting Delete all files Default setting Recover default setting function Software version Check software version on the camera File playback Play the current file File delete Delete the current file Lock unlock files Lock or unlock the current file Slide play Slide play mode off Slide play mode on ...

Отзывы: