background image

8

Cleaning the Coffee Brewer

Regular cleaning and preventive maintenance is essential to keep your coffee brewer looking and working 

like new. For cleaning, prepare a mild solution of dish washing detergent and warm water.

CAUTION –

 Do not use cleansers, bleach liquids, powders or any other substance containing chlo-

rine. These products promote corrosion and will pit the stainless steel. USE OF THESE PRODUCTS 

WILL VOID THE WARRANTY.

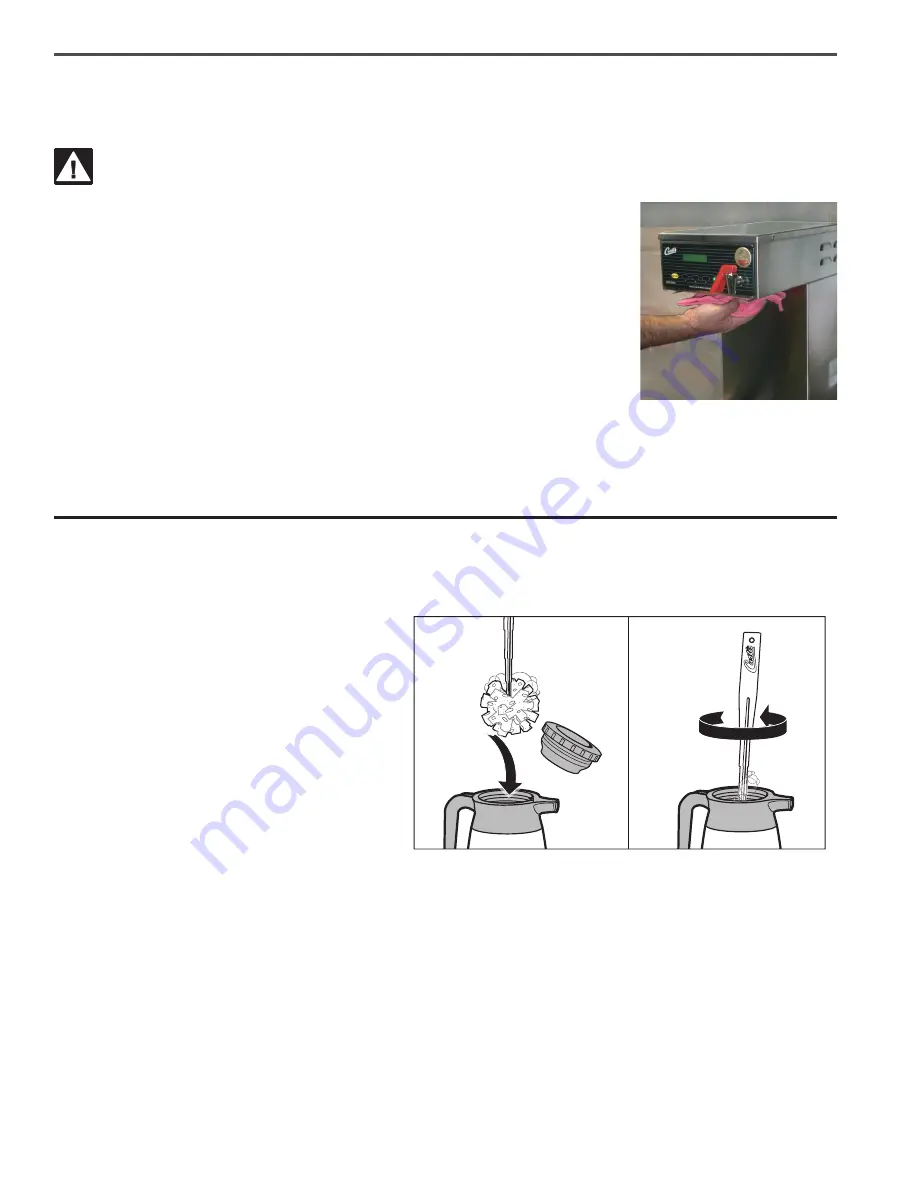
1. Wipe exterior surfaces with a cloth soaked with cleaning solution. Scrub off 

dried coffee spots, spills, and coffee grounds.

2. Remove the brew cone and wash it in a sing using the cleaning solution 

Brush inside the brew cone with cleaning solution. 

3. Scrub the sprayhead area with a cleaner soaked cloth.
4. Rinse the sprayhead area with a water soaked cloth, removing any residu-

al detergent. Dry with a clean cloth.

5. Rinse and dry the brew cone.
6. Rub the outside cabinet surfaces with a stainless steel polish to protect the metal.

Cleaning Pourpots

Prepare a mild solution of detergent and warm water to clean the pour pot.

1. Wipe exterior surfaces with a moist cloth, removing water spots and dried coffee.
2. Remove the pour pot lid. Clean the lid. 

Brush inside the funnel tube with the deter-

gent solution. 

3. Use a sponge brush soaked in detergent 

solution to scrub inside the pour pot. 

4. Rinse the pour pot and lid with clean warm 

water.

5. Air dry the pour pot and lid.

Содержание D60GT10

Страница 1: ...left to right and front to back located on a solid counter top Connect a water line from the water filter to the brewer NOTE A water filtration system must be used to help maintain trouble free operat...

Страница 2: ...he tank approximately 2 3 minutes depending on water flow rate When the proper level is reached will appear on the screen Approximately 20 minutes are required to reach the set point temperature Contr...

Страница 3: ...ess display will now show the next feature During the actual brew cycle a 2 minute drip mode is added to the brew time The programmed water level compensates for back to back brewing Delta 3 to allow...

Страница 4: ...the C pulse setting Of course any of the A B or C settings may be used to suit your taste profile There are two additional settings D and E that allow you to manually set the ON TIME pulses and OFF T...

Страница 5: ...1 0 GPM 120V 9A WC 856 VALVE INLET 1 GPM 240V 10W 10 WC 5970 COVER BACK CTR WRAP ALPHA D60GT 11 WC 8591 CAPACITOR X2 USED ON ALL ADS MODELS 12 WC 29025 SPRAYHEAD PURPLE ADVANCE FLOW 13 WC 3518 LEG GL...

Страница 6: ...T HEATING 3 5KW 220V W JAM NUTS WASHERS 22 WC 523 THERMOSTAT MANUAL RESET 120 240 VAC 25A 220 F MAX 22A WC 522 THERMOSTAT HI LIMIT HEATER CONTROL DPST 277V 40A 23 WC 6289 HEATING TANK CMPLT 120V W HI...

Страница 7: ...7 ELECTRICAL SCHEMATIC...

Страница 8: ...g using the cleaning solution Brush inside the brew cone with cleaning solution 3 Scrub the sprayhead area with a cleaner soaked cloth 4 Rinse the sprayhead area with a water soaked cloth removing any...

Страница 9: ...riteTM scuff pad 6 If a residual white layer is still visible on the probe remove the probe and soak it in vinegar or a scale removing chemical Repeat this step until the white layer is removed Filter...

Страница 10: ...eaning The resetting of safety thermostats and circuit breakers programming and temperature adjustments are the responsibility of the equipment owner The owner is responsible for proper cleaning and r...

Отзывы: