15
3. USE
A. Before using for the fi rst time
•
Remove all packaging materials and all labels from your
juice extractor. Make sure all the parts (see section 2) of your
new appliance have been unpacked before discarding the
packaging.
We recommend you carefully wash all the accessories and bowls
before using the appliance for the fi rst time.
B. Assembling the juice extractor
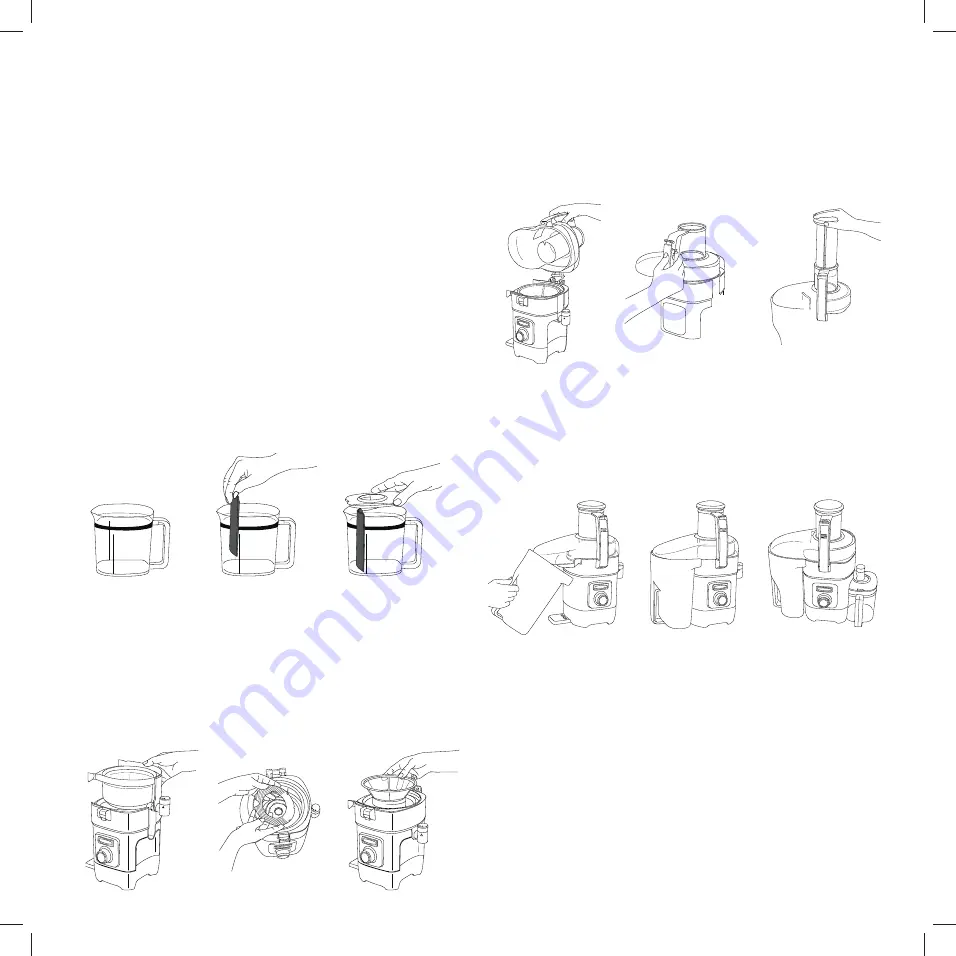
Assemble the juice pitcher
1 . Place the juice pitcher on a level surface.
2 . Insert the foam fi lter.
3 . Put the lid in place.
4 . Place the pitcher below the juice extractor’s fl ow spout.
Assemble the juice extractor
1. Place the juice extractor housing base on a level surface.
2. Place the bowl on the housing base.
3. Place the foam management disk in the bowl by aligning the
notches.
4. Firmly lock the fi lter in the bowl.
5. Press the button in the handle to unlock.
Hold the lid by the handle, hinge facing down. Fit the hinge and
the housing base together and tilt the lid.
6 . Press down on the handle to lock.
7. Slide the pusher into the feed tube and line up the slot of the
pusher with the small recess located inside the feed tube.
8. Put the container for the pulp in place by slightly tilting its
opening to slide under the lid.
9. Place the juice pitcher under the fl ow spout with the handle
facing the front.
10. Make sure that the pour spout is open properly. Never press
fruit when the pour spout is closed.
C. Foam management system
If you prefer juice without too much foam, use the foam
management disk by setting the pour spout to a smaller
opening.
If you prefer more foam, do not use this disk and set the pour
spout to a larger opening
Содержание CJE1000E
Страница 1: ...Instructions Hinweise Instructies Istruzioni Instrucciones CJE1000E Centrifugeuse Juice extractor...
Страница 5: ...5...
Страница 48: ...IB 9 450...


