background image

18

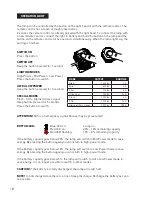
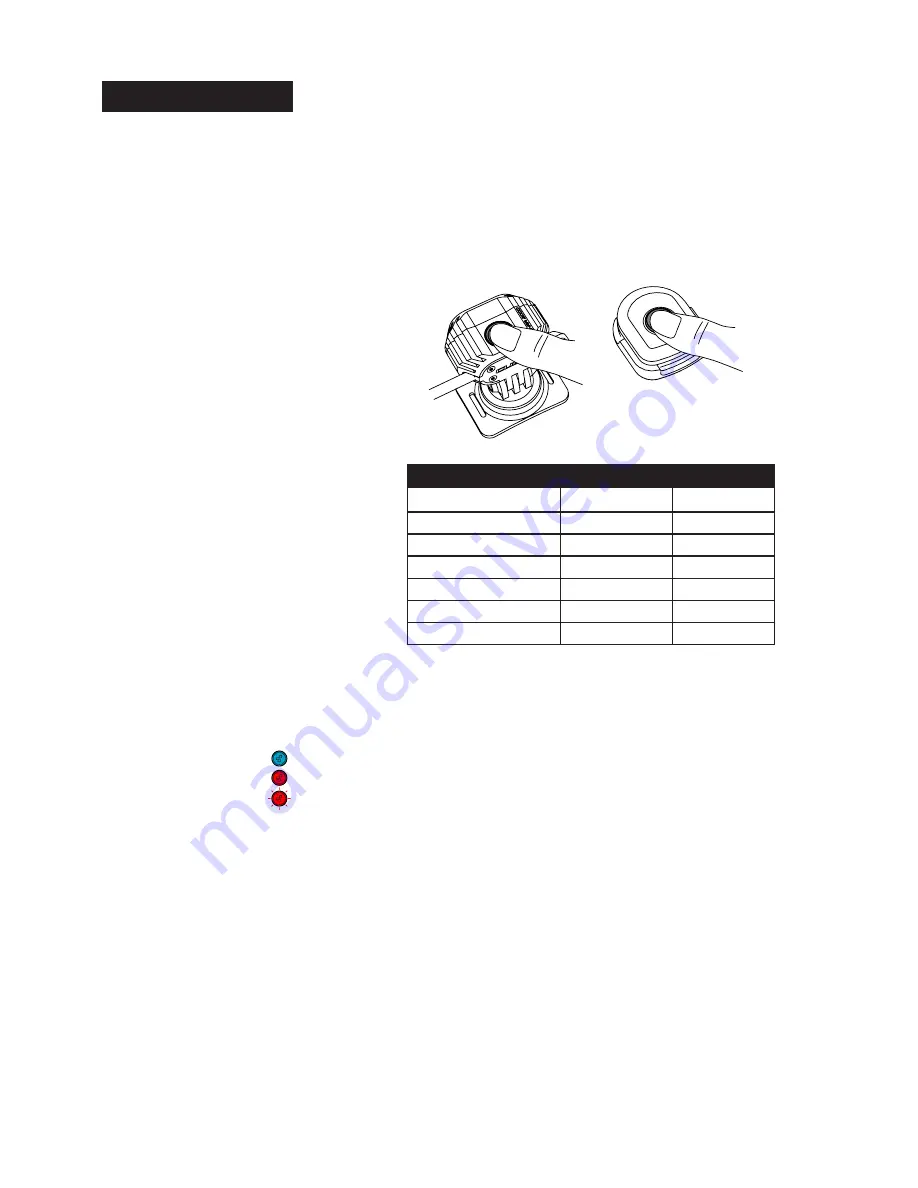
The lamp can be controlled by the button on the light head or with the remote control. The 

remote control has a reach of roughly five metres.

Ex works the remote control is already paired with the light head. To connect the lamp with 

a new remote control, connect the light to battery and hold the button on the lamp and the 

button on the remote control for five seconds simultaneously. When the lamp lights up, the 

pairing is finished.


attentIon! 

SOS is an emergancy signal! Misuse may be prosecuted!

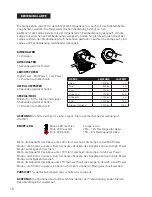
Button-leD: 

Blue LED on:  

Lamp on


Red LED on:   

20% - 10% remaining capacity


Red LED flashing: 

10% - 0% remaining capacity

If the battery capacity goes below 20%, the lamp will switch to Mid Power mode to save 

energy. By pressing the button again you can return to high-power mode.

If the battery capacity goes below 10%, the lamp will switch to Low Power mode to save 

energy. By pressing the button again you can return to high-power mode.

If the battery capacity goes below 5%, the lamp will switch to Ultra Low Power mode to 

save energy. It is no longer possible to switch to other modes.

cautIon! 

If the battery is totally discharged, the lamp will switch off. 

note!

 In a discharged state there is a risk of deep discharge. Recharge the battery as soon 

as possible.

MoDe

outPut

runtIMe

High

1600 lm

2 h

Mid 

800 lm

4 h

Low

300 lm

8 h

Ultra Low

100 lm

30 h

Flash

1000 lm

6 h

SOS

1000 lm

13 h

Alpine distress signal

1000 lm

105 h

sWItch on

Press the button

sWItch oFF

Keep the button pressed for 1 second

lIghtIng MoDes

High Power - Mid Power - Low Power

Press the button to switch

ultra loW PoWer

Keep the button pressed for 3 seconds

sPecIal MoDes

Flash - SOS - Alpine distress signal

Keep button pressed for 5 seconds

Press the button to switch

  oPeratIon lIght

Содержание HPA 2000

Страница 1: ...1 H I G H P E R F O R M A N C E L I G H T I N G S Y S T E M B E D I E N U N G S A N L E I T U N G I N S T R U C T I O N M A N U A L...

Страница 2: ...2...

Страница 3: ...5 Technische Daten 05 montage 06 Bedienung akku 09 Bedienung Lampe 10 pflege 11 Garantiebedingungen 11 Entsorgung 11 English GENERAL 12 CONTENT 13 Technical data 13 Mounting 14 Operation battery 17 Op...

Страница 4: ...r fernhalten Akku und Leuchte inkl Zubeh r nicht im Feuer entsorgen Lagern Sie den Akku k hl und trocken Achten Sie darauf dass der Akku mindestens 70 geladen ist wenn er f r mehr als 3 Monate nicht b...

Страница 5: ...asonic 18650 Li Ion 7 4 V 3400 mAh Schutzklasse IP68 Gewicht HPA 2000 Lampenkopf 60 g HPA 2000 Akku 140 g Ladeger t Input 100 240V AC 50 60Hz Output 8 4V DC 2A Ladezeit 3 h LIEFERUMFANG TECHNISCHE DAT...

Страница 6: ...gen und kontrollieren Sie diesen vor jeder Aktivit t Mit dem im Lieferumfang enthaltenen Verl ngerungs kabel kann der Akku auch im Rucksack Trikottasche o getragen werden Montage an Helmen ohne Bel ft...

Страница 7: ...en Gummiringen Kontrollieren Sie die Tauglichkeit der Gummiringe und den festen Sitz der Halte rungen vor jeder Aktivit t Bei besonders dicken oder flachen Rohren kann sich auch der Helmhalter mit Kle...

Страница 8: ...und der Akku in die Halterung eingerastet sind Anschluss Verbinden Sie den Stecker der Lampe mit dem Akku Pack Achten Sie darauf dass die Stecker b ndig miteinander verbunden und sp rbar eingerastet s...

Страница 9: ...ion den Taster f r 2 Sekunden gedr ckt halten Es gibt 3 verschiedene Funktionen Dauerlicht Blinklicht Lauflicht Die einzelnen Funktionen k nnen durch Dr cken des Tasters gewechselt werden Zum Ausschal...

Страница 10: ...High Power Modus zur ckgekehrt werden Wenn die Kapazit t des Akkus unter 10 f llt wechselt die Lampe in den Low Power Modus um Strom zu sparen Durch erneutes Dr cken des Knopfes kann zum High Power Mo...

Страница 11: ...ells eingestellt wurde Bitte wenden Sie sich mit allen Reklamationen und Garantieanspr chen an Ihren Fachh ndler bei dem Sie das Ger t gekauft haben Oder senden Sie ihre Reklamation direkt an Pending...

Страница 12: ...vice while charging Never crush or puncture the battery Never place the battery or device on or in heating units Do not dispose the battery or device in a fire Store device in a cool dry area Make sur...

Страница 13: ...50 Li Ion 7 4 V 3400 mAh Protection class IP68 Weight HPA 2000 light head 60 g HPA 2000 battery 140 g Charger Input 100 240V AC 50 60Hz Output 8 4V DC 2A Charging time 3 h Contents Technical data Engl...

Страница 14: ...s securely attached and check it before every activity Use the extension cable included in the package contents to carry the battery in a backpack a cycling jersey pocket etc Use the helmet mount with...

Страница 15: ...each activity check the suitability of the rubber rings and the tight fit of the mounts For extra large or flat tubes you can also use the helmet mount with the velcro strap The headband has two moun...

Страница 16: ...activity check whether the light head and the battery are locked into the bracket Connecting Connect the light plug to the battery pack Be sure the plugs are securely connected and you feel them click...

Страница 17: ...function hold the button down for two seconds There are three different functions Constant light Flash light Moving light You can switch through the individual functions by pressing the button To turn...

Страница 18: ...f the battery capacity goes below 10 the lamp will switch to Low Power mode to save energy By pressing the button again you can return to high power mode If the battery capacity goes below 5 the lamp...

Страница 19: ...ment of the identical model if the model in question is no longer in production due to a model change Please contact the dealer from whom you purchased the device for all complaints and guarantee clai...

Страница 20: ...20...

Отзывы: