background image

4

I N T E R FA C E   I N T R O D U C T I O N

15

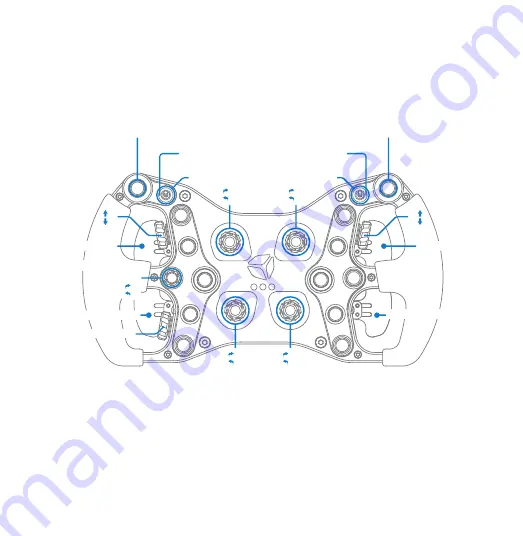
LEFT TOGGLE: 16

INTEGRATED WARNING LED

INTEGRATED WARNING LED

LEFT TOGGLE

STATUS LED

17

9

10

19

20

CLUTCH LEFT

LEFT CLUTCH ADJ

21

1

2

6

5

22

RIGHT TOGGLE: 23

RIGHT TOGGLE

STATUS LED

24

25

27

11

12

26

28

29

3

4

7

8

18

4 WAY POV SWITCH

PUSH: 32

 13

14

DOWNSHIFT: 30

UPSHIFT: 31

CLUTCH RIGHT

Содержание Formula

Страница 1: ...1 User Guide Formula eSports Racing Wheel ...

Страница 2: ... Due to continuous improvement the actual product may differ from the manual This manual is for reference only For info or support contact us at hello cubecontrols com or visit us at www cubecontrols com ...

Страница 3: ... does not have waterproof function please keep it away from rain moisture and other items containing liquid such as vape cup and so forth This wheel is designed for simulation use only Disconnect the USB cable from both sides if you will not use this product for a long time Should you find any problems in your wheel please contact us at hello cubecontrols com do not repair it by yourself ...

Страница 4: ... WARNING LED INTEGRATED WARNING LED LEFT TOGGLE STATUS LED 17 9 10 19 20 CLUTCH LEFT LEFT CLUTCH ADJ 21 1 2 6 5 22 RIGHT TOGGLE 23 RIGHT TOGGLE STATUS LED 24 25 27 11 12 26 28 29 3 4 7 8 18 4 WAY POV SWITCH PUSH 32 13 14 DOWNSHIFT 30 UPSHIFT 31 CLUTCH RIGHT ...

Страница 5: ...d again the flashing stops Useful for warning options pit limiter etc Toggles 16 and 23 works in a similar fashion once the toggle has been activated the respective led will turn on when the toggle has been flipped off it turns the led off In the ON status the respective button is not seen as always pressed it only activate the button for a few ms when flipped on or off Toggles are useful for on o...

Страница 6: ...1 cars until 2015 where it was possible to set the clutch bite point Finding the correct clutch knob setting In a practice session set the clutch knob at around 50 of its travel fully depress both clutch paddles engage first gear reach the optimal engine RPM release the right clutch paddle As the car starts gaining speed release the left clutch paddle and shift gears as normal If you notice that t...

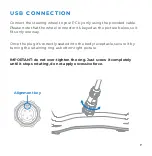
Страница 7: ...nnector it s keyed as the picture below so it fits only one way Once the plug it s correctly seated into the body receptacle secure it by turning the retaining ring as bottom right picture IMPORTANT do not over tighten the ring Just screw it completely until it stops rotating do not apply excessive force Alignment key ...

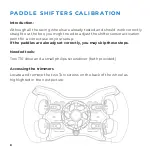
Страница 8: ...ight need to adjust the shifter sensor activation point for a correct use on your setup If the paddles are already set correctly you may skip these steps Needed tools Torx T10 drive and a small philips screwdriver both provided Accessing the trimmers Locate and remove the two Torx screws on the back of the wheel as highlighted in the next picture ...

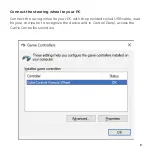
Страница 9: ...ect the steering wheel to your PC Connect the racing wheel to your PC with the provided coiled USB cable wait for your computer to recognize the device and in Control Panel access the Game Controllers window ...

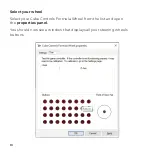
Страница 10: ...10 Select your wheel Select your Cube Controls Formula Wheel from the list and open the properties panel You should now see a window that displays all your steering wheels buttons ...

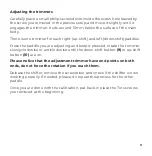
Страница 11: ...the paddle you are adjusting and keep it pressed rotate the trimmer slowly clockwise or anticlockwise until the down shift button 9 or up shift button 10 are on Please notice that the adjustment trimmer have end points on both ends do not force the rotation if you reach them Release the shifter remove the screwdriver and check if the shifter is now working properly If needed please do repeat this ...

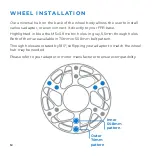
Страница 12: ...ur FFB base Highlighted in blue the M5x0 8 metric holes In gray 5 5mm through holes Both of them are available in 70mm or 50 8mm bolt pattern Through holes are rotated by 180 so flipping your adapter to match the wheel hub may be needed Please refer to your adapter or motor manufacturer to ensure compatibility Outer 70mm pattern Inner 50 8mm pattern ...

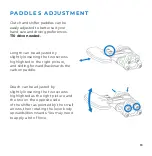
Страница 13: ...y slightly loosening the two screws highlighted in the right picture and sliding forward backwards the carbon paddle Reach can be adjusted by slightly loosening the two screws highlighted as the right picture and the two on the opposite side of the shifter as pointed by the small arrows then rotating the lever body upwards downwards You may need to apply a bit of force ...

Страница 14: ...ations On some systems the backlit buttons available only on PRO spec wheels will remain ON even when the PC it s turned off You may need to change your PC power options and or BIOS settings to avoid this Some simulators will require the analog clutch axis to be calibrated before use Open the device properties as page 8 9 and click the settings tab Click the calibrate button and follow the procedu...

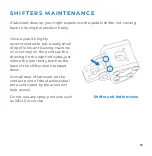
Страница 15: ... really small drop of lubricant sewing machine oil or similar on the points as the drawing on the right indicates just where the lever body touches the base of the shifter when pressed down A small drop of lubricant on the contact point of the stainless steel pin as indicated by the arrow will help as well Do not use any spray products such as WD40 or similar Shifter unit bottom view ...

Страница 16: ...16 WWW CUBECONT R OLS COM ...

Отзывы: