Installation
Publication date: April 17, 2020
Revision 1.1
13
Step 3.
Insert the screws provided in the rack-mount kit through each bracket and into the
bracket mounting holes in the switch. Then, tighten the screws with the screwdriver to
secure each bracket. (See Figure 2-1)
Step 4.
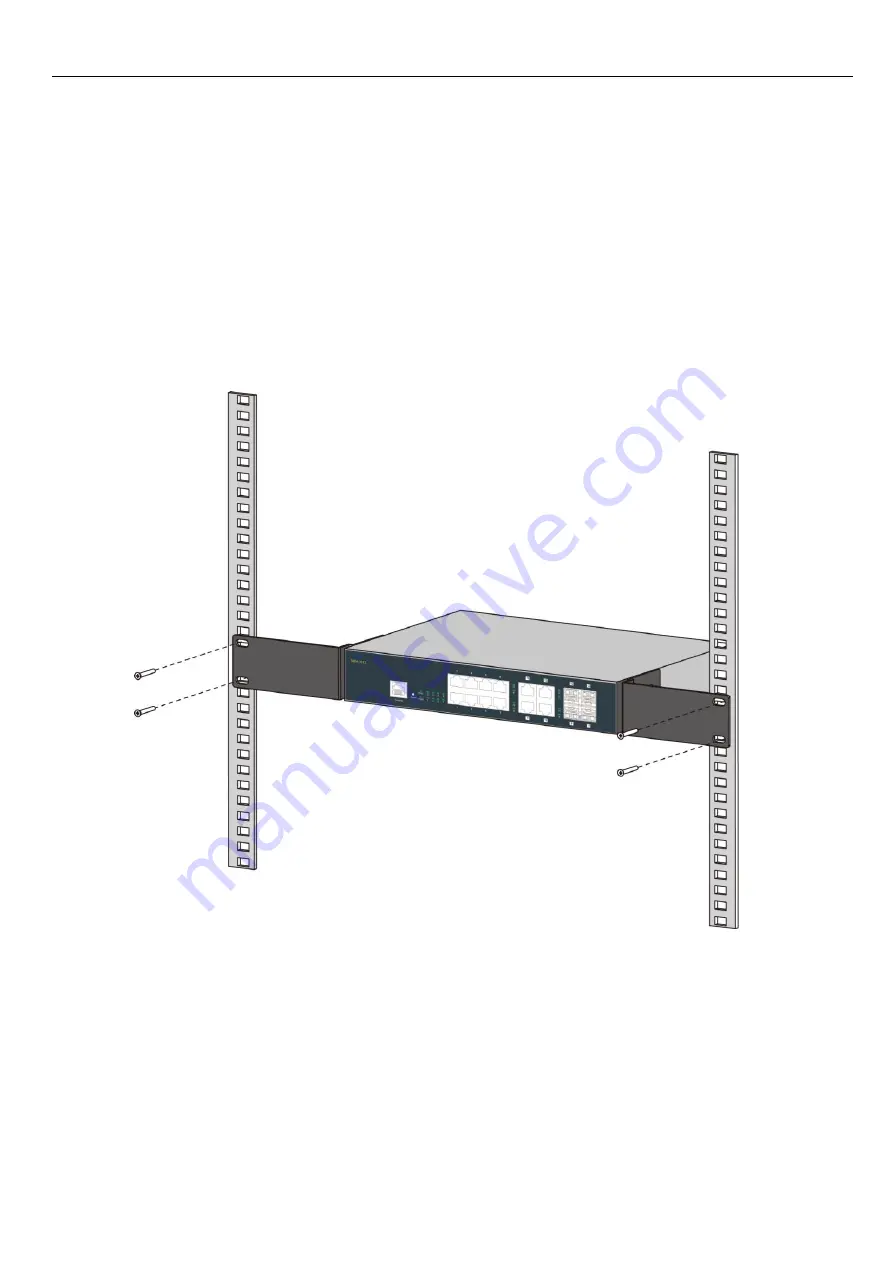
Align the mounting holes in the brackets with the desired holes in the rack, and insert
screws through each bracket and into the rack. (See Figure 2-2)
Step 5.
Then, tighten the screws with the screwdriver to secure mounting brackets to the rack.
Step 6.
Please ensure that the ventilation holes are not blocked.
Figure 2-2. SWH-3112 Switch Rack-mounting


