Chapter 3 Front Panel Operation
23
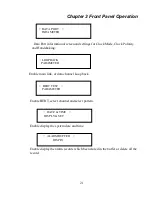
Press ENTER, the ETU01-D will store all the parameters as current settings
and then reboot. The next time the ETU01-D is powered on, all the parameters
used will be those that were previously saved.
NOTE: Remember to save the parameters if you want to commit the
ETU01-D with the current parameters. If not, the ETU01-D will resume all
the parameters from the last saved settings when it is powered on the next time.
When pressing ENTER here, the system will reply with Y/N:[N]. Press
ENTER again and the system will show Y/N:[Y] and then reboot. Otherwise,
press ESC to leave without rebooting the system.
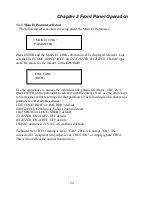
Press ENTER to set the system clock: Internal/External(Data Port)/Recovery(E1).
In a typical point-to-point application, the local unit will set the clock source to the
built-in oscillator (Internal) and the remote unit will recover clock from the received
E1 (Recovery).
If the clock source comes from connected DCE equipment, such as a multiplexer or
another modem, a crossover cable may be employed to send the connected DCE's
clock from the RC to the ETU01-D's ETC and the clock setting will be set to the
data port (External).
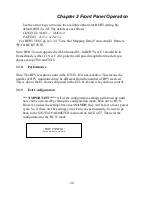
REBOOT SYSTEM
< SYSTEM CLOCK >
INTERNAL
Содержание ETU01-D
Страница 2: ......
Страница 4: ......
Страница 6: ...Table of Contents ...
Страница 42: ...Chapter 4 Control Port Operation 42 Press 7 to Define Time Date Pressing 1 the result is displayed as below ...
Страница 56: ...Chapter 4 Control Port Operation 56 This page left blank intentionally ...
Страница 58: ...Chapter 5 Loopback and BERT Tests 58 local payload loop back remote analog loop back remote payload loop back ...
Страница 60: ...Chapter 5 Loopback and BERT Tests 60 BERT TEST E1 ...
Страница 62: ...Appendix A 62 ...
Страница 65: ......

