Personal safety
Stay alert, watch what you are doing and
use common sense when operating a
tool. Do not use a tool while you are
tired or under the influence of drugs,
alcohol or medication. A moment of inat-
tention while operating a tool may result in
serious personal injury or incorrect meas-
urement results.
Use safety equipment. Always wear eye
protection. Safety equipment such as dust
mask, non-skid safety shoes, hard hat, or
hearing protection used for appropriate
conditions will reduce personal injuries.
Use and care
Use the correct tool for your application.
The correct tool will do the job better and safer.
Do not use the tool if the switch does
not turn it on and off. Any tool that cannot
be controlled with the switch is dangerous
and must be repaired.
Store idle tool out of the reach of chil-
dren and do not allow persons unfamil-
iar with the tool or these instructions to
operate the tool. Tools are dangerous in
the hands of untrained users.
Maintain tools. Check for misalignment
or binding of moving parts, breakage of
parts and any other condition that may
affect the operation. If damaged, tool
repaired before use. Many accidents are
caused by poorly maintained tools.
Use the tool, accessories, etc., in accor-
dance with these instructions and in the
manner intended for the particular type
of tool, taking into account the working
conditions and the work to be per-
formed. Use of the tool for operations dif-
ferent from those intended could result in a
hazardous situation.
Service
Have your tool serviced by a qualified
repair person using only identical
replacement parts. This will ensure that
the safety of the tool is maintained.
Develop a periodic maintenance sched-
ule for tool. When cleaning a tool be
careful not to disassemble any portion
of the tool since internal wires may be
misplaced or pinched or may be improp-
erly mounted. Certain cleaning agents
such as gasoline, carbon tetrachloride,
ammonia, etc. may damage plastic parts.
SAVE THESE INSTRUCTIONS.
5
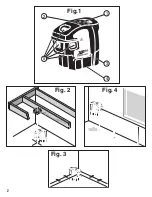
The numbering of the product features
shown refers to the illustration of the meas-
uring tool on the graphic page.
1. On/Off Switch
2. Low Battery / ±3° Out of Level LED
Indicator
3. Battery Compartment
4. Tripod Mount– 1/4-20
5. Exit opening for laser beam
Universal Mount
1. Magnets for attachment to steel objects
2. Slots to attach mounting strap vertically
or horizontally
3. 1/4 - 20 or 5/8 -11 threads for tripod
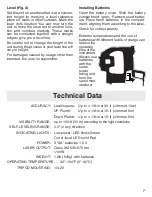
By sliding the Universal Mount back, you
can expose the bottom beam to transfer
down plumb points.
Once the Universal Mount is attached to
the bottom of the unit, the unit can be
mounted on a 1/4 - 20 thread camera tri-
pod, a 5/8 - 11 surveyor’s tripod or attached
to any ferrous metal surface (such as steel
studs) by using the magnets located on the
rear and bottom side of the mount, or fixed
thanks to the strap (supplied) to wood
studs, etc.
Trivet – Platform with 3 legs used for down
plumb alignment jobs (such as framing and
drywall installation).
Features
Содержание XP5S
Страница 2: ...4 3 1 2 5 Fig 1 Fig 2 Fig 4 Fig 3 2...


