English |
23
2 610 A15 111 • 23.6.09
If the measuring tool is set up unstable or used with
heavy wind, inconsistent indication of the vertical
angle can occur. In this case, it is better to deactivate
the inclination sensor.
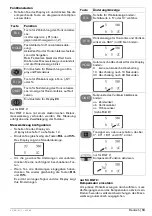
– To display the compensation value, press the
R/L
and
V/%
buttons at the same time.
To return to the standard indication, press the
R/L
and
V/%
buttons at the same time again.
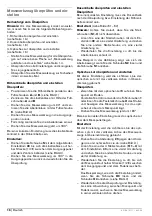
When the measuring tool is not within the compensa-
tion range, the display shows the following indication:
– Realign the measuring tool again.
“Setting Up/Aligning the Measuring Tool” see
page 23.
Setting Up the Measuring Tool
f
Protect the measuring tool against moisture
and direct sun light.
f
Do not subject the measuring tool to
extreme temperatures or variations in tem-
perature.
As an example, do not leave it in vehi-
cles for longer periods. In case of large variations
in temperature, allow the measuring tool to adjust
to the ambient temperature before putting it into
operation. In case of extreme temperatures or var-
iations in temperature, the accuracy of the measur-
ing tool can be impaired.
f
Avoid heavy impact to or falling down of the
measuring tool.
After severe exterior effects to
the measuring tool, it is recommended to carry out
an accuracy check (see “Accuracy Check of the
Measuring Tool”, page 24) each time before con-
tinuing to work.
Setting Up/Aligning the Measuring Tool
For optimal performance, the measuring tool should
be fastened on a tripod and accurately aligned.
– Set up the tripod stably above the measuring
point.
– Mount the measuring tool onto the tripod.
– Adjust levelling screws
1
(
A
,
B
,
C
) so that the bub-
ble of the circular bubble vial
21
is centred.
(see figures E1 – E2)
– For fine adjustment, turn the measuring tool until
base plate
10
is in one of the positions shown.
(see figure E3)
Adjust levelling screws
1
(
A
,
B
,
C
) so that the bub-
ble of plate level
12
is centred. (see figure E4)
– Align the measuring tool with the optical plummet
9
.
For this, focus the crosshair with the eyepiece of
the optical plummet
27
.
Focus a measuring point on the ground with the
focussing ring of the optical plummet
28
.
Lightly unscrew fastening screw
X
of the tripod
and move the measuring tool until the measuring
point on the ground is centred in the optical plum-
met.
Tighten the fastening screw again.
(see figures E5–E7)
– Repeat steps 3 and 4.
Focussing the Eyepiece
– Aim at a bright surface with the eyepiece
17
and
adjust until the crosshair is focussed.
To avoid a parallax when adjusting, please observe
the following:
– When adjusting, direct the telescope at a target
object.
– The crosshair and the target mark must not deviate
from each other, even when moving your eyes.
Note:
Avoid a parallax, as exact measurements are
otherwise not possible.
In case a parallax occurs, repeat the adjustment as
required.
Target Alignment
Horizontally
–
Coarse Alignment
Loosen set screw
5
and aim at the target with the
optical peep sight
7
.
Keep a certain clearance between your eye and
the optical peep sight.
Tighten set screw
5
again.
–
Fine Adjustment
View the target through the eyepiece
17
and focus
with adjustment screw
4
.
Vertically
The target alignment in vertical direction is carried out
analogue with set screw
18
and adjustment screw
19
.
V
H
RL
OBJ_BUCH-1021-001.book Page 23 Tuesday, June 23, 2009 8:57 AM
Содержание DGT 10
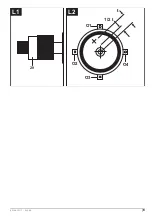
Страница 3: ... 3 2 610 A15 111 23 6 09 1 2 3 4 5 6 7 8 9 10 15 16 17 18 19 20 21 11 12 13 14 ...
Страница 5: ... 5 2 610 A15 111 23 6 09 D E1 E3 E2 E4 A B B C C 90 A 270 0 0 0 0 180 180 90 90 90 90 270 ...
Страница 6: ...6 2 610 A15 111 23 6 09 E5 E6 E7 F G 100 0 0 100 100 100 27 28 X A B ...
Страница 7: ... 7 2 610 A15 111 23 6 09 60 m A A B D B A B 30 m 30 m 60 m L A B l l H1 H3 I1 I2 H2 ...
Страница 8: ...8 2 610 A15 111 23 6 09 J3 K1 J2 J1 K2 S1 S2 S1 3 t 1 2t S C 90 180 A B ...
Страница 9: ... 9 2 610 A15 111 23 6 09 L1 L2 t 1 2 t O4 O3 O1 O2 29 ...

