


For PC Users
3. Download the Win98 file and follow the instructions on the website
to install it.
•
Windows
98SE, 2K, ME & XP
4. Connect
the
DataPort HotDock to your computer with either the
USB or FireWire cable. Connect the power supply providing power
to your DataPort HotDock. Turn on the power switch located on
the back of the enclosure.
•
Available FireWire or USB 2.0 Port
For Mac Users
•
Mac OS 9.7 & X
•
Available FireWire or USB Port
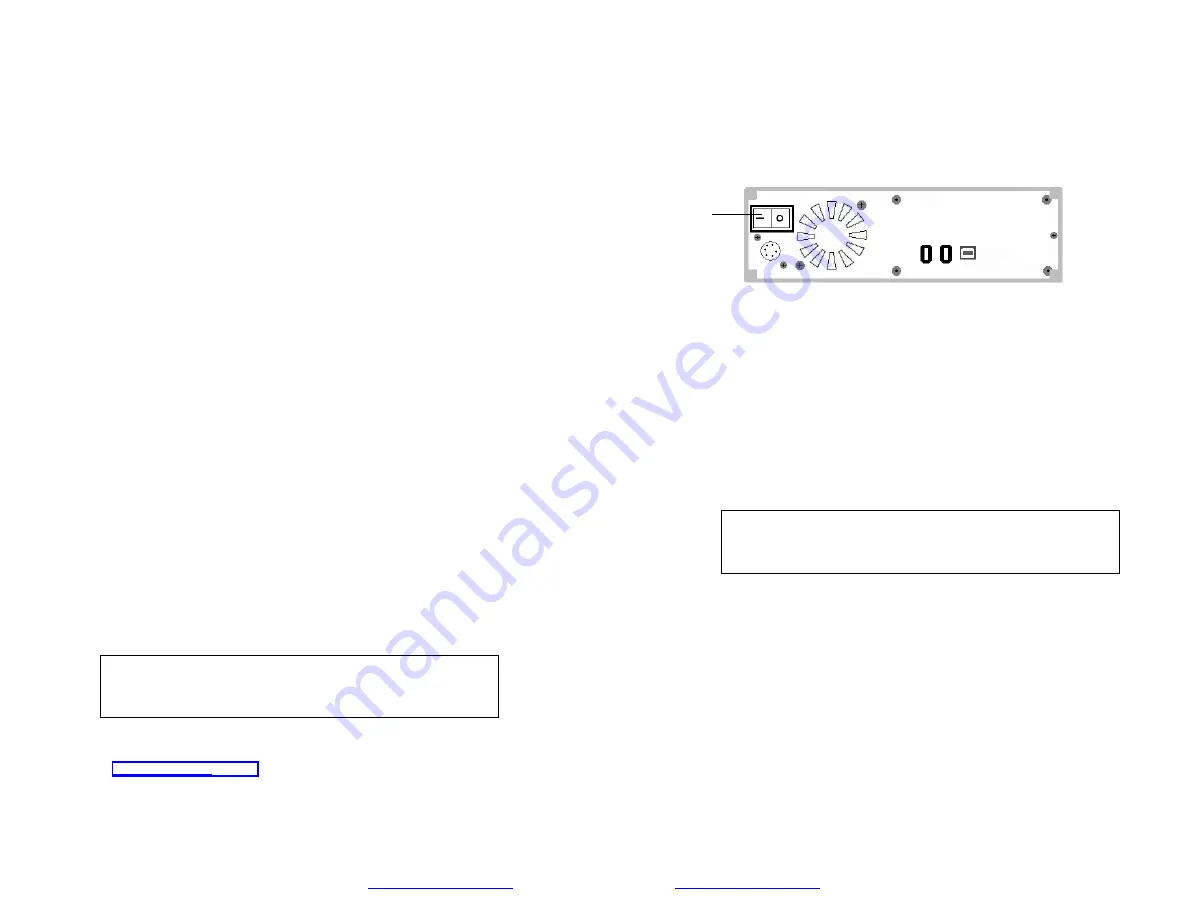
Power
switch
Mounting a Hard Drive in the Carrier
1. Remove the carrier top and bottom covers:
The metal covers for the carrier are snapped into place on the
carrier without any screws. Use the supplied cover removal tool or
a small flat-head screwdriver to gently pry the covers off.
Back of DataPort HotDock
2. Set the jumper on the drive to master before placing the drive in
the carrier.
The Device Driver Wizard will pop up.
5. Click
Next
. The “recommended” option will be selected: click
Next
. The wizard will be set to install the software automatically.
3. Connect the DC power cable to the drive:
Plug the 4-pin DC power cable into the power connector on the
drive and ensure it is fully seated.
6. Click
Next
and the wizard will ask where to look for the driver.
7. Select the directory that you opened the driver into or select the
primary drive and let the computer find it.
4. Connect the data cable in the carrier to the drive.
5. Install the drive in the carrier:
8. Once the driver installation is completed, click
Close
.
Place the drive in the carrier. Use the four screws provided to
mount the drive. Position the cables inside the carrier assembly so
that they are completely enclosed within the carrier.
Setting up the Drive for Windows 2000
6. Insert the carrier into the HotDock:
W
ARNING
!
Formatting your drive will result in loss of data.
Ensure that the lock of the carrier is in the “open” (vertical)
position. Position the carrier on the guide rails, then slide the
carrier into the frame. Using thumb pressure, fully seat the carrier
in the frame and then lock the unit with the keylock. (Required for
operation.)
1. Right-click
the
My Computer
icon and select
Properties
.
2. Select
the
Device Manager
tab.
3. Click the plus sign (+) beside Disk Drives.
Setting up the Drive for Windows 98
4. Right-click your drive icon and select
Properties
.
W
ARNING
!
Formatting your drive will result in loss of data.
5. Select
the
Settings
tab, place a check beside
Removable
and
then assign it a drive letter.
6. After completing these steps, reboot your computer. Once your
computer has booted up you should see an additional icon on your
Task Bar.
1. To install a drive on your computer via the USB port you must
download the drivers from CRU-DataPort’s website
(
). Navigate to the website.
7. Double-click
My Computer
.
Your new drive should now be listed.
8. Double-click the drive icon.
If it is a new drive or a drive with an
incompatible format
, it will ask you to format it:
2. On the left side of the web page you will see a link titled
Support
.
Click the
Support
link, then click
USB Drivers
, and then select
the
Windows 98SE USB drivers
link.
a. Click
Yes
. A new window will open. At the top, the capacity
of your drive will be listed; directly below that will be a section
titled
Format Type
.
Page 4
www.CRU-DataPort.com
www.CRU-DataPort.com
Page
5


