6
9
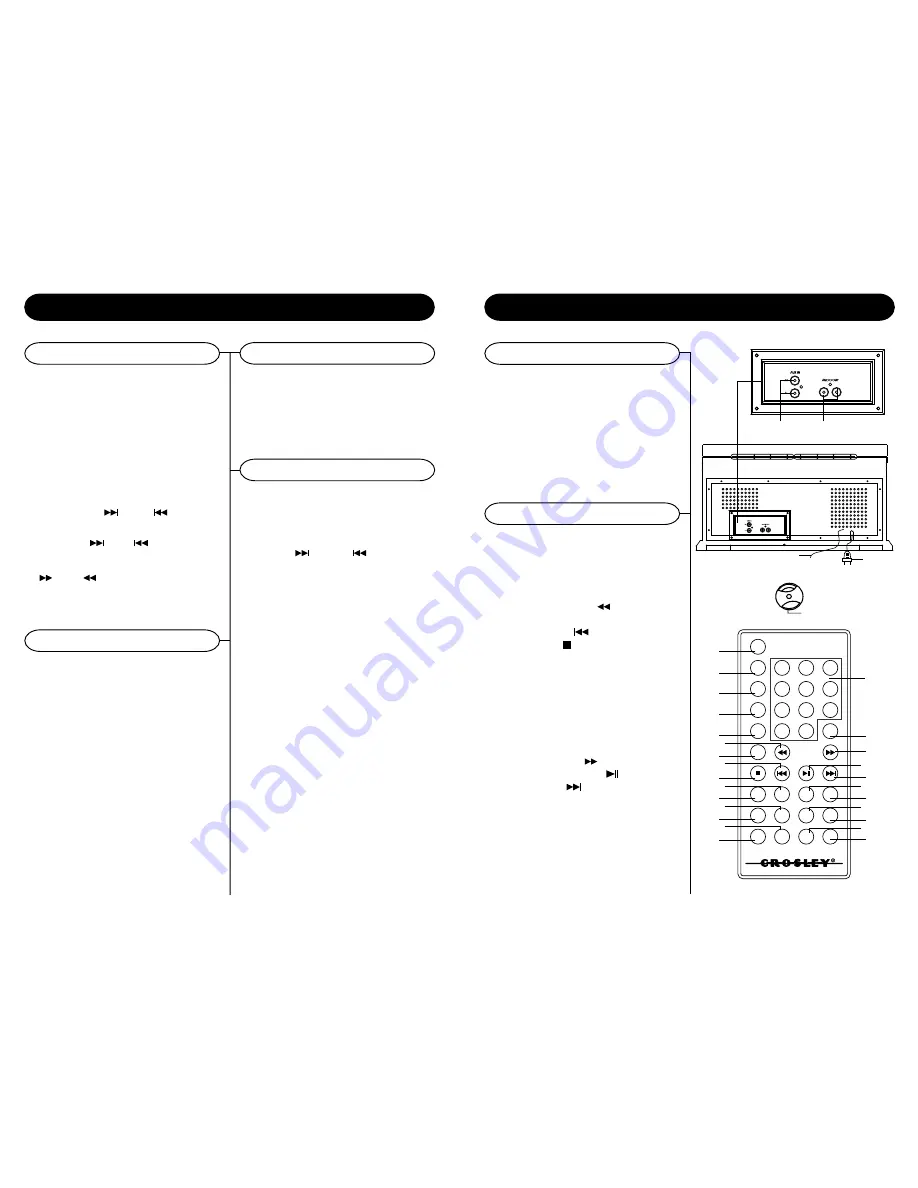
Control Locators
Unit Controls
Remote Controls
40
Aux In Jack
41
Audio Output Jack
42
AC Power Cord
43
External antenna
44
Adapter For 45 rpm Records
45
46
47
48
49
51
53
50
55
57
54
59
58
52
56
POWER
EJECT
REPEAT
FIND
REC
ERASE
FINALIZE
1
4
7
0
2
5
8
10+
3
6
9
MUTE
BAND
MO/ST
TRACK
SPLIT
VOL -
EQ
PROGRAM
FUNCTION
VOL +
RANDOM
FOLDER
+
FOLDER
-
61
62
64
63
65
66
67
68
69
70
60
41
40
Random Play
Programmed Playback
Repeat Playback
Playing a CD
1
While playing a CD, press the RANDOM button
(48) on the remote control. Rand will show on
the LCD display. The unit will randomly select
songs from the CD.
2
To cancel Random playback, press the
RANDOM button (48) again.
1
Make sure the CD is stopped.
2
Press the PROGRAM button (20/47). " 01" will
shown on the display.
3
Press the
(11/64) or
(8/52)buttons to
select a desired track.
4
Press the PROGRAM button (20/47) twice to
store the selected track number.
5
Repeat above steps 3 and 4 to program
additional tracks into memory.
NOTE
: Maximum of 99 tracks can be programmed
into memory.
1
Press the FUNCTION button (2/68) to set the
unit to CD mode.
2
Press the EJECT button (17/46) to open the CD
drawer. Insert a CD into the tray with the label
side facing up.
3
Press the EJECT button (17/46) again to close
the CD drawer. The display will show CD Load
for a few seconds and playback will automatically
begin.
4
To skip forwards or backwards through the tracks
on a CD, press the
(11/64) or
(8/52) buttons.
5
To fast forward or rewind through a track, press
and hold the
(11) or
(8) buttons on the
control panel. Release the buttons once you
reach the desired position on the track. To use
the remote to fast forward or rewind, press the
(62) or
(50) button one time. Once the
desired position is reached, press the button
again to resume play.
1
To repeat a single track, select the desired track
number and press the REPEAT button (49)
once. Press the PLAY button. "Repeat one" will
show on the display and the selected track will
repeat once it is finished.
2
To repeat a whole CD, press the REPEAT button
(49) twice. The display will show "Repeat All".
Once the disc is finished, it will start over again
from the beginning.
3
To turn off the repeat feature, press the REPEAT
button (49) again. The repeat display will
disappear from the LCD.
CD Operation
44
45
Power Button
46
Eject Button
47
Program Button
48
Random Button
49
Repeat Button
50
Tuning Down Button
51
Find Button
52
Backward Skip
53
Stop Button
54
Button
55
Record Button
56
Track Split Button
57
Erase Button
58
Band Button(AM/FM)
59
Finalize Button
60
0-9, 10+ Button
61
Mute Button
62
Tuning Up Button
63
Play/CD Pause Button
64
Forward Skip
65
Folder - Button
66
Mono/Stereo Button
67
EQ Button
68
Function Button
69
Volume Down
70
Volume Up
42
43


