


20 – Cricket Robot Documentation
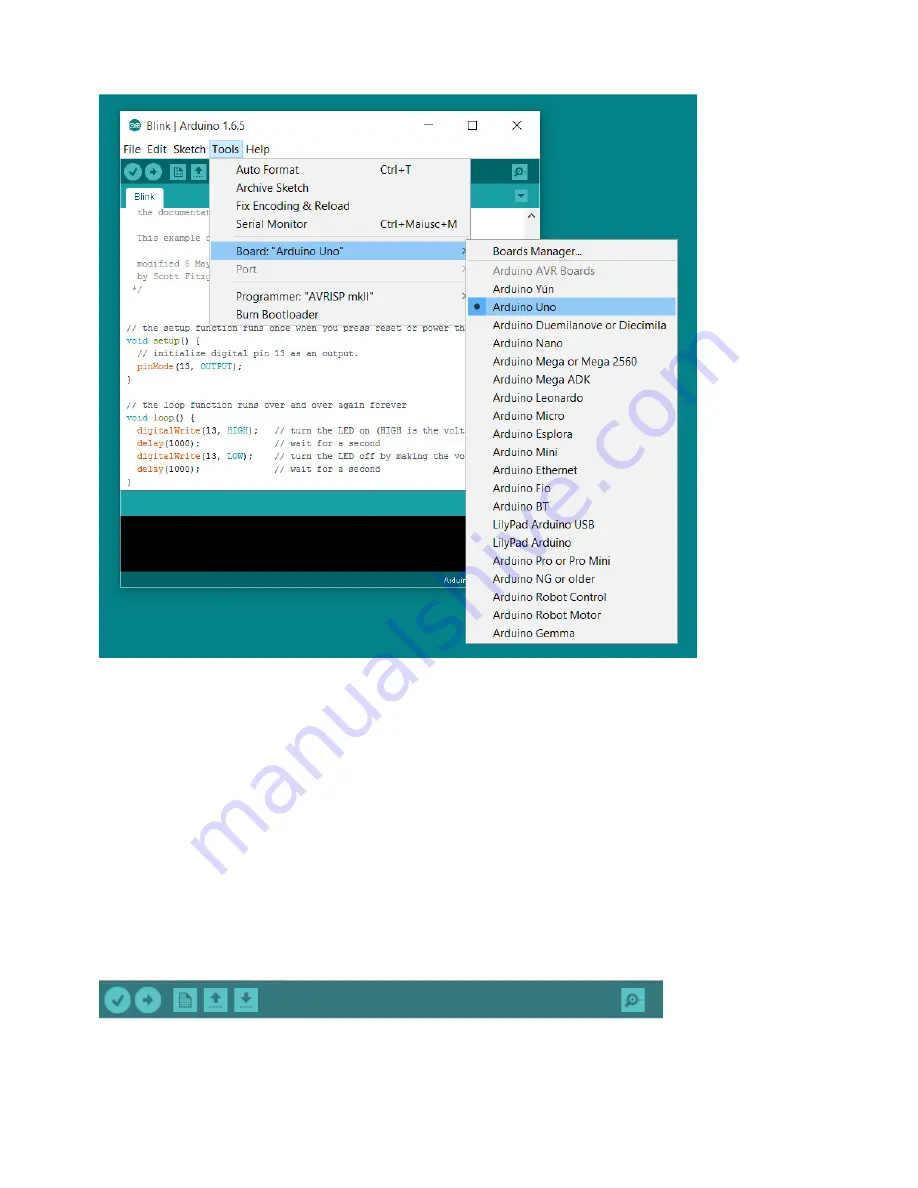
Selecting an Arduino Uno
Select your serial port
Select the serial device of the Arduino board from the Tools | Serial Port menu. This is
likely to be COM3 or higher (COM1 and COM2 are usually reserved for hardware serial
ports). To find out, you can disconnect your Arduino board and re-open the menu; the
entry that disappears should be the Arduino board. Reconnect the board and select that
serial port.
Upload the program
Now, simply click the "Upload" button in the environment. Wait a few seconds - you should
see the RX and TX LEDs on the SparkFun USB/Serial board flashing. If the upload is
successful, the message "Done uploading." will appear in the status bar.
Содержание Arduino Walking Robot
Страница 1: ...Revision 1 0B Copyright 2015 Cricket Robot Documentation...
Страница 8: ...8 Cricket Robot Documentation Top View...
Страница 9: ...9 Cricket Robot Documentation Bottom View...
Страница 10: ...10 Cricket Robot Documentation Front View...
Страница 90: ...90 Cricket Robot Documentation Appendix A Schematics...
Страница 91: ...91 Cricket Robot Documentation...
Страница 92: ...92 Cricket Robot Documentation Appendix B Parts List...
Страница 93: ...93 Cricket Robot Documentation...
Страница 94: ...94 Cricket Robot Documentation Appendix C PC Board Layout All Layers Parts Layout...


