Installing Hardware 1-7
Step 3: Connect to
audio cable
(Optional step for
Analog or Digital
CD audio cable
connection)
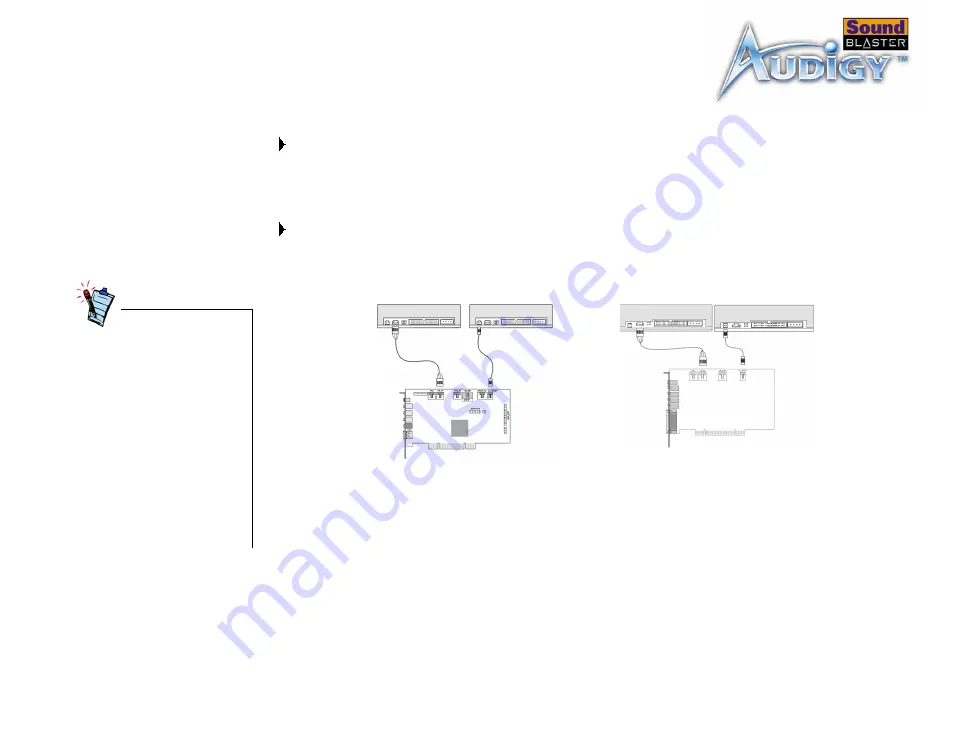
For analog CD audio output:
connect the Analog CD audio cable from the Analog Audio connector on your CD-
ROM/DVD-ROM drive to the CD_IN connector on the Sound Blaster Audigy card
For digital CD audio output:
connect the Digital CD audio cable from the Digital Audio connector on your CD-
ROM/DVD-ROM drive to the CD_SPDIF connector on the Sound Blaster Audigy
• The MPC-to-MPC (4-pin)
Analog CD audio cable
and the MPC-to-MPC (2-
pin) Digital CD audio
cable are not included
with your audio card.
• If the Sound Blaster
Audigy card is connected
to both the CD SPDIF and
CD Audio connectors on a
CD-ROM or DVD-ROM
drive, do not enable the
CD Audio and CD Digital
options at the same time
in Surround Mixer.
Figure 1-6: Connecting the drives.
CD-ROM/DVD-ROM drive
OR
CD-ROM/DVD-ROM drive
OR
Sound Blaster Audigy (SB1394)
Sound Blaster Audigy (non-SB1394)
Содержание Sound Blaster Audigy non-SB1394
Страница 7: ...Introduction...
Страница 13: ...1 Installing Hardware This chapter tells you how to install the Sound Blaster Audigy hardware...
Страница 29: ...2 Installing Software This chapter tells you how to install the Sound Blaster Audigy software...
Страница 33: ...3Sound Blaster Audigy Applications This chapter tells you how to get the most out of your Sound Blaster Audigy...
Страница 48: ...A General Specifications This section displays the specifications of your Sound Blaster Audigy card...
Страница 69: ...Index...


