


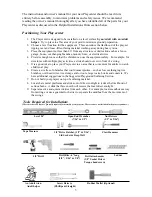


Basic Setup Dimensions
Place the set on level ground, not less than 6ft (1.83M) from any structure or
obstruction such as a fence, garage, house, overhanging branches, laundry lines or
electrical wires.
Important Assembly Notes
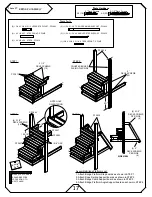
1) While assembling unit, take time before and after each phase
to make sure Fort is level. If fort is not level, assembly will be
difficult and improper assembly may result. Extra care must
be taken to assure the fort is square on the phases that
include this symbol in Fig i.
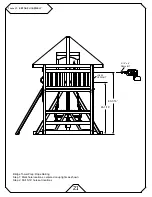
Note: It is vital that the fort
be level before and
after this phase!
Fig. i
5) Pay close attention to make sure you are using the correct hardware in the correct places. Using
incorrect hardware may result in improper assembly.
6) Read the steps of each phase thoroughly. The written steps may include important information not
shown in the illustrations.
4) Pay close attention to the "Items needed" and "Hardware needed" sections of each phase. They can
be a valuable aid when sorting your wood and hardware. Assembly will be made easier if items are
sorted by phase.
1/8" Drill Bit
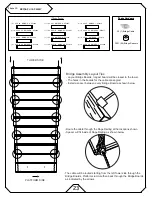
2) When installing a board on the small face of a 2x4, pre-drilling
the attachment hole is REQUIRED. Just place the board where
attachment is needed and by using the holes in the board as a
guide, drill holes into the 2x4 with a
1
8
" drill bit 1
1
4
" deep.
Failure to Pre-drill may result in board splitting
HEX BOLT
SPLIT WASHER
FLAT WASHER
T-NUT
3) Whenever a T-nut is used, follow these directions. Place t-nut in pre-drilled
hole. Tap in with hammer. Place bolt with split and flat washers in the]
opposite side. Hand tighten to make sure the bolt is in the t-nut. Secure
with socket. DO NOT Over Tighten.
10
33'-3" [10.1M]
28
'-1
1"
[8
.8
M
]


