background image

Before


using


the


unit

be


sure


to


read


all


operating


instructions


carefully

Please


note


that


these

are


general


precautions


and


may


not


pertain


to


your


unit

1

Read


these


instructions

.


All


the


safety


and


operating


instructions


should


be


read


before


the


product


is


operated

.

2

Keep


these


instructions

.


The


safety


and


operating


instructions


should


be


retained


for


future


reference

.

3

Heed


all


warnings

.


All


warnings


on


the


product


and


in


the


operating


instructions


should


be


adhered


to

.

4

Follow


all


instructions

.


All


operating


and


use


instructions


should


be


followed

.

5

Do


not


use


this


apparatus


near


water

.


Do


not


use


this


product


near


water


and


moisture

for


example

near


a


bathtub

washbowl

kitchen


sink


or


laundry


tub

in


a


wet


basement

or


near


a


swimming


pool

.

6

Clean


only


with


dry


cloth

.


Unplug


this


product


from


the


wall


outlet


before


cleaning

Do


not


use


liquid


cleaners


or


aerosol


cleaners

Use


a


dry


cloth


for


cleaning

.

7

Do


not


block


any


ventilation


openings

Install


in


accordance


with


the


manufacturer

'

s


instructions

.


Slots


and


openings


in


the


cabinet


and


in


the


back


or


bottom


are


provided


for


ventilation

to


ensure


reliable


operation


of


the


product


and


to


protect


it


from


overheating

These


openings


must


not


be


blocked


or


covered

The


openings


should


never


be


blocked


by


placing


the


product


on


a


bed

sofa

,


rug


or


other


similar


surface

This


product


should


never


be


placed


near


or


over


a


radiator


or


heat


source

This


product


should


not


be


placed


in


a


built

-

in


installation


such


as


a


bookcase


or


rack


unless


proper


ventilation


is


provided


or


the


manufacturer

'

s


instructions


have


been


adhered


to

.

8

Do


not


install


near


any


heat


sources


such


as


radiators

heat


registers

stoves

or


other


apparatus

(

including


amplifiers

that


produce


heat

.

9

Do


not


defeat


the


safety


purpose


of


the


polarized


or


grounding

-

type


plug

A


polarized


plug


has


two


blades


with


one


wider


than


the


other

A


grounding


type


plug


has


two


blades


and


a


third


grounding


prong

The


wide


blade


or


the


third


prong


are


provided


for


your


safety

.

 If


the


provided


plug


does


not


fit


into


your


outlet

consult


an


electrician


for


replacement


of


the


obsolete


outlet

.

10

)

Protect


the


power


cord


from


being


walked


on


or


pinched


particularly


at


plugs

convenience


receptacles

and


the


point


where


they


exit


from


the


apparatus

.

11

)

Only


use


attachments

/

accessories


specified


by


the


manufacturer

.

12

)

Use


only


with


the


cart

stand

tripod

bracket

or


table


specified


by


the


manufacturer

or


sold


with


the


apparatus

When


a


cart


is


used

use


caution


when


moving


the


cart

/

apparatus


combination


to


avoid


injury


from


tip

-

over

.


An


appliance


and


cart


combination


should


be


moved


with


care

.


Quick


stop

excessive


force


and


uneven


surfaces


may


cause


the


appliance


and


cart


combination


to


overturn

.

13

Unplug


this


apparatus


during


lightning


storms


or


when


unused


for


long


periods


of


time

.


To


protect


your


product


from


a


lightning


storm

or


when


it


is


left


unattended


and


unused


for


long


periods


of


time

unplug


it


from


the


wall


outlet


and


disconnect


the


antenna


or


cable


system

This


will


prevent


damage


to


the


product


due


to


lightning


and


power

-

line


surges

.

14

Refer


all


servicing


to


qualified


service


personnel

Servicing


is


required


when


the


apparatus


has


been


damaged


in


any


way

such


as


power

-

supply


cord


or


plug


is


damaged

liquid


has


been


spilled


or


objects


have


fallen


into


the


apparatus

the


apparatus


has


been


exposed


to


rain


or


moisture


does


not


operate


normally

or


has


been


dropped

.

15

Power


source


This


product


should


be


operated


only


from


the


type


of


power


source


indicated


on


the


marking


label

.


If


you


are


not


sure


of


the


type


of


power


supply


to


your


home

consult


your


appliance


dealer


or


local


power


company

.

 For


products


intended


to


operate


from


battery


power

,

 or


other


source

refer


to


the


operation


instructions

.

16

Power


lines


An


outside


antenna


system


should


not


be


located


in


the


vicinity


of


overhead


power


lines


or


other


electric


light


or


power


circuits

or


where


it


can


fall


into


such


power


lines


or


circuits

When


installing


an


outside


antenna


system

extreme


care


should


be


taken


to


keep


from


touching


such


power


lines


or


circuits


as


contact


with


them


might


be


fatal

.

-2-

IMPORTANT  SAFETY  INSTRUCTION

For  example,  this  unit  may  not  have  the  capability  to  be  connected  to  an  outdoor  antenna.

Содержание CHT755

Страница 1: ...del CHT755 Owner s Manual PLEASE READ BEFORE OPERATING THIS EQUIPMENT 5 1 CHANNEL HOME THEATER SYSTEM with DVD Player 5 1 CHANNEL HOME THEATER SYSTEM with DVD Player CHT754 Eng IB IB Size 105 5 x 210mm A5 ...

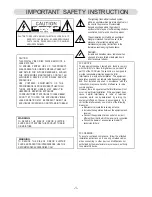
Страница 2: ...led or defeated Avoid direct exposure to beam FCC NOTICE This equipment has been tested and found to comply with the limits for a Class B digital device pursuant to part 15 of the FCC Rules These limits are designed to provide reasonable protection against harmful interference in a residential installation This equipment generates uses and can radiate radio frequency energy and if not Installed an...

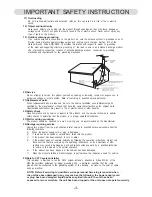
Страница 3: ...ided plug does not fit into your outlet consult an electrician for replacement of the obsolete outlet 10 Protect the power cord from being walked on or pinched particularly at plugs convenience receptacles and the point where they exit from the apparatus 11 Only use attachments accessories specified by the manufacturer 12 Use only with the cart stand tripod bracket or table specified by the manufa...

Страница 4: ... to perform safety checks to determine that the product is in proper operational condition 23 Wall or ceiling mounting The product should be mounted to a wall or ceiling only as recommended by the manufacturer 24 Damage requiring service Unplug this product from the wall outlet and refer service to qualified service personnel under the following conditions a When the power supply cord or plug is d...

Страница 5: ...rts of the DVD player Moisture condensation occurs during the following cases When you bring the DVD player directly from a cold place to a warm place When you use the DVD player in a room where you just turned on the heater or a place where the cold wind from the air conditioner directly hits the unit ln summer when you use the DVD player in a hot and humid place just after you moved the unit fro...

Страница 6: ...y set to PAL the TV picture may roll vertically In this case set the TV system to NTSC ABOUT DISCS Notes on Copyright It is forbidden by law to copy broadcast show broadcast on cable play in public and rent copyrighted material without permission DVD video discs are copy protected and any recordings made from these discs will be distorted This product incorporates copyright protection technology t...

Страница 7: ... R Audi utput 4 Coaxial Digital Audio Output 6 5 1 Audio Output 1 Component Video Output 5 1 2 3 4 6 2 omposit ide utput L R COAXIAL VIDEO Y Pb Cb Pr Cr SL SR CEN FL FR SUB 5 AC Power Cord 120V 60Hz Display PLAY PAUSE Button Standby Indicator OPEN CLOSE Button POWER Button e V o C O L o O ...

Страница 8: ...HOC ELECTRIQUE NE PAS OUVRIR 5 1 CHANNEL HOME THEATER SYSTEM WITH DVD PLAYER POWER SUPPLY DC 12V A POWER CONSUMPTION 3 W CHT755 DC IN DC 12V A Remote Sensor Indicators Volume Knob 7 7 Audio Input Jacks Speakers Connection Jacks DC IN Jack POWER ON OFF Switch 3 3 3 3 6 6 ...

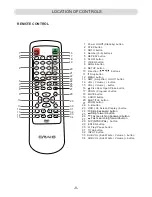
Страница 9: ... TITLE button INPUT button SUB VOL Sub Woofer Volume button button AMP Amplifier On Off button Number 0 9 buttons VOL Volume button VOL Volume button MENU button Stop button SETUP button ANGLE button VIDEO button SLOW button REPEAT button GOTO button STEP button Power On Off Standby button 11 12 13 14 15 1 2 3 4 5 6 7 8 9 10 31 32 33 16 17 18 19 20 21 22 23 24 25 26 27 28 29 30 34 11 12 13 14 15 1...

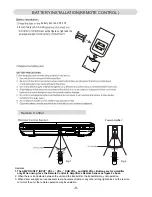
Страница 10: ... unit and the transmitter the transmitter may not operation 3 When direct sunlight an incandescent lamp fluorescent lamp or any other strong light shines on the remote control of the unit the remote operation may be unstable Fig 2 Fig 1 Power Amplifier V V 1 The AMP ON OFF INPUT VOL VOL SUB VOL and SUB VOL Buttons are for Amplifier only When using face the Remote Control to Amplifier s Remote Sens...

Страница 11: ...ction cable not included L R COAXIAL VIDEO Y Pb Cb Pr Cr SL SR CEN FL FR SUB White Red Yellow White Red Yellow ellow cable do not input L R COAXIAL VIDEO Y Pb Cb Pr Cr SL SR CEN FL FR SUB Y Connection to TV through Video Composite and Audio Output Jacks Video Connection cable included Connection to TV through Component Video and Audio Output Jacks YUV Connection cable NOT included ...

Страница 12: ...n decoder through Coaxial Output Jack Coaxial Connection cable NOT included 11 External Amplifier with built in decoder White Red Yellow L R COAXIAL VIDEO Y Pb Cb Pr Cr SL SR CEN FL FR SUB A V CABLE SUPPLIED CONNECTION TO TV AND EXTERNAL AMPLIFIER ...

Страница 13: ...DC IN DC 12V A DC IN DC 12V DC IN DC 12V 3 3 A 3 3 A 3 3 ...

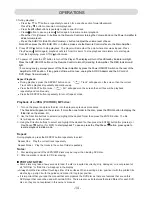
Страница 14: ...the DVD player to open the disc tray Place the disc on the center of tray with Control The Standby Indicator to ON 1 Connect the Home Theater and DVD Player together then power source as previous procedures the Standby Indicator on the DVD Player will light Press the POWER ON OFF button on the DVD Player will turned off and the display will light position to power on the Amplifier The Power on Ind...

Страница 15: ...files will be playback repeatedly and continuously Press the REPEAT button repeatedly to turn off repeat mode Repeat Playback The files list will appear on the screen If more than one folder in the disc press the PROG button to display the folder list on the screen Or Play Pause button for MP3 to start playback To pause press the Play Pause button press again to resume playback in slide mode Playb...

Страница 16: ...ck press the SLOW button to reduce the playing speed to 1 2 Repeatedly press this button and the speed will reduce to 1 4 1 8 1 16 and resume normal playback To resume normal playback press the Play button N P NTSC PAL Press the N P button to change the video output signal from the player to PAL NTSC or AUTO to matching the color system of your Television Note The color system of Television in USA...

Страница 17: ...below Repeat the same procedures until all specific tracks were selected Start TT CH 01 02 TT CH 1 2 3 4 5 6 7 8 9 10 Exit Next Start 02 Fig A During CD Playback press the PROG Program button the program setting menu will pop up Use the direction buttons to select and highlight the Start button then press the ENTER button to start programs playback Use the the Direction button to highlight Track c...

Страница 18: ... speakers Set to Stereo if you connected the DVD Player to TV through 2 1 Audio connection jacks Set to 5 1 if you connected the DVD Player to the supplier Home you need to set or reset Press the ENTER button to enter or confirmed the selection After setting press the SET UP button to save the settings and exit General Audio Dolby Video General Setup Page Go To General Setup Page Preference Captio...

Страница 19: ...t Mode is selected using the direction and ENTER buttons to set connected between DVD Player and TV 2 If TV Mode is selected using the direction and ENTER buttons to set to to Spdif Off Raw or PCM to match the decoding system of the set it to 48k or 96k to match the recording frequency of the playing to Stereo L Mono Play Left channel on all speakers R Mono Play Right Mixed Right and Left channel ...

Страница 20: ... 17 years old Parental Guidance strongly 7 NC 17 17 years old and above 8 Adult Adult only 4 If Password is selected press the ENTER button to enter the sub setting menu will appear If Password Mode is selected using the direction and ENTER buttons If Password is selected press the ENTER button twice to enter The Enter the six digit old password The Colum of New Password will be highlighted Enter ...

Страница 21: ...sc Sharp writing Cleaning the Unit To prevent fire or shock hazard disconnect your unit from the AC power source when cleaning The finish on your unit may be cleaned with a dust cloth and Mild soap and a damp cloth may be used on the front panel 20 the shiny unprinted Never allow your fingers to contact with side of the disc Never use detergents or abrasive cleaners to clean the disc If necessary ...

Страница 22: ...ure appears on the TV repeatedly Clean the disc Replace batteries Install batteries as the polarity markings inside battery compartment Aim the remote control to the sensor Operate within 20 feet Move obstacle The unit does not start playback Some functions do not operate as stated Selected language is not being shown in the subtitles or spoken Subtitle are not working properly Angle cannot be cha...

Страница 23: ...ling CD Audio 20Hz 20KHz S N Ratio 70dB Remote Control DC 3V 2 x AAA size batteries included Contains 1 x User s Manual 1 x Remote Control 3 x Audio connection cables 2 x AAA size batteries for Remote Control 1 x AV connection cable AC 120V 60Hz Max 10W Home Theatre System DC 12V 3A DVD Player 1 x DVD Player Home Theatre System Impedance of speakers Woofer 1 x 4 Ohm 15W Others 5 x 8 Ohm 5W Audio P...

Страница 24: ...d by anyone other than an authorized Craig service center d Damaged because it is improperly connected to any other equipment Note This warranty does not cover a Ordinary adjustments as outlined in the Owner s Manual which can be performed by the customer b Damage to equipment not properly connected to the product c Any cost incurred in shipping the product for repair d Damage to the product not u...

Отзывы: