background image

Table of Contents:

Safety Tips. pg. 1
Unpacking Your Fan. pg. 2
Parts Inventory. pg. 2
Installation Preparation. pg. 3
Hanging Bracket Installation. pg. 3
Fan Assembly. pgs. 4 - 5 
Wiring. pgs. 5 - 6
Canopy Assembly. pg. 6
Blade Assembly. pg. 7
Light Kit Assembly (Optional). pgs. 7 - 8
Handheld Remote Control Assembly. pgs. 8 - 9
Automated Learning Process./
   Activating Code. pg. 9
Remote/Wall Control Operation. pg. 10
Testing Your Fan. pg. 10
Troubleshooting. pg. 11
Warranty. pg. 11
Parts Replacement. pg. 11

net weight of fan: 12.92 lb (5.86 kg) 

PRINTED IN CHINA

READ THESE INSTRUCTIONS AND

SAVE THEM FOR FUTURE USE

For Models:

SON52CH
SON52ESP

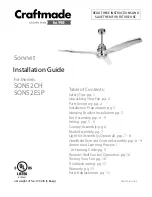
Installation Guide

E192641

Sonnet

Содержание SON52CH

Страница 1: ... pg 7 Light Kit Assembly Optional pgs 7 8 Handheld Remote Control Assembly pgs 8 9 Automated Learning Process Activating Code pg 9 Remote Wall Control Operation pg 10 Testing Your Fan pg 10 Troubleshooting pg 11 Warranty pg 11 Parts Replacement pg 11 net weight of fan 12 92 lb 5 86 kg PRINTED IN CHINA READ THESE INSTRUCTIONS AND SAVE THEM FOR FUTURE USE For Models SON52CH SON52ESP Installation Gui...

Страница 2: ... than one house wire to connect to the corresponding fan lead wires consult an electrician for the proper size wire connectors to use 5 Electrical diagrams are for reference only Light kits that are not packed with the fan must be CUL Canada or UL USA listed and marked suitable for use with the model fan you are installing Switches must be CUL Canada or UL USA general use switches Refer to the ins...

Страница 3: ...piece p hardware packs page 2 d g k e j a b c 1 Unpacking Your Fan Carefully open the packaging Remove items from Styrofoam inserts Remove motor housing and place on carpet or Styrofoam to avoid damage to finish The three motor stabilization pieces may be dicarded at this time Do not discard fan carton or Styrofoam inserts should this fan need to be returned for repairs Check against parts invento...

Страница 4: ...ical wiring around the back of the hanging bracket and away from the bracket opening Note It is very important that you use the proper hardware when installing the hanging bracket as this will support the fan page 3 ON OFF ON OFF hanging bracket spring washers outlet box screws flat washers 3 Installation Preparation Installation requires these tools Phillips screwdriver flathead screwdriver adjus...

Страница 5: ...e canopy cover in hardware pack Slide yoke cover canopy cover and canopy over downrod Refer to diagram 3 Note Canopy cover must be turned with shiny side toward the motor housing Thread safety cable and wires through hanging ball and then slide hanging ball over downrod the top of the downrod should be noted as having a set screw hole use this hole when setting the set screw Insert stop pin into t...

Страница 6: ...g safety cable hanging bracket tab hanging ball slot wood ceiling joist wood screw and washer safety cable loop 6 Wiring WARNING Turn off circuit breakers to current fixture from breaker panel and be sure switch is turned to the OFF position CAUTION Be sure outlet box is properly grounded and that a ground GREEN or Bare wire is present Make sure all electrical connections comply with Local Codes o...

Страница 7: ...ning the equipment off and on the user is encouraged to try to correct the interference by one or more of the following measures Reorient or relocate the receiving antenna Increase the separation between the equipment and receiver Connect the equipment into an outlet on a circuit different from that to which the receiver is connected Consult the dealer or an experienced radio TV technician for hel...

Страница 8: ...e male plug with the colors on the female plug for correct fit Be sure that plugs connect securely NOTE If you will NOT be using the light kit do NOT connect the plugs Light Kit Assembly continued on next page fitter plate motor plate female plug Locate 6 blade screws lock washers and flat washers in one of the hardware packs Place 1 lock washer and 1 flat washer in that order on a blade screw Rep...

Страница 9: ...tor housing dimmer switch wall control wire wire wire 12V battery 10 Handheld Remote Control Assembly IN ORDERTO USETHE HANDHELD REMOTE CONTROL PLEASE CONTINUE WITH SECTION 10 for remote control assembly instructions If you have already installed the wall control but do not wish to use the handheld remote control please proceed to Section 11 Gently pull on remote control cover to separate top and ...

Страница 10: ...I IV VI III V OFF ON SET button faceplate black handheld remote control I II IV VI III V OFF ON SET button CAUTION The wall and or handheld remote control can be programmed to multiple receivers or fans If this is not desired turn wall switch off to any other programmable receiver or fan Restore electrical power and then if using wall control set slider switch on wall control to the ON position Wi...

Страница 11: ...he remote control operates all of the functions of the fan battery has been installed correctly If the wall and or remote controls do does not operate all of the fan functions refer to Troubleshooting section to solve any issues before contacting Customer Service Fan must be on LOW before setting the fan in reverse Use button to recirculate air depending on the season A ceiling fan will allow you ...

Страница 12: ...ues may result in serious injury CRAFTMADE ELLINGTON LIFETIME WARRANTY CRAFTMADE ELLINGTON warrants this fan to the original household purchaser for indoor use under the following provisions 1 YEAR WARRANTY CRAFTMADE ELLINGTON will replace or repair any fan which has faulty performance due to a defect in material or workmanship Contact Craftmade Ellington Customer Service at 1 800 486 4892 to arra...

Страница 13: ...ation du support de suspension p 3 Groupe ventilateur p 4 5 Câblage p 5 6 Montage de la garniture p 6 Assemblage des pales p 7 Assemblage du Kit d éclairage facultatif p 7 8 Assemblage du module de télécommande p 8 9 Processus d apprentissage automatisé Activation du Code p 9 Utilisation de la télécommande commande murale p 10 Tester votre ventilateur p 10 Dépannage p 11 Garantie p 11 Pièces de re...

Страница 14: ...u s il y a plus d un fil résidentiel à connecter aux fils correspondants du ventilateur consulter un électricien pour savoir quelle taille de connecteurs de fils utiliser 5 Les schémas électriques ne sont fournis que pour référence Les kits d éclairage qui ne sont pas livrés avec le ventilateur doivent être homologués CUL Canada ou UL USA avec une mention précisant qu ils sont adaptés au modèle de...

Страница 15: ...page 2 p 1 Déballage de votre ventilateur Ouvrir l emballage avec précaution Retirer toutes les pièces des inserts en polystyrène Retirer le carter moteur et le placer sur une pièce de tapis ou de polystyrène afin de ne pas endommager la finition Les trois pièces de stabilisation du moteur peuvent maintenant être mises au rebut Ne pas jeter le carton ou les pièces de polystyrène pour le cas où le ...

Страница 16: ...nnement est bien en position ARRÊT AVERTISSEMENT Le fait de ne pas débrancher l alimentation électrique avant l installation peut causer des blessures graves Déposez l appareil existant AVERTISSEMENT Dans le cas de l utilisation d une boîte de sortie existante veillez à s assurer que la boîte de sortie est solidement fixée à la structure de la construction et qu elle peut supporter la totalité du ...

Страница 17: ...et de quincaillerie Glissez le couvre étrier le couvercle de la garniture et la garniture par dessus la tige de suspension Voir Schéma 3 Remarque Le côté brillant du couvercle de la garniture doit être tourné vers le carter moteur Passez le câble de sécurité et les fils par l ouverture de la rotule de suspension puis glissez la rotule de suspension dans la tige de suspension il est à noter que l e...

Страница 18: ...rité glisse la boucle doit être resserrée Le mou du câble inutilisé peut être laissé en zone plafond boucle de câble sécurité vis à bois et rondelle câble de sécurité ergot dans le support de suspension fente dans la rotule de suspension fil d alimentation blanc fil d alimentation noir AVERTISSEMENT Coupez l alimentation électrique du luminaire ou appareil en place au niveau des coupe circuits du ...

Страница 19: ...éfastes à la réception radio ou télévision qui peut être déterminée en mettant en marche puis en arrêtant l équipement il est recommandé à l usager d essayer de corriger le problème d interférence en suivant une ou plusieurs des démarches suivantes réorienter ou déplacer l antenne de réception augmenter la distance qui sépare l équipement du récepteur brancher l équipement sur une source électriqu...

Страница 20: ... fois par an carter moteur Si vous souhaitez utiliser le kit d éclairage retirez 1 vis de la plaque du moteur sur la face inférieure du carter de moteur et desserrez partiellement les 2 autres vis Alignez les trous oblongs situés au centre de la plaque de l adaptateur avec les vis desserrées de la plaque du moteur en faisant passer la prise femelle du boîtier moteur par le trou situé au centre de ...

Страница 21: ...e de l adaptateur couvercle métallique carter moteur abat jour en verre kit d éclairage LED carter moteur kit d éclairage LED 10 Assemblage du module de télécommande AFIN D UTILISER LE MODULE DETÉLÉCOMMANDE VEUILLEZ PASSER À LA SECTION 10 pour les instructions d assemblage de la télécommande Si vous avez déjà installé la commande murale mais ne souhaitez pas utiliser le module de télécommande veui...

Страница 22: ...atterie si le module de télécommande n est pas utilisé pendant de longues périodes commande murale bouton SET ATTENTION La commande murale et ou le module de télécommande peuvent être programmé s de telle sorte qu ils elle contrôle nt plusieurs récepteurs ou ventilateurs Si vous ne souhaitez pas programmer d autres récepteurs ou ventilateurs programmables mettez l interrupteur mural de ceux ci en ...

Страница 23: ... échéant Testez la commande murale installation facultative en localisant l interrupteur coulissant ON OFF Marche Arrêt sur la commande murale puis amenez le en position ON Marche Testez la fonction lumière et variateur puis les vitesses du ventilateur Trouvez ensuite le module de télécommande Testez les vitesses du ventilateur avec les différents boutons du module de télécommande Testez la foncti...

Страница 24: ...vous que la vis de fixation de la rotule de suspension est bien serrée GARANTIE LIMITÉE À VIE CRAFTMADE ELLINGTON CRAFTMADE ELLINGTON garantit ce ventilateur au ménage acheteur d origine pour une utilisation en intérieur selon les dispositions et aux conditions suivantes GARANTIE DE 1 AN CRAFTMADE ELLINGTON remplacera ou procédera à la réparation de tout ventilateur au fonctionnement défectueux en...

Страница 25: ... ventilador Págs 4 5 Instalación eléctrica Págs 5 6 Colocación de la cubierta decorativa Pág 6 Colocación de las aspas Pág 7 Instalación del juego de luz opcional Págs 7 8 Ensamblaje del control remoto de mano Págs 8 9 Proceso de aprendizaje automático El activar el código Pág 9 Funcionamiento del control remoto de pared Pág 10 Verificación del funcionamiento del ventilador Pág 10 Localización de ...

Страница 26: ... 12 o hay más de un cable de la casa para conectar a los cables principales del ventilador al cual corresponda cada uno consultar con un electricista para informarse sobre el tamaño correcto de conectores para cable que se debe usar 5 Los diagramas eléctricos son únicamente para referencia Los juegos de luz que no se incluyen con el ventilador deben tener el símbolo CUL Canadá o UL EEUU y también ...

Страница 27: ...tes de artículos de ferretería página 2 1 Desempaquetado del ventilador Abrir el empaque cuidadosamente Sacar los artículos del embalaje Sacar el motor y ponerlo en una alfombra o en el embalaje para evitar rayar el acabado Se pueden desechar las tres piezas de estabilización del motor en este momento Guardar la caja de cartón o el empaquetamiento original en caso de que tenga que mandar el ventil...

Страница 28: ...e suplen corriente a la caja de salida y asegurarse de que el interruptor de luz esté APAGADO ADVERTENCIA El no desconectar el suministro de fuerza antes de la instalación puede tener por resultado lesiones graves Quitar el aparato existente ADVERTENCIA Si utiliza una caja de salida existente asegurarse de que la caja de salida esté firmemente conectada a la estructura del edificio y que sea capaz...

Страница 29: ...pa de la cubierta decorativa y la cubierta decorativa por el tubo Referirse al diagrama 3 Nota Se tiene que voltear la tapa de la cubierta decorativa para que el lado brillante dé al bastidor del motor Pasar los cables y el cable de seguridad por la bola que sirve para colgar y luego deslizar la bola que sirve para colgar sobre el tubo la parte de arriba del tubo debe tener el agujero para el torn...

Страница 30: ... la instalación eléctrica como sigue Conectar los cables NEGRO del ventilador al cable NEGRO del techo con un conector para cable provisto Conectar el cable BLANCO del ventilador al cable BLANCO del techo con un conector para cable provisto Conectar todos los CONDUCTORES A TIERRA VERDES del ventilador a los PELADOS VERDES del techo con un conector para cable provisto Como una medida de seguridad a...

Страница 31: ...adversa en la recepción de radio o televisión que se puede determinar apagando y prendiendo el equipo se le urge al usuario a intentar rectificar la interferencia tomando una o más de las medidas que siguen Orientar la antena de nuevo o localizarla en otro sitio Aumentar la separación entre el equipo y el receptor Conectar el equipo a un tomacorriente en un circuito distinto al cual está conectado...

Страница 32: ... los enchufes NOTA Si no piensa utilizar el juego de luz NO conectar los enchufes La Instalación del juego de luz continúa en la página siguiente 9 Instalación del juego de luz opcional Localizar los 6 tornillos para las aspas las arandelas de seguridad y las arandelas planas en uno de los paquetes de artículos de ferretería Colocar 1 arandela de seguridad y 1 arandela plana en el orden indicado e...

Страница 33: ...rar bastidor del motor juego de luz LED pantalla de vidrio placa de conexión bastidor del motor 10 Ensamblaje del control remoto de mano PARA PODER UTILIZAR EL CONTROL REMOTO DE MANO FAVOR DE SEGUIR CON LA SECCION 10 para armar el control remoto Si ya se instaló el control de pared pero no desea utilizar el control remoto de mano favor de pasar a la sección 11 Con cuidado separar la cubierta del c...

Страница 34: ...egra control remoto de mano I II IV VI III V OFF ON botón SET botón SET PRECAUCION Se puede programar el control de pared control remoto de mano para usar con varios receptores o ventiladores Si no desea hacer esto apagar el interruptor de cualquier otro receptor o ventilador programable Conectar la electricidad y luego si se instaló el control de pared poner el interruptor corredero en el control...

Страница 35: ... NOTA Si el control de pared control remoto de mano interfiere con otros aparatos activar un código nuevo en el control de pared control remoto de mano cortando la corriente primero Repetir las instrucciones que se refieren al botón SET de la sección 11 página 9 IMPORTANTE Hay que sincronizar el control remoto de mano y el control de pared con el ventilador para que funcionen correctamente control...

Страница 36: ...plicada en absoluto Esta limitación de daños emergentes no se aplicará en estados donde es prohibido Para piezas o información referirse al Inventario de piezas en la página 2 Servicio al cliente de Craftmade Ellington 1 800 486 4892 www craftmadebrands com Problema El ventilador no funciona Soluciones 1 Inspeccionar el interruptor de pared del ventilador control de pared 2 Verificar la instalació...

Отзывы: