background image

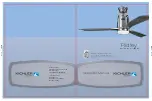
Installation Guide

Table of Contents:

Safety Tips. pg. 1
Unpacking Your Fan. pg. 2
Parts Inventory. pg. 2
Installation Preparation. pg. 3
Hanging Bracket Installation. pg. 3
Fan Assembly. pgs. 4 - 5 
Wiring. pg. 6
Canopy Assembly. pg. 6
Blade Assembly. pg. 7
Switch Housing Assembly. pg. 7
Light Kit Assembly. pg. 8
Testing Your Fan. pg. 9
Troubleshooting. pg. 10
Warranty. pg. 10
Parts Replacement. pg. 10

net weight of fan: 21.89 lb. (9.93 kg) 

PRINTED IN CHINA

For Model:

PAR52ESP4

READ THESE INSTRUCTIONS AND

SAVE THEM FOR FUTURE USE

E192641

For

Wet Location

Содержание PAR52ESP4

Страница 1: ... 3 Fan Assembly pgs 4 5 Wiring pg 6 Canopy Assembly pg 6 Blade Assembly pg 7 Switch Housing Assembly pg 7 Light Kit Assembly pg 8 Testing Your Fan pg 9 Troubleshooting pg 10 Warranty pg 10 Parts Replacement pg 10 net weight of fan 21 89 lb 9 93 kg PRINTED IN CHINA For Model PAR52ESP4 READ THESE INSTRUCTIONS AND SAVE THEM FOR FUTURE USE E192641 For Wet Location ...

Страница 2: ...e proper size wire connectors to use WARNING If using this fan in a WET or damp location this fan must be connected to a supply circuit that is protected by a Ground Fault Circuit Interrupter GFCI to reduce the risk of personal injury electrical shock or death 5 Electrical diagrams are for reference only Light kits that are not packed with the fan must be CUL Canada or UL USA listed and marked sui...
Страница 3: ...he parts provided with this fan for proper installation and safety 2 Parts Inventory a canopy 1 piece b hanging bracket 1 piece c downrod and hanging ball 1 piece d motor housing 1 piece e yoke cover 1 piece f switch housing 1 piece g light kit fitter 1 piece h glass shade 1 piece i blade arm 4 pieces j blade 4 pieces k safety cable already attached to motor 1 piece l canopy cover in hardware pack...

Страница 4: ...nnect power supply prior to installation may result in serious injury Remove existing fixture WARNING When using an existing outlet box be sure the outlet box is securely attached to the building structure and can support the full weight of the fan Ensure the outlet box is clearly marked Suitable for Fan Support If not it must be replaced with an approved outlet box Failure to do so can result in ...

Страница 5: ...ove pin and clip from motor housing yoke Slide downrod through canopy canopy cover and weatherproof yoke cover Note Canopy cover must be turned with shiny side toward the motor housing Thread safety cable and electrical wires through downrod and pull extra wire slack from the upper end of the downrod Thread downrod into the motor yoke until holes for pin and clip in downrod align with holes in yok...

Страница 6: ... injury or death Tip Seek the help of another person to hold the stepladder in place and to help lift the fan up to you once you are set on the ladder Find a secure attachment point wood ceiling joist highly recommended and secure safety cable It will be necessary to use a heavy duty wood screw washer and lock washer not supplied with the safety cable loop If necessary adjust the loop at the end o...

Страница 7: ...rom fan to BLACK wire from ceiling with wire connector provided Connect WHITE wire from fan to WHITE wire from ceiling with wire connector provided Connect all GROUND GREEN wires together from fan to BARE GREEN wire from ceiling with wire connector provided If you intend to control the fan light with a separate light switch connect BLUE wire from fan to the BLACK or RED supply from the independent...

Страница 8: ... in blade arm with holes in blade as shown Be sure to note label on blade indicating THIS SIDE UP and turn blade so that label faces up With fingers insert 3 blade attachment screws along with washers from the TOPSIDE of blade and 3 wing nuts from UNDERSIDE of blade making sure to completely insert each screw so that the blade arm can be attached correctly Repeat procedure for remaining blades Rem...

Страница 9: ...ith holes in switch housing Attach light kit fitter with 3 screws that were previously removed Secure all 3 screws with Phillips screwdriver Install 1 medium base 13 watt max compact fluorescent bulb included Important When replacing bulb please allow bulb and shade to cool down before touching them Remove 4 larger screws from the tabs in the shade Align holes in light kit fitter with holes in the...

Страница 10: ...tely off before moving the reverse switch Set reverse switch to recirculate air depending on the season LEFT position in summer diagram 2 RIGHT position in winter diagram 3 A ceiling fan will allow you to raise your thermostat setting in summer and lower your thermostat setting in winter without feeling a difference in your comfort Important Reverse switch must be set either completely LEFT or com...

Страница 11: ...lation and shipping of the product for repairs This warranty does not apply when damage from mechanical physical electrical or water abuse results in causing the malfunction Deterioration of finishes or other parts due to time or exposure to salt air is specifically exempted under this warranty Neither Craftmade Ellington nor the manufacturer will assume any liability resulting from improper insta...

Страница 12: ...cubierta decorativa Pág 6 Colocación de las aspas Pág 7 Instalación de la caja de encendido Pág 7 Instalación del juego de luz Pág 8 Verificación del funcionamiento del ventilador Pág 9 Localización de fallas Pág 10 Piezas de repuesto Pág 10 Garantía Pág 10 IMPRESO EN CHINA LEER ESTAS INSTRUCCIONES Y GUARDARLAS PARA UTILIZACION FUTURA peso neto del ventilador 9 93 kg 21 89 lb E192641 For Wet Locat...

Страница 13: ...n electricista para informarse sobre el tamaño correcto de conectores para cable que se debe usar ADVERTENCIA Si va a utilizar este ventilador en un lugar MOJADO o HUMEDO hay que conectar el ventilador a un circuito de alimentación que esté protegido por un Interruptor de Circuito de Falla de Tierra GFCI por sus siglas en inglés para reducir el riesgo de daño corporal descarga eléctrica o la muert...

Страница 14: ... una instalación adecuada y su seguridad a cubierta decorativa 1 unidad b soporte de montaje 1 unidad c tubo y bola que sirve para colgar 1 unidad d bastidor del motor 1 unidad e cubierta del cuello 1 unidad f caja de encendido 1 unidad g conectador para el juego de luz 1 unidad h pantalla de vidrio 1 unidad i brazo para el aspa 4 unidades j aspa 4 unidades k cable de seguridad fijado de antemano ...

Страница 15: ...nte asegurarse de que la caja de salida esté firmemente conectada a la estructura del edificio y que sea capaz de sostener el peso total del ventilador Asegurarse de que la caja de salida indique claramente que Sirve para ventilador FOR FAN SUPPORT si no se debe reemplazar con una caja de salida aprobada El no hacer el cambio si es necesario puede resultar en lesiones graves PRECAUCION Asegurarse ...

Страница 16: ...tes de artículos de ferretería Aflojar los tornillos de fijación del cuello y las tuercas en la parte superior del bastidor del motor y quitar el perno y la clavija del cuello del motor Pasar el tubo por la cubierta decorativa la tapa de la cubierta decorativa y la cubierta del cuello Nota Se tiene que voltear la tapa de la cubierta decorativa para que el lado brillante dé al bastidor del motor Pa...

Страница 17: ...rencia Solicitar ayuda de otra persona para mantener la escalera sujeta y para que le suba el ventilador cuando usted ya esté preparado en la escalera para colgarlo Encontrar un punto de acoplamiento seguro se recomienda la viga de madera en el techo y asegurar el cable de seguridad Utilizar tornillo para madera para trabajos pesados arandela y arandela de seguridad no provistos en el bucle del ca...

Страница 18: ...LANCO del ventilador al cable BLANCO del techo con un conector para cable provisto Conectar todos los conductores a TIERRA VERDES del ventilador a los PELADOS VERDES del techo con un conector para cable provisto Si usted piensa controlar la luz del ventilador con un interruptor distinto conectar el cable AZUL del ventilador al conductor NEGRO o ROJO que corresponde al interruptor independiente Com...

Страница 19: ...as con los agujeros para los tornillos en el motor y fijar el brazo para el aspa con arandelas de seguridad y tornillos para el brazo para el aspa Antes de apretar los tornillos bien repetir el mismo procedimiento con los demás brazos para las aspas Apretar bien todos los tornillos Nota Apretar los tornillos para los brazos para las aspas dos veces al año Quitar 1 tornillo junto al punto rojo de l...

Страница 20: ...ncendido Fijar el conectador para el juego de luz con los 3 tornillos que se sacaron previamente Apretar bien los 3 tornillos con un destornillador de estrella Phillips Instalar 1 bombilla fluorescente compacta de 13 vatios máx incluida Importante Cuando necesite reemplazar la bombilla favor de dejar que se enfríen la pantalla y la bombilla antes de tocarlas Quitar las 4 tuercas grandes de las len...

Страница 21: ... Servicio al cliente Apagar el ventilador completamente antes de mover el interruptor de reversa Regularlo para que se circule bien el aire dependiendo de las estaciones del año posición IZQUIERDA en verano diagrama 2 posición DERECHA en invierno diagrama 3 Un ventilador de techo le permitirá subir el termostato en verano y bajarlo en invierno sin notar una diferencia en su comodidad Importante Ha...

Страница 22: ...ilador que tenga funcionamiento deficiente debido a defectos en los materiales o trabajo manual Comunicarse con el Servicio al Cliente de CRAFTMADE ELLINGTON al 1 800 486 4892 para acordar el reenvío del ventilador Devolver el ventilador con los gastos de envío propagados a Craftmade Ellington Nosotros repararemos o reemplazaremos el ventilador y pagaremos los gastos de envío de regreso GARANTIA D...

Отзывы: