Craftmade Accolade TH015 Скачать руководство пользователя страница 5

Craftmade  •  P.O. Box 1037  •  Coppell, TX  USA    •  75019  

 4-2005

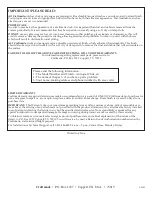
IMPORTANT! PLEASE READ:

All Craftmade

 outdoor clocks and gauges are prepared with a durable lacquer finish or a powder-coated/painted finish. 

Your proper care of clocks and gauges (see below) will enhance both their life and appearance. Post treatments, such as 

clear lacquer, are not recommended.

PROPER CARE

In order to maximize the appearance of a Craftmade clock, it is important that dust and debris is removed from the 

surface periodically. It is recommended that they be wiped down weekly using a soft, dry or damp cloth.

DO NOT

 use any abrasives such as car wax, brass cleaners or other polishes, glass cleaners or chemicals, as this will 

scratch/remove/damage the protective coating, allowing moisture and pollutants to come in contact with the brass, 

which will result in discoloration and pitting.

ALL Craftmade

 clocks and gauges receive a durable powder coat finish, which enhances their durability. This finish 

should also be wiped down weekly with a soft, dry or damp cloth to remove the dust and debris that will accumulate on 

the surface. 

FAILURE TO FOLLOW THE ABOVE CARE INSTRUCTIONS WILL VOID THE WARRANTY.

For information regarding replacement parts, please write to:

Craftmade, P.O. Box 1037, Coppell, TX  75019

LIMITED WARRANTY

Craftmade warrants against defects in materials or workmanship for a period of ONE (1) YEAR from date of purchase for 

use, and agrees to repair or, at our option, replace a defective unit without charge.  Brass finish is covered 90 days from 

purchase date.

IMPORTANT: 

 This Warranty does not cover damage resulting from accident, misuse or abuse, lack of reasonable care 

(see above), the affixing of any attachment not provided with the product, alteration of any attachments factory installed, 

loss of parts or subjecting the fixture to any but the specified electrical service. No responsibility is assumed for any 

special incidental or consequential damages. Damages occurring during transit are not covered by this warranty.
To obtain warranty service, mail sales receipt as proof of purchase-date, and a brief explanation of the nature of the 

defect, to P.O. Box 1037, Coppell, TX  75019. You will receive, by mail, a Return Goods Authorization number issued by 

Craftmade, and returned freight prepaid.
For Installation or Technical Support, call 1-800-486-4892, 8 a.m. - 5 p.m., Central Time, Monday-Friday.

Please send the following information…

1. The Model Number and Finish – Antique, White, etc.

2. The name of the part – if you have a parts problem.

3. Your name, mailing address and phone number (with area code).

Printed in China

Содержание Accolade TH015

Страница 1: ...ould be at least 12 X 12 and 16 deep Use the anchor bolt template included inside the box to identify accurate mounting locations for each anchor bolt b Set Anchor Bolts into wet concrete as shown in Diagram A by gently wiggling the bolts while pressing downward Be sure to leave approximately 1 1 25 above the cement allowing enough threads to mount base to ground c Allow concrete to cure 24 48 hou...

Страница 2: ...d the anchor bolts d Check the base to see that it is level in both directions e Leave base wrapped in plastic bag and anchor bolt assembly attached until concrete has cured f Allow concrete to cure 24 48 hours before assembling clock on base Mounting Method 3 Existing Concrete Pad a Using the anchor bolt template which is included inside the box mark the location of each mounting hole using a con...

Страница 3: ...t Break Knuckle Set Screw Mounting Screw Detail A Attach Clock Assembly to Base a Attach the Clock Assembly to the Base by threading the Clock Assembly on the Base as shown b Secure the Clock Assembly with Set Screws and Mounting Screw as shown in Detail B c Slide the Break Knuckle in place over the Base Connection as shown in Detail C Note The Break Knuckle fits onto the Post and is not affixed i...

Страница 4: ...g down the access door you can install the batteries Then simply push the access door back into place b The winding mechanism is accessed in the locations shown below beneath the battery access doors By using the adjustments keys provided simply place the key into the slot and set time Remember there are two clocks and the movements are separate and each must be set individually AA 1 5V AA 1 5V AA...

Страница 5: ... replacement parts please write to Craftmade P O Box 1037 Coppell TX 75019 LIMITED WARRANTY Craftmade warrants against defects in materials or workmanship for a period of ONE 1 YEAR from date of purchase for use and agrees to repair or at our option replace a defective unit without charge Brass finish is covered 90 days from purchase date IMPORTANT This Warranty does not cover damage resulting fro...

Страница 6: ... y de 16 pulg de profundidad Utilice la plantilla de pernos de anclaje incluida dentro de la caja para identificar las ubicaciones exactas de montaje para cada perno de anclaje b Instale los pernos de anclaje en el concreto húmedo tal como se muestra en el Diagrama A moviéndolos suavemente mientras los empuja hacia abajo Asegúrese de dejar aproximadamente 1 pulg a 1 25 pulg sobre el cemento permit...

Страница 7: ... a ras con el concreto Asegúrese de que el concreto cubra por completo los pernos de anclaje d Revise la base para verificar que está nivelada en ambas direcciones e Deje la base envuelta en bolso plástico y el montaje del perno de ancla unido hasta que el concreto ha curado f Permita que el concreto cure 24 48 horas antes de montar el reloj en base Método de montaje 3 Plataforma de concreto exist...

Страница 8: ...ornillo de fijacíons Base La rótula de separación La rótula de separación se desliza hacia abajo en posición Poste La rótula de separación Tornillo de montaje Tornillo de montaje Detalla A Conecte el reloj a la base a Conecte el reloj a la base atornillándolo en la forma mostrada b Sujete el reloj con tornillos de fijación tal como se muestra en el Detalle B c Deslice la rótula de separación en po...

Страница 9: ...cceso para instalar las pilas Luego simplemente empuje la puerta de acceso en posición b Se puede ganar acceso al mecanismo de la cuerda en los puntos mostrados abajo debajo de las puertas de acceso de las pilas Usando las llaves de ajuste suministradas simplemente inserte la llave en la ranura y ponga la hora Recuerde que hay dos relojes con movimientos separados y que cada uno se debe ajustar en...

Страница 10: ...de reemplazo sí rvase escribir a Craftmade P O Box 1037 Coppell TX 75019 GARANTÍA LIMITADA Craftmade garantiza esta unidad contra defectos de materiales o mano de obra durante un perí odo de UN 1 AÑO a partir de la fecha de compra y acuerda reparar o a nuestra opción reemplazar una unidad defectuosa sin cargo El acabado de latón se cubre durante 90 dí as a partir de la fecha de compra IMPORTANTE E...

Страница 11: ...iser le gabarit de perçage pour boulons de scellement qui se trouve dans la boî te pour localiser avec précision l emplacement de chaque boulon de scellement b Mettre les boulons de scellement en place dans le béton frais comme indiqué sur le Schéma A en les remuant doucement tout en les enfonçant Veiller à laisser de 2 à 3 cm 1 à 1 25 po environ au dessus du béton afin que le filetage qui dépasse...

Страница 12: ...nd du socle soit à ras du béton S assurer que le béton a complètement recouvert les boulons de scellement d Vérifier le socle pour s assurer qu il est de niveau dans les deux sens e Permettez au béton de traiter 24 48 heures avant d assembler l horloge sur la base Méthode 3 de montage semelle en béton existante a Se servir du gabarit de perçage pour boulons de scellement qui se trouve dans la boî ...

Страница 13: ...nture Vis de support Vis de support Détaillée A Fixation de la jointure a a Fixer la pendule au socle en la vissant dessus comme indiqué b Assujettir la pendule au moyen de vis de pression comme indiqué sur la vue détaillée B c Glisser la jointure sur le raccord de socle comme indiqué sur la vue détaillée C Remarque la jointure s adapte sur le poteau et n est pas fixée de façon permanente Elle ser...

Страница 14: ...ue côté comme indiqué sur la figure ci dessous Il est possible de mettre les piles en place en tirant vers le bas la porte d accès qu il suffit ensuite de repousser en place b Le remontoir est accessible aux endroits indiqués ci dessous en dessous des portes d accès aux piles Il suffit d enfoncer les clés de mise à l heure fournies dans le trou AA 1 5V AA 1 5V AA 1 5V AA 1 5V ...

Страница 15: ...tmade P O Box 1037 Coppell TX 75019 U S A GARANTIE LIMITÉE Craftmade garantit ce produit contre tout défaut de matière ou de fabrication pendant une période d UN 1 AN à compter de la date de l achat pour mise en service et accepte de réparer ou à son choix de remplacer gratuitement un appareil défectueux Le fini en laiton est couvert pendant 90 jours à compter de la date de l achat IMPORTANT cette...

Отзывы: