


9
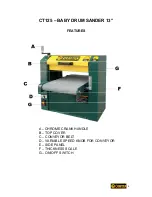
CT125 – BABY DRUM SANDER 13”
TEST RUN
Connect your machine to the correct power source. Once it is connected you are
ready to perform the first test run. Take a careful look in and around your
machine before turning it on to ensure everything is in place, all screws and
knobs are securely fastened and that all controls are working properly.
Before turning the machine on, make sure you are wearing your safety glasses
and that any one around you is also wearing safety glasses and not standing in
the front or back of the machine.
Turn the power switch to
ON.
The drum sander should run smoothly and create very little noise or vibration. If
any loud or strange noises occur
turn the machine OFF right away
and inspect
the problem.
DO NOT
make any adjustments while the machine is running.
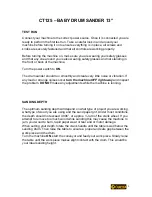
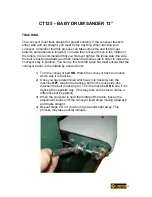
SANDING DEPTH
The optimum sanding depth will depend on what type of project you are working,
what type of wood you are using and the sand paper grit. Under most conditions,
the depth should not exceed 0.006”, or approx. ¼ turn of the crank wheel. If you
attempt to remove too much wood while sanding this may cause the machine to
jam, your wood to burn, rapid paper wear or tear and or motor damage.
When setting your depth, rotate the crank handle until the table is well below the
sanding drum. Then raise the table to ensure a proper and safe gap between the
work piece and the drum.
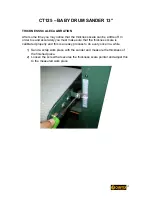
Turn the machine
ON
, start the conveyor and feed your work piece. Slowly raise
the table until the work piece makes slight contact with the drum. This would be
your ideal sanding height.
Содержание CT125
Страница 1: ...CT125 BABY DRUM SANDER 13 ...
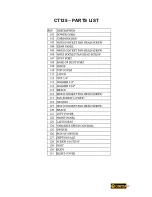
Страница 19: ...19 CT125 PARTS LIST ...
Страница 20: ...20 CT125 PARTS DIAGRAM ...
Страница 21: ...21 CT125 PARTS LIST ...
Страница 22: ...22 CT125 PARTS DIAGRAM ...
Страница 23: ...23 CT125 PARTS LIST ...
Страница 24: ...24 CT125 PARTS DIAGRAM ...
Страница 26: ...26 ...
Страница 27: ...27 ...
Страница 28: ...28 ...
Страница 29: ...29 ...