background image

HS1R, HS1R-C

E

N

G

L

IS

H

2

Call for customer service and/or missing or damaged parts (800-334-6871)

Installation Instructions

How it works

Congratulations on your purchase of a Cooper Lighting Emergency Power
Failure light!  You will find this product to be an invaluable aid in the event of a
power outage. The emergency lights will automatically turn ON when the power
fails, preventing you from being stranded in the dark at a time when you need
light the most.

WARNING: Risk of Electric Shock. Disconnect power at fuse or circuit
breaker before installing or servicing.

Read and follow all safety instructions.

Do not use outdoors. Do not let power supply cords touch hot surfaces. Do not
mount near gas or electric heaters. Use only as intended as a power failure
light. The use of accessory equipment not recommended by manufacturer may
cause an unsafe condition. Servicing of this equipment should be performed by
qualified personnel. The lamps come with 6V, .9A wedge base bulbs 
already installed.

Installation

Step 1:

Select a mounting location. Mount the fixture where power cord can
easily reach a standard 120 Volt AC outlet.
Unit must be plugged in to charge and to 
recognize a power failure.

Step 2:

Put two screws 5-1/4

˝

apart into wall or

other mounting surface.

Step 3:

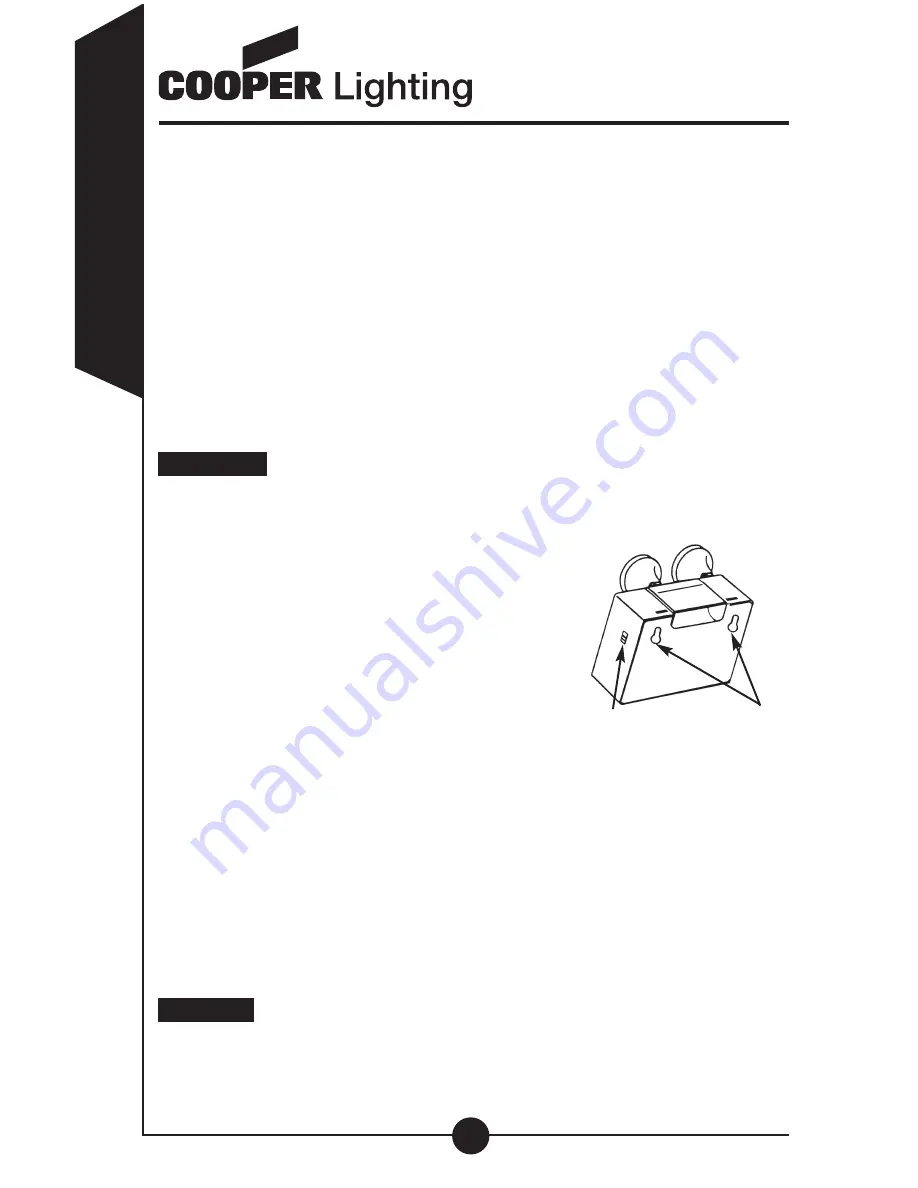
Using the keyhole slots on the 
backplate of the light, mount light 
onto screws (Fig. 1).

Step 4:

Adjust lamps towards an exit path or 
as needed by loosening screws
in swivels and rotating heads.

Step 5:

Plug unit into standard 120 Volt AC outlet.

Step 6:

Select “1 Light” or “2 Lights” on the light selection switch, located on
the side of the unit (Fig. 1).

1 Light - One lamp only comes on when power fails.

2 Lights - Both lamps come on when power fails.

Wiring:

Note:

The switch must be set to either “1 Light” or “2 Lights” when the unit is

plugged into an AC outlet to charge the battery. Please allow 48 hours to 
completely charge the battery to its rated capacity.

Step 7:

The “Test / Charge” LED display will light up when the unit is 
being charged.

Operation

Step 1:

During a power failure, either one or both lamps will come on,
depending on the position of the light selection switch.

Key Hole

Slots

Light Selection

Switch

Fig. 1

Содержание Power Failure Emergency Light HS1R-C

Страница 1: ...Instruction Manual Directives Instrucciones ENGLISH FRAN AIS ESPA OL HS1R HS1R C Power Failure Emergency Light De Secours en Cas de Panne de Courant Luz de Emergencia Para Apagones...

Страница 2: ...lled Installation Step 1 Select a mounting location Mount the fixture where power cord can easily reach a standard 120 Volt AC outlet Unit must be plugged in to charge and to recognize a power failure...

Страница 3: ...ccident misuse abuse lack of reasonable care alteration or faulty installation subjecting the product to any but the specified electrical service or any other failure not resulting from defects in mat...

Страница 4: ...sponsible for merchandise damaged in transit Repaired or replaced products shall be subject to the terms of this warranty and are inspected when packed Evident or concealed damage that is made in tran...

Страница 5: ...s comp tentes Les lampes comportent des ampoule de 6 volts 9 amp culot poussoir pr install es Installation Etape 1 Choisir un emplacement pour le montage Monter la partie fixe un endroit o le cordon l...

Страница 6: ...riode Cela n inclut pas la main d oeuvre relative au d montage ou au remontage de l installation Cette garantie n est accord e qu l acheteur d origine du produit Une facture ou une autre preuve accep...

Страница 7: ...orisation de retour de marchandises pour nous renvoyer le produit d fectueux Tous les produits renvoy s doivent tre accompagn s d un tel num ro d autorisation de retour de marchandises fourni par le c...

Страница 8: ...quipadas con bombillas de 6V 9A y una base de cu a Instalaci n Paso 1 Seleccione una ubicaci n para montar la l mpara Monte el portal mparas donde el cable de alimentacion pueda alcanzar f cilmente un...

Страница 9: ...material o fabricaci n por un per odo de uno a o a partir de la fecha de la compra original y acuerda reparar o a opci n de la Compa a reemplazar un producto defectuoso sin cargo ya sea por las pieza...

Страница 10: ...lemas que experimenta adem s de su direcci n y n mero de tel fono Ser contactado entonces para obtener una soluci n o un n mero de Autorizaci n de Retorno de Mercanc as Return Goods Authorization e in...

Отзывы:

Похожие инструкции для Power Failure Emergency Light HS1R-C