background image

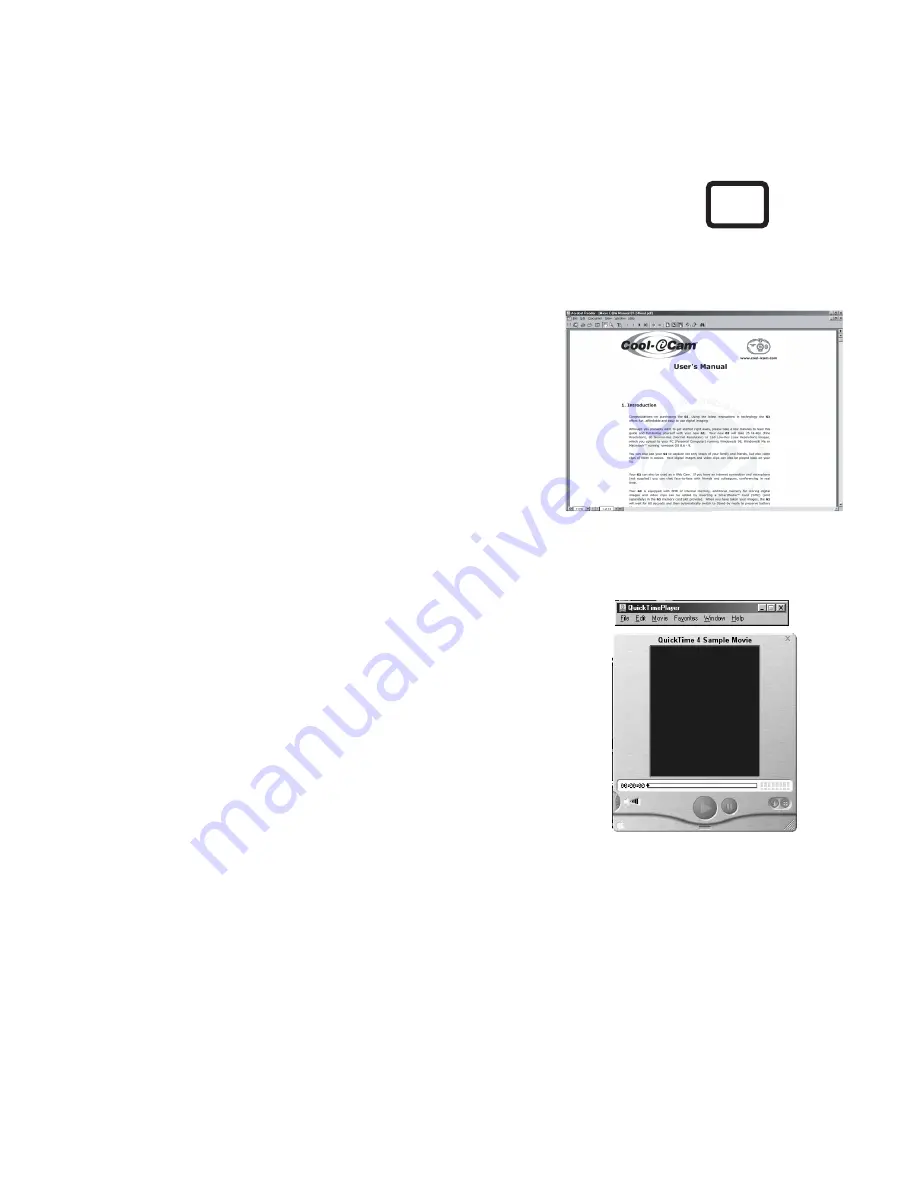
11.12 How to use Adobe® Acrobat® Reader

Adobe®  Acrobat®  Reader  enables  you  to  view  the 
documents .PDF format.

For more details go to www.adobe.com/acrobat

11.13 How to use QuickTime™

QuickTime™  enables  you  to  view  the  movie  clip  taken 
by your 


G3

.

Follow  steps  on  Section  10.2  on  how  to  upload  movie 
clips to your computer. 

You can now open the movie clip save in your computer 
using QuickTime™.

1.

2.

3.

52

For Macintosh® Users:

MAC

Содержание CIC-260

Страница 1: ...TM ...

Страница 2: ...u can also use your G3 to capture not only snaps of your family and friends but also video clips of them in action Your digital images and video clips can also be played back on your TV Your G3 can also be used as a Web Cam If you have an internet connection and microphone not supplied you can chat face to face with friends and colleagues conferencing in real time Your G3 is equipped with 8MB of i...

Страница 3: ...r Macintosh Users 5 6 How to install the Digital Camera Driver Software 13 5 7 How to install ArcSoft Software 14 5 8 How to install Adobe Acrobat Reader 16 5 9 How to install QuickTime 4 16 6 Battery Installation 17 7 Getting to Know Your G3 18 7 1 LCD Display 19 7 2 Power 20 7 3 CompactFlash Card Slot 21 8 Getting Started 24 8 1 Switching the G3 On 24 8 2 G3 Controls 24 8 3 Taking an Image 28 8 ...

Страница 4: ...r 2000 42 11 4 How to use ArcSoft VideoImpression 1 6 43 11 5 How to use Microsoft NetMeeting 45 11 6 How to use Adobe Acrobat Reader 46 11 7 How to use QuickTime 4 46 For Macintosh Users 11 8 How to use PhotoStudio 2000 47 11 9 How to use ArcSoft PhotoFantasy 2000 48 11 10 How to use ArcSoft PhotoPrinter 2000 49 11 11 How to use ArcSoft VideoImpression 1 5 50 11 12 How to use Adobe Acrobat Reader...

Страница 5: ...ce CD ROM Drive Colour Monitor with High Colour 16 bit graphic capability or higher Standard mouse and keyboard For Macintosh Users PowerPC Processor Mac OS version 8 6 9 2 USB port 64MB RAM 128MB recommended 150MB Free disk space Colour Monitor with High Colour 16 bit graphic capability or higher CD ROM Drive Standard mouse and keyboard 5 3 System Requirement PC MAC ...

Страница 6: ...ore plugging the D igit al C am er a into your computer After you have installed all the software plug the USB cable into the D igit al C am er a and your computer Detailed instructions can be found in your user manual USB Series A Plug Connects to your PC or Mac USB Series B Plug Connects to your D igit al C am er a VIDEO OUT VIDEO OUT TM G3 Q uic k S t a r t G uide Product Overview 1 Viewfinder ...

Страница 7: ...l and reinstall your My Digital Camera software For Windows Users 5 1 1 How to Install My Digital Camera Software Insert the CD ROM disc into the CD ROM drive and close the CD ROM drawer An installation wizard will automatically launch Click My Digital Camera icon Follow the instructions presented on the screen to complete the installation You will be asked to select between 50hz 60hz lighting fre...

Страница 8: ...ght click on the icon My Camera and select create shortcut Select Yes and this will place My Camera icon on your computer desktop 5 1 2 Creating a Desktop Icon Right click on your computer desktop select New Select Folder and a new folder will appear on your computer desktop and it will be waiting for you to name it by flashing Call it My Images Now go to Section 5 2 5 1 3 Creating a Desktop Folde...

Страница 9: ...ew clicks of the mouse The fantasy backgrounds include fictional characters classic works of art Olympic heroes 50 s funnies bathing beauties muscle men and a lot more ArcSoft PhotoPrinter 2000 ArcSoft PhotoPrinter is an easy to use printing utility that enables the user to layout and print multiple images in different sizes quickly and easily on a single sheet of paper The program offers a large ...

Страница 10: ...lick Next to continue Follow the instructions presented on the screen to complete the installation 1 2 3 4 5 6 7 Notes Don t worry if you made a mistake and want to add in ArcSoft titles you did not tick Reinsert the CD ROM and follow steps 1 6 ticking only the software you want to add For Windows Users Please note that images saved in your computer memory are able to be accessed via the ArcSoft S...

Страница 11: ...ve and close the CD ROM drawer An installation wizard will automatically launch Click the Microsoft NetMeeting icon Follow the instructions presented on the screen to complete the installation You will have a choice during installation to place a desktop icon on your desktop for easy access directly to the software For further installation details please visit the following website http www micros...

Страница 12: ...structions presented on the screen to complete the installation Visit http www adobe com for all your FAQ s tips and technical support 1 2 3 4 5 Reinsert the CD ROM disc into the CD ROM drive and close the CD ROM drawer An installation wizard will automatically launch Click the QuickTime icon Follow the instructions presented on the screen Refer to your PC manual or separate modem manual for speed...

Страница 13: ...amera 1 icon Click Continue Click Quit to finish the installation A folder named My Camera will appear in your Hard Disk after installation and a short cut icon My Camera will appear on your desktop 5 6 How to Install My Camera Software 5 6 1 How to Install My Camera 5 6 2 How to Uninstall My Camera To uninstall the My Camera simply remove the My Camera folder and the short cut icon on the desktop...

Страница 14: ...tructions presented on the 1 2 3 4 5 7 How to Install ArcSoft Software 5 7 1 How to Install PhotoStudio 2000 Insert the CD ROM disc into the CD ROM drive and close the CD ROM drawer Double click the CD ROM icon Digital Camera Double click the PhotoFantasy 2000 icon in English folder Follow the instructions presented on the 1 2 3 4 5 7 2 How to Install ArcSoft PhotoFantasy 2000 For Macintosh Users ...

Страница 15: ...n to complete the installation 1 2 3 4 5 7 3 How to Install ArcSoft PhotoPrinter 2000 Insert the CD ROM disc into the CD ROM drive and close the CD ROM drawer Double click the CD ROM icon Digtial Camera Double click the VideoImpres1 5 installer icon in English folder Follow the instructions presented on the screen to complete the installation 1 2 3 4 5 7 4 How to Install ArcSoft VideoImpression 1 ...

Страница 16: ...stall Adobe Acrobat Reader Insert the CD ROM disc into the CD ROM drive and close the CD ROM drawer Double click the CD ROM icon Digital Camera Double click the QuickTime Installer E icon Follow the instructions presented on the screen to complete the installation QuickTime will ask you to enter your name organization and then click Next No need to enter registration number as this is a Basic Vers...

Страница 17: ...r and Diagram B Press down the battery cover lock the battery door as shown on Diagram C 1 2 3 The battery compartment is located on the bottom of the G3 G3 requires 2 x AA alkaline batteries supplied To install the batteries Diagram A Diagram B Diagram C slide the button to open the battery door Press down the battery door lift battery cover up insert batteries 1 2 3 4 G3 F 3 0 f 6 5mm 1 3 M E G ...

Страница 18: ... PIXE L DIGITAL C A M E R A M E G A P I XEL CAME R A Lens Viewfinder Flash Hole for wrist strap USB Cable Port USB Video Out Port Bottom View Battery Compartment Tripod Mount Back View CompactFlash Card Eject Button CompactFlash Card Slot Cover LCD Display Viewfinder Top View Feature Button Feature Change Flash On OFF Button Shutter Button Power ON OFF ...

Страница 19: ...on to access and display the G3 settings See Section 10 4 for LCD display quick reference guide Battery Indicator High Resolution Normal Resolution Low Resolution 2X digital zoom No of images taken LCD Messages details will be available under separate sections Delete All PAL NTS C TV Mode Movie Auto Flash On Self Timer HIGH NOR MAL LOW 2X 2X HIGH NOR MAL LOW PAL NTS C ...

Страница 20: ...mory When your G3 has full power the Battery indicator on the LCD display will be fully shown When power is low the icon will flash This indicates that the batteries are weak and need to be replaced 7 2 1 Stand by Mode 7 2 2 Low Battery Important Notes Your G3 will go to Standby Mode during insertion of your CompactFlash card any images taken will not be lost Full Battery Power Low Battery Power ...

Страница 21: ...d When the CompactFlash card is removed images stored in the internal memory will again become accessible Your G3 can use CompactFlash Card of 8 16 32 and 64MB memory sizes Your G3 already comes with 8MB internal memory for storing images If this is not enough memory for you you can extend your G3 s storage capacity up to 64MB by inserting a CompactFlash memory card not included They are available...

Страница 22: ...ory means that the memory will be lost from your G3 if the battery runs too low dead or if the battery is removed In the event that the batteries become low we recommend that you immediately upload your images to your My Digital Camera via the USB cable with your G3 turned on Also see 7 2 2 Non Volatile Memory Your G3 may have a CompactFlash card installed CompactFlash Card is a non volatile memor...

Страница 23: ...de of your G3 Diagram A Push the memory card all the way into the card slot Diagram B The card is designed only to fit in the G3 one way Close the card slot cover Ensuring the card cover is pushed firmly closed 1 2 3 To Insert a CompactFlash Memory Card To Eject a CompactFlash Memory Card Diagram A Lift up the card slot cover Lift up the card slot cover Diagram B Diagram C Diagram D Notes Remember...

Страница 24: ...0 seconds Alternatively the power can be turned off manually by pressing the Power ON OFF button again The LCD will display the number of images that have been taken Notes To preserve your images taken we recommend that you use the auto power off mode after 60 seconds of inactivity 8 2 G3 Controls Your G3 contains 4 buttons and a LCD display Top View LCD Display HIGH Power ON OFF Shutter Button Fe...

Страница 25: ...veral useful items of information It can be used to monitor the status of your G3 or it can be used to change your G3 s settings through use of the Feature Button Pressing the Feature Button moves through the features in this sequence Feature Mode can be exited by any of these methods pressing the Feature Button again after the last feature in the sequence a 5 second period with no button presses ...

Страница 26: ...tive G3 will capture motion movie clips at 160 x 120 resolution in the form of MOV files Once Image Setting is at the desired choice press the Feature Button to move to the next feature or press the Feature Button again after the last in sequence or wait 5 seconds with no button presses for the G3 to set to image taking mode The HIGH NORMAL LOW and 2X settings are all used for capturing still imag...

Страница 27: ... Button is pressed the sensor reads the level of available light and the flash is automatically fired only if there is insufficient light for good exposure without it When the automatic flash is turned on it will be enabled for all subsequent images until one of the following occurs Press the Shutter Button again in a light area then the flash would not be activated G3 Feature Settings are changed...

Страница 28: ...ection shows you how to take images with your G3 To take digital image shots with your G3 make sure that there is enough battery power or that your G3 is connected to your computer via the USB cable If you want to use a CompactFlash memory card to store your images insert the memory card before you start taking images Important Notes To take a still image press the Shutter Button Since there may b...

Страница 29: ...You can record movie clips in MOV format by using your G3 This section shows you how to record a movie clip In Movie Mode G3 captures QuickTime motion movie clips at 160 x 120 resolution These video clips are stored as MOV files which can be subsequently viewed on a computer using QuickTime or other MOV compatible applications Important Notes If G3 does not have sufficient memory space available t...

Страница 30: ...era in your PC When both the G3 s internal memory and the inserted CompactFlash Card are full it is time for you to erase some or all of their contents to free up storage space Before you erase anything make sure that you transfer the contents first to your computer if you still want to use them When the Delete All Feature Mode is entered the Delete All icon will be on Holding down the Feature Cha...

Страница 31: ...creen saying New Hardware Found and Building Driver Information Database After this you can start to upload images USB Series A Plug Connects to your PC or Mac USB Series B Plug Connects to your G3 9 Connecting your G3 to Your Computer USB Notes Always switch the G3 power ON before connecting to the USB cable to your computer Note When your new Digital Camera is first plugged into your computer s ...

Страница 32: ... folder To transfer a continuous set of images hold down the CTRL key and click on the group of images and drag and drop the group into your folder Once the copy process is completed the image s and movie clip s have transferred from your G3 to your PC successfully Double click on the folder to access the images 1 2 3 4 5 Tip To drag and drop with your mouse pointer over the required image or movi...

Страница 33: ...er 1 particular image or movie clip highlight the image or movie clip and drag and drop from the My Camera to your specified folder in your hard disk To transfer a continuous set of images hold down the SHIFT key and you click on the first image Then SHIFT Click on the last image that you want to select To select multiple images hold down the CTRL key and click on each image that you want to selec...

Страница 34: ... Your G3 in TV Output Mode Set your G3 to TV Output Mode when you want to use a TV to view the images you have taken 10 3 2 Button Controls in TV Output Mode Top View Important Notes To use the television output plug a cable into the Video Connector The insertion of the cable is automatically detected by the G3 and the display is activated NTS C Power ON OFF Shutter Button Feature Button Feature C...

Страница 35: ... Video Out cable supplied to connect your G3 to a TV or VCR Selecting NTSC or PAL Video Format Before you can view images on your TV you need to identify first what system your TV uses If your TV is with NTSC system set your G3 to NTSC If your TV is with PAL system set your G3 to PAL Refer to the Broadcasting System Table on Section 17 for international settings Connect one end of the Video Out Ca...

Страница 36: ...the Next Image and Previous Image Buttons will scroll through the images in memory in the order in which they were taken 1 2 Slide Show Mode During image review on TV the Slide Show Mode can be used to automatically sequence through all of the images in memory starting with the oldest to the newest When the list if completed it will recycle to the beginning and run again continuously until the Sli...

Страница 37: ...ur G3 on TV including the firmware version number and the amount of memory in G3 This information is often useful for technical support purpose To enter Info Display hold down the Previous Image Button for at least 1 second The Info Display will appear on the TV Press any button to return to Review Mode INFO B ATTE R Y VE R Y LOW VE R S ION 3 000 ME MOR Y US E D 80K B FR E E 1440K B S IZE 1523K B ...

Страница 38: ... is selected Holding down the Change Button will delete all images Deletion in progress Flash Pressing Shutter Button will cause 12 seconds delay before next image Self Timer Flash Off no icon Auto Flash On icon displayed 2X digital zoom PAL NTS C HIGH NORMAL LOW 2X LCD Segment Interpretation LCD Icons Indication When Lit Indication When Flashing Full Battery Power Low Battery Power In feature set...

Страница 39: ...a Suite program group on the Windows Start Menu You can now start to move your stored image s by the following steps Go to File select Open Select desktop and then select My Images folder Select Open to move an image into the PhotoStudio Go to File and select Save as and name image For further help on how to use PhotoStudio 2000 go to Help to access the Help Topics Visit http www arcsoft com for a...

Страница 40: ...elect Open to move an image into the ArcSoft PhotoFantasy Go to File and select Save as and name image You can also capture a live shot when your G3 is connected to your PC by the following steps Click Get Fantasy to select the template in the existing library and then click OK to confirm Important Make sure the Digital Camera CD ROM is in the CD ROM Drive Click the Camera front icon on the top to...

Страница 41: ...sition the images by using the function icons shown on the right hand side or reposition the image using your mouse and dragging the image For further help on how to use ArcSoft PhotoFantasy 2000 go to Help to access the Help Topics Visit http www arcsoft com for all your FAQ s tips and technical support See Section 13 for more details 8 9 10 11 Mask capture image select camera source start live v...

Страница 42: ...nto the ArcSoft PhotoPrinter The selected images will be shown on the photo library panel Select the image you want and click OK The selected image will be shown on the chosen template Click Print when finish placing the images For further help on how to use ArcSoft PhotoPrinter 2000 click the on the top right hand corner to access the Help Topics Visit http www arcsoft com for all your FAQ s tips...

Страница 43: ...toryboard on the bottom Double click on the small frame directly right of the large frame A new template will appear at the top called special effects Double click on the 1 Fire special effect which will now drop into the special effect frame you highlighted Double click on the next right large frame and repeat step 3 using a video template and double click template 5 Countdown avi Repeat step 4 S...

Страница 44: ...he USB cable Click on the capture icon And press the record icon Wait for the video link to go live and now you re recording press the ESC key on your keyboard to end the video Press the Save icon and name your file and then press save Video impression will ask you where you want to place your video Select video template Select the album icon and your video clip you have just produced will appear ...

Страница 45: ...mputer name or telephone number for the person you want to call and press the Place Call button To find your own IP address go to Start and click Run Type in winipcfg and click OK IP configuration window will appear and you can see your IP address If you need further help on how to use Microsoft NetMeeting select the Help under the manual bar and choose the topic you need Or you can visit the foll...

Страница 46: ...low steps on Section 10 1 on how to upload movie clips to your computer You can now open the movie clip save in your computer using QuickTime by the following step Go to File and then Open Select desktop and then select My Images folder Highlight the wanted movie clip and select Open 1 2 3 For Windows Users PC Notes QuickTime does not support Windows XP Use the ArcSoft VideoImpression or other mov...

Страница 47: ...steps Go to File and select the folder where you store your image and then click Open You can now edit your image s with PhotoStudio s features For further help on how to use PhotoStudio 2000 go to Help to access the Help Topics Visit http www arcsoft com for all your FAQ s tips and technical support See Section 13 for more details 47 For Macintosh Users 1 2 3 4 5 MAC ...

Страница 48: ...and click Open The selected images will be shown on the left hand side Click OK The selected image will shown within the mask on the selected template You can resize rotate or reposition the image by using the function icons show in the right hand side or reposition the image using your mouse and dragging the image For further help on how to use ArcSoft PhotoFantasy 2000 go to at the top right han...

Страница 49: ...u have already saved in your hard disk and click Open The selected images will be shown on the photo library panel Select the image you want and click OK The selected image will be shown on the chosen template Click Print when finish placing the images For further help on how to use ArcSoft PhotoPrinter 2000 click the on the top right hand corner to access the Help Topics Visit http www arcsoft co...

Страница 50: ...t large frame on the storyboard on the bottom Double click on the small frame directly right of the large frame A new template will appear at the top called special effects Double click on the 1 Fire special effect which will now drop into the special effect frame you highlighted Double click on the next right large frame and repeat step 3 using a video template and double click template 5 Countdo...

Страница 51: ...bum click on Get with the selector click on the down arrow and select desktop and then double click on Album folder and select a file ending with mov video file the video will appear in the video templates Double click on the video and it will appear just like other video templates in the storyboard Now go to step 10 For Macintosh Users you cannot capture live video with your G3 Digital Camera whe...

Страница 52: ... more details go to www adobe com acrobat 11 13 How to use QuickTime QuickTime enables you to view the movie clip taken by your G3 Follow steps on Section 10 2 on how to upload movie clips to your computer You can now open the movie clip save in your computer using QuickTime 1 2 3 52 For Macintosh Users MAC ...

Страница 53: ...ia ArcSoft Australian Support Center Baulkham Hills New South Wales Tel 61 2 9899 5888 Fax 61 2 9899 5728 E mail support supportgroup com au For North America ArcSoft HQ Support Center Fremont California CA Tel 1 800 762 8657 toll free number Fax 1 510 440 1270 E mail support arcsoft com For South Central America Tel 1 510 979 5520 Fax 1 510 440 1270 E mail latinsupport arcsoft com For Europe Midd...

Страница 54: ... PC as soon as possible please refer to Battery Guidance section in User s Manual You have lost power to your G3 by either Removing the battery without being connected to your PC turned on via the USB cable If you need to change batteries and retain the images in your G3 s memory ensure you are connected to a PC which is turned on via the USB cable which will then draw power from the PC whilst you...

Страница 55: ...s flashing after I took my last image Wait for the LCD to stop flashing and then take your next image You may need to wait a further 20 seconds before taking the next image The G3 is processing the image The Flash icon and the image counter on the LCD is flashing after I took my last image using the Flash Mode I get a blurred image when uploading my images to my computer There may be a momentory d...

Страница 56: ...ase refer to Battery Guidance section in User s Manual You have lost power to your G3 by either Removing the battery without being connected to your PC turned on via the USB cable If you need to change batteries and retain the images in your G3 s memory ensure you are connected to a Mac which is turned on via the USB cable which will then draw power from the Mac whilst you inserting new batteries ...

Страница 57: ... image counter on the LCD is flashing after I took my last image The G3 is processing the image Wait for the LCD to stop flashing and then take your next image You may need to wait a further 20 seconds before taking the next image The Flash icon and the image counter on the LCD is flashing after I took my last image using the Flash Mode The G3 is processing the image and recharging the flash unit ...

Страница 58: ...vable Different types of batteries or new and used batteries are not to be mixed Only batteries of the same or equivalent type as recommended are to be used Batteries are to be inserted with the correct polarity Exhausted batteries are to be removed from the camera The supply terminals are not to be short circuited Do not mix alkaline standard carbon zinc or rechargeable nickel cadmium batteries D...

Страница 59: ...0 x 512 pixel Video Frame Rate 9 fps frame per second in High Resolution 320 x 240 pixel 16 fps frame per second in Low Resolution 160 x 120 pixel Video Clip unlimited when connected to the computer via video capture software File Formats For Windows Users Still Image compression in JPG format Video MOV format For Macintosh Users Still Image compression in JPG format Video MOV format Self Timer El...

Страница 60: ...y and if not installed and used in accordance with the instructions may cause harmful interference to radio communications However there is no guarantee that interference will not occur in a particular installation If this equipment does cause harmful interference to radio or television reception which can be determined by turning the equipment off and on the user is encouraged to try to correct t...

Страница 61: ...Belgium B G PAL Nicam Teletext Bermuda M Brazil N PAL N MTS Bulgaria D SECAM Canada M NTSC MTS CC Canary Island B PAL China D PAL Colombia M NTSC Cyprus B PAL Czechsolvakia D K SECAM PAL Denmark B PAL Nicam TeleText Egypt B SECAM Faroe Islands DK B PAL Finland B G PAL Nicam Teletext France E L SECAM Teletext Gambia I PAL Germany B G PAL FM FM Teletext Germany Prev East B G SECAM PAL Gibraltar B PA...

Страница 62: ...AL Kenya B PAL Korea M NTSC Luxembourg B G PAL NICAM Teletext Madeira B PAL Madagascar B SECAM Malaysia B PAL Malta B G PAL Mauritius B SECAM Mexico M NTSC MTS CC Monaco L G SECAM PAL Morocco B SECAM Netherlands B G PAL FM FM Teletext New Zealand B G PAL Nicam Teletext North Korea D K SECAM Norway B G PAL Nicam Pakistan B PAL Paraguay N PAL Peru M NTSC Philippines M NTSC Poland D K PAL Teletext Po...

Страница 63: ...TV configuration setting Country TV Color Stereo Subtitles Russia D K SECAM Saudi Arabia B SECAM Seychelles I PAL Singapore B PAL South Africa I PAL South Korea M NTSC Spain B G PAL Nicam Teletext Sri Lanka B G PAL Sweden B G PAL Nicam Teletext Switzerland B G PAL FM FM Teletext Tahiti KI SECAM Taiwan M NTSC Thailand B PAL Trinidad M NTSC Tunisia B SECAM Turkey B PAL Teletext United Arab Emirates ...

Отзывы: