


Timer Functions
ThermoPad Operation Instructions
8
www.coolautomation.com
© 2008 Cool Automation
Timer Functions
3
Time and Date Settings
3.1
Setting the correct time and day of the week is essential for timer (Sleep Timer) and Weekly Timer
operations.
The procedure of setting the time and the day of the week is performed by the following steps.
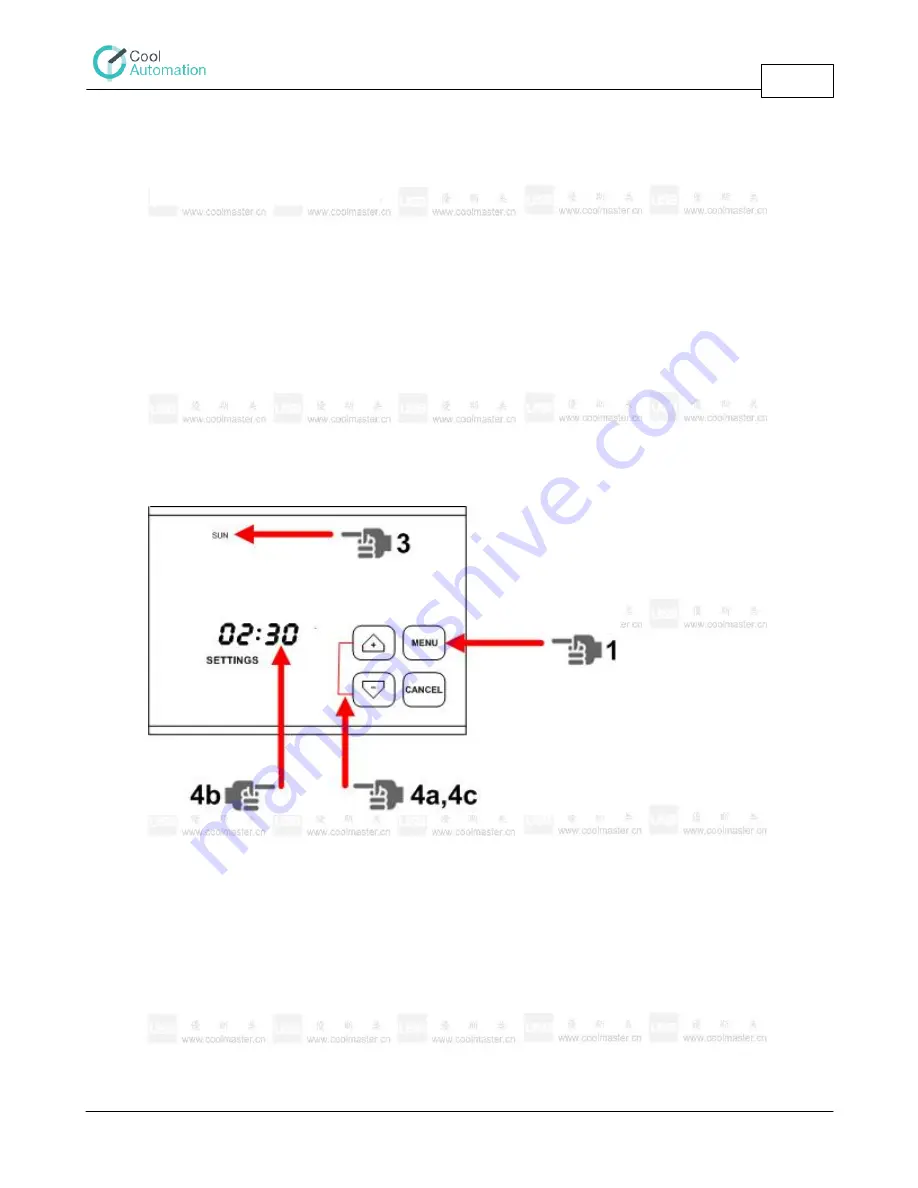
1. Pressing on the empty upper space (10) will lit the "Menu" button. Pressing another 3 times at the
same place will enter the time settings screen, and note
"Settings" (14) will appear on the screen.
2. At this stage, the correct day of the week and minutes are blinking.
3. The day of the week can be selected by pressing at the area (2) at the required day, till the correct
day is blinking.
4. The required time is configured by setting the "hours" and "minutes".
a. While "hours" (1) are blinking, the correct time is selected by the navigation arrows (11).
b. After setting the "hours", pressing on "minutes" will make "minutes" blinking.
c. At this stage, navigation arrows (11) are used for setting "minutes".
5. Pressing the "Menu" button (10) will save the settings and move ThermoPad back to the timer
setting screen.
6. Pressing the "Cancel" button (10) will save the settings and return to the normal screen.
Timer Settings
3.2
ThermoPad supports 4 timer operations (Sleep Timer). Each timer enables to turn the unit on/off by a
preset "time period" from the current time.
The procedure of the programming is shown below.
1. Pressing on the empty upper space (10) will lit the "Menu" button. Pressing again at the same place
will enter programming the timer mode and "Sleep Timer" note will appear on the screen (7).
2. On pressing the "Menu" button the following screen will appear where the timer number "01" is
blinking.


