


Timer Functions
ThermoPad Operation Instructions
10
www.coolautomation.com
© 2008 Cool Automation
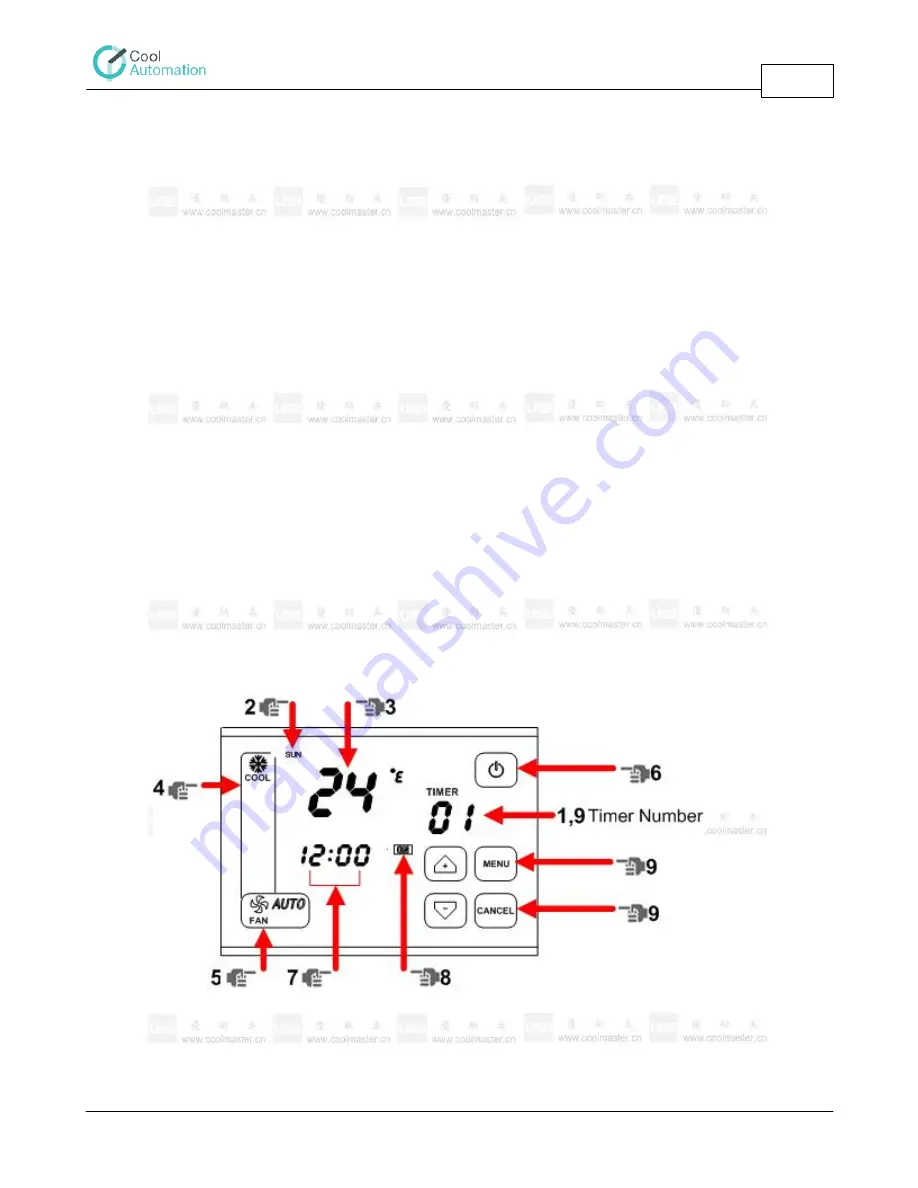
Weekly Schedule Settings
3.3
ThermoPad allows up to 50 "operations", based on a weekly timer. One "operation" can occur once
(at one day) , or it can occur up to 7 times (if all days are selected). In each "Operation" the user can
choose the operation status (on/off), operation mode (Cool, Heat, Dry, Auto, HAUX, Fan), Fan speed
(Low, Medium,High, Auto), Set point temperature, and the occurrence (day of the week and time).
Each "operation" can be initialized or disabled after the programming.
The programming procedure is performed by the following steps.
1. Pressing on the empty upper space (10) will lit the "Menu" button. Pressing twice at the same place
will enter programming the weekly timer mode and "Timer" note will appear on the screen (7). At
this time, the day of the week (2) and the "timer number" (9) will blink.
2. In order to select the day (or several days) of the "operation", the required day should be pressed.
The signs of the selected days are blinking (others are constantly
lit).
3. In order to select the set point temperature, the set point temperature area should be pressed (3).
At this point it starts blinking and now it can be set by the
navigation arrows (11).
4. The operation mode is selected by pressing at the "mode area" (19) till the desired operation mode
is lit.
5. The fan speed is set by pressing at the fan speed button (18).
6. The operation status (on/off) is selected by pressing On/Off button (6).
7. The time of the operation is selected by pressing the time area (1). Pressing at "hours" will make it
blink and can be set by the navigation arrows (11). After that,
pressing at "minutes" will make the "minutes" blink and can be set by the navigation arrows (11).
8. At this stage the "operation" number 01 is activated, and the sign "ON" is lit next to the clock (12).
Pressing on this sign will deactivate this "operatiion" and the
"OFF" sign will lit (12). Pressing on it again will activate this operation again.
9. Pressing on the Timer number (9) will make it blink. At this stage, using navigation arrows (2) a
second "operation" can be programmed.
Pressing "Menu" button (10) will save the data and move to the Timer Setting screen.
Pressing "Cancel" button (10) will save the data and move to the normal screen.


