Operation
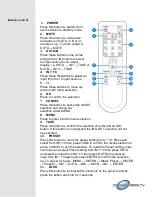
Controls and
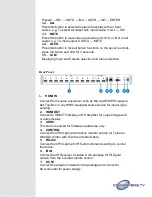
Front Panel
Functions
1.
POWER Button
Press this button to switch On or set the device to standby mode.
2.
POWER LED
This LED will illuminate in green when the device is power On and if
it is switched to standby mode the LED will turn red.
3.
IR Window
This IR Receiver receives the remote control signal from the
package included remote control only.
4.
IN 1~10
Press these IN buttons to select an input from the 10 input sources.
5.
OUT A/B
Press these buttons once a time along with an IN buttons to select
an input source for an output display. i.e. OUTA → IN1 → TAKE or
OUTB → IN10 → TAKE.
6.
CANCEL
Press this button to cancel the IN/OUT selection and during any
selection under MENU.
7.
TAKE
Press this button to confirm the selection of an IN and an OUT
button. If this button is not pressed the IN & OUT selection will not
be executed.
8.
MENU
Press to enter into the menu selection.
9.
ENTER
Press to confirm the selection.
10.
+/-
Press these buttons to move up/down under menu selection.
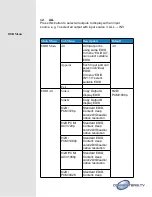
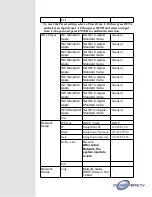
11.
PRESET
Press this button to recall the preset setting from 1~10. Press and
select from IN1~10 then press TAKE to confirm the recall selection or
press CANCEL to exit the selection. To reset the Preset setting, enter
into menu and select Preset setting from IN1~10 then press OUTA
and select an input from IN1~10 then press OUTB and select an
input from IN1~10 again and press ENTER to confirm the selection.
eg. To preset 2’s figure, MENU → ENTER → Matrix Preset →
Enter→


