

Maintenance
Battery installation
The Mini Remote is designed to maximize
the life of your batteries, though actual
battery life will depend on usage and
environment. The Mini Remote also includes
LED indicators for low battery levels. When
your Mini Remote LED blinks yellow or red
twice after a button push, your batteries are
low and it’s time for you to replace them.
In the event the LED remains red and the
buttons cease to respond, the batteries do
not have sufficient power for the remote to
operate.
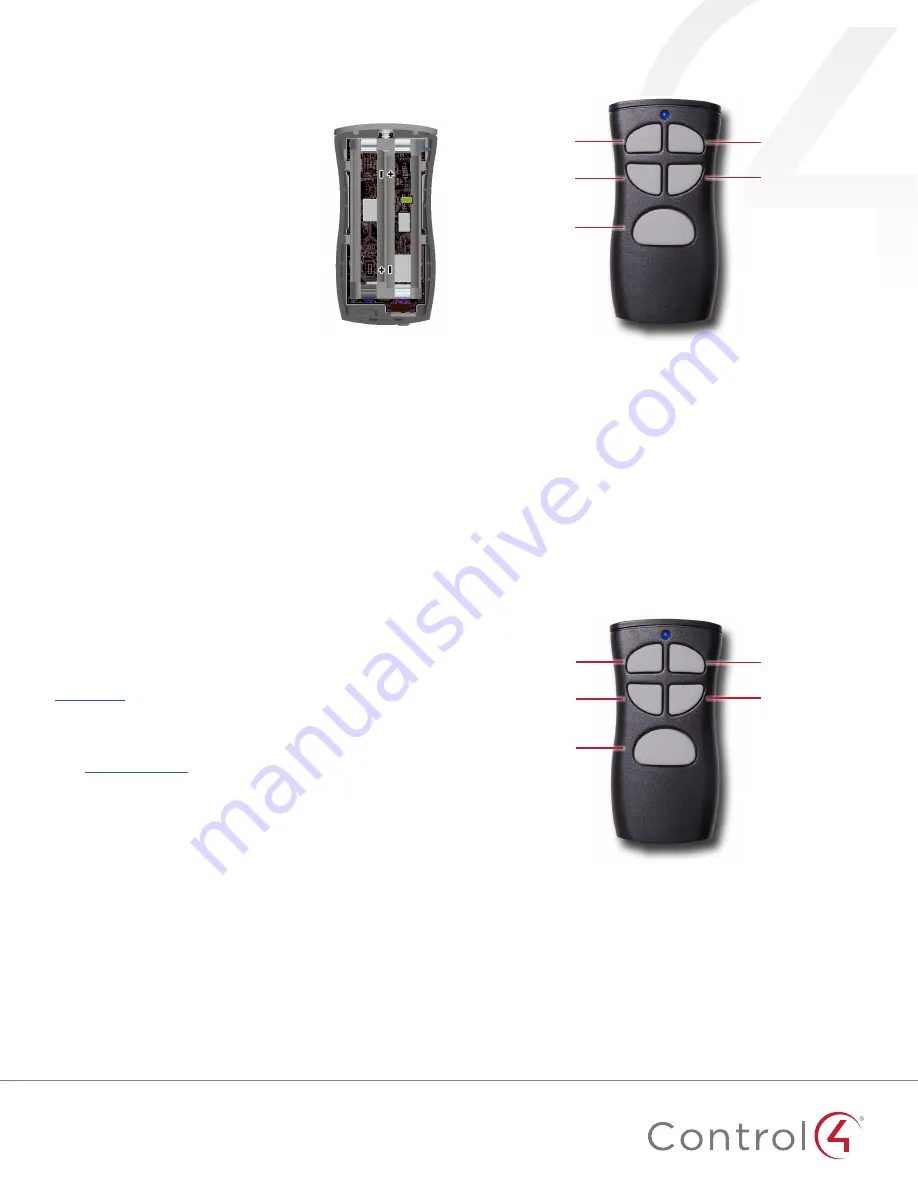
1
Remove the end cap by pulling
outward.
2
Remove the screw.
3
Open the case.
4
Replace the batteries.
Polarities (+ and -) are marked on the center divider.
Battery optimization and safety
• Keep the battery contacts and the compartment clean and
dry.
• Remove batteries if the remote is not expected to be used
for a long period of time.
• Avoid extreme temperatures, as they reduce battery
performance.
• Use only AAA alkaline or lithium batteries.
• Never dispose of a battery in a fire.
Regulatory/Safety information
To review regulatory information for your particular Control4
products, see the information located on the Control4 website at
ctrl4.co/reg
.
Warranty
Visit
ctrl4.co/warranty
for details.
Support
Contact your Control4 Installer for support questions.
Control4 Installer Name:
Control4 Installer Phone:
Control4 Installer Email:
Remote name:
LED color:
Notes:
Remote name:
LED color:
Notes:
Left battery: positive (+) down
Right battery: positive (+) up
Copyright ©2016, Control4 Corporation. All rights reserved. Control4, the Control4 logo, the 4-ball logo, 4Store, 4Sight,
Control4 My Home, and Mockupancy are registered trademarks or trademarks of Control4 Corporation in the United
States and/or other countries. All other names and brands may be claimed as the property of their respective owners.
All specifications subject to change without notice. DOC-00220-A 2016-05-23 DH


