


11
GETTING
ST
AR
TED
NOTE: Your Target Ranges must be within your High and Low Alert levels. You set
your Target Ranges next.
Accept
Change
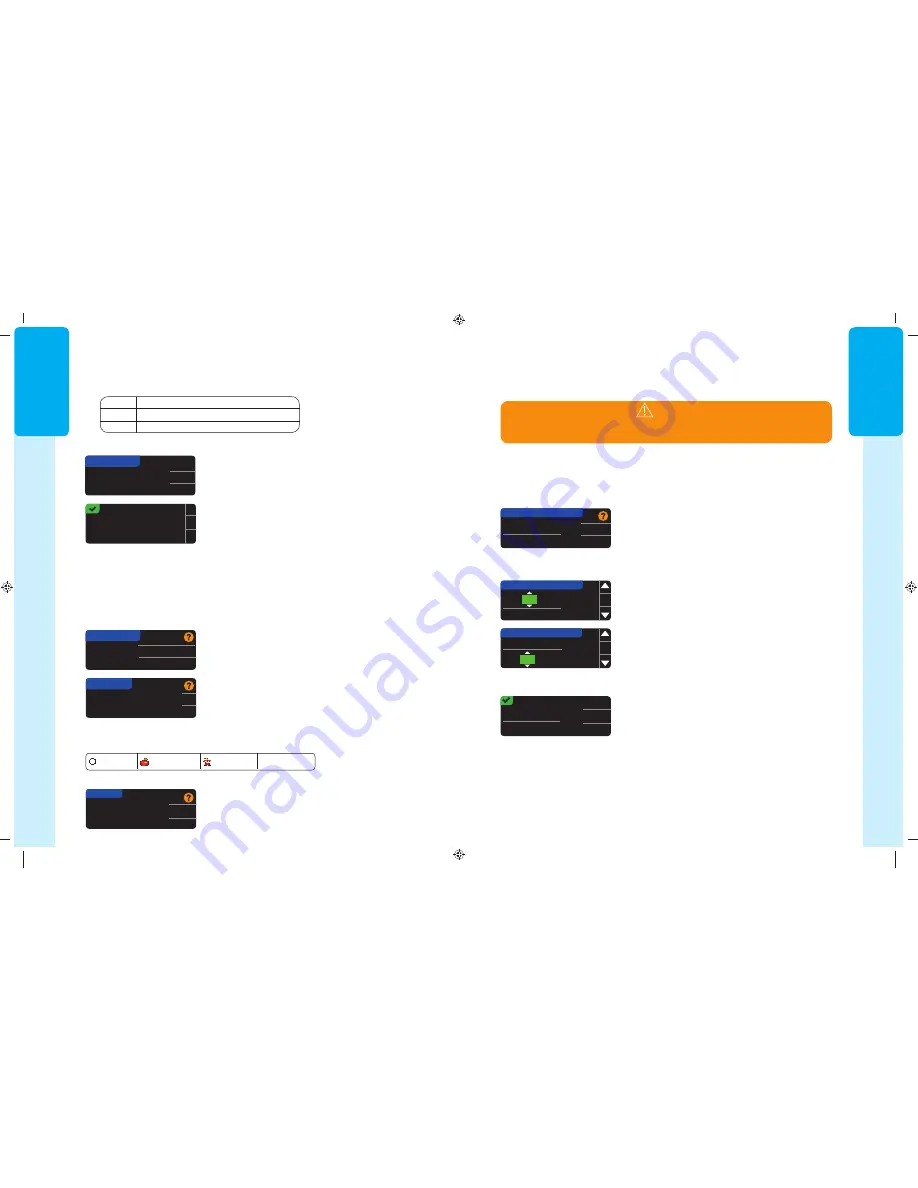
HIGH AND LOW ALERTS
High: 250
mg/dL
Low: 70
mg/dL
Your meter comes preset with a high alert level of 250 mg/dL and a low alert level of
70 mg/dL. You can
Accept
or
Change
these levels.
NOTE: Alerts can only be set outside your selected Target Range(s). For additional
information, you may contact Customer Service. Contact information for Customer
Service is on the back cover.
23. Select
Accept
to keep the preset alert levels. If you
wish to change these alert levels, press
Change
.
24. If you selected
Change
, press the
or
button to
select your High Alert level. This can be set between
126 – 360 mg/dL. Press
OK
.
25. Press the
or
button to select your Low Alert
level. This can be set between 54 – 99 mg/dL.
Press
OK
.
NOTE: Press and hold the
or
button to scroll through the numbers faster.
HIGH AND LOW ALERTS
High:
250
mg/dL
Low: 70
mg/dL
OK
HIGH AND LOW ALERTS
High: 251
mg/dL
Low:
70
mg/dL
OK
26. The next screen confirms your choices. Press
Accept
to confirm your Alert settings.
Alerts are set.
Accept
Change
High: 251
mg/dL
Low: 69
mg/dL
WARNING
Talk to your health care professional before setting any High or Low Alerts on
your meter.
High and Low Alerts
High and Low Alerts
The High and Low Alert feature tells you when your test result is above or below the settings
you choose. Results above High are marked High Blood Sugar. Results below Low are
marked Low Blood Sugar. Alerts appear as large orange numbers.
85587269_CntrNextLINK_2_4_UG_EN_FpBp_v4.indd 11
11/18/16 9:03 AM
GETTING ST
AR
TED
10
Automatically send
results to the Pump?
Always
Ask me
Never
SEND OPTIONS
OK
Send Options set.
Meter will always
send results.
Meter Send Options
18. After the meter and pump are connected, you set your Send Options. This controls
how your meter sends blood glucose readings to your MiniMed insulin pump.
Your options are:
Always
Meter will always send results
Ask Me
Meter will ask you before sending results
Never
Meter will never send results
Press the
Send Option that is best for you.
21. Press
OK
.
OK
DATE/TIME
Date / Time is set
by Pump.
10:30 AM | 10/13/11
AutoLog is Off.
Accept
Turn On
AUTOLOG
Meter
Send Options
Your choice can be changed later using Setup (see
page 42).
19. Press
OK
.
Date and Time Format
In this step, you select how the date and time are displayed on your meter. If you are not
connected to a pump (e.g., if you pressed
Skip
in Step 5 of Initial Setup), you are asked to
accept or change the displayed date, followed by the time.
NOTE: Your pump automatically controls the date and time. If they need to be
changed on your pump, see your MiniMed insulin pump user guide. The date
format you choose on the meter applies to the meter only.
Month/Day/Year
Day.Month.Year
DATE FORMAT
SELECT
20. The
Date Format
screen appears on your meter.
Choose your date format.
AutoLog
The AutoLog feature lets you mark your test result as
Fasting
Before Meal
After Meal
No Mark
Your meter comes preset with AutoLog turned OFF.
22. When the AutoLog screen appears, press
Accept
to
keep AutoLog OFF. Or, to activate AutoLog, select
Turn On
.
85587269_CntrNextLINK_2_4_UG_EN_FpBp_v4.indd 10
11/18/16 9:03 AM
11
GETTING
ST
AR
TED
NOTE: Your Target Ranges must be within your High and Low Alert levels. You set
your Target Ranges next.
Accept
Change
HIGH AND LOW ALERTS
High: 250
mg/dL
Low: 70
mg/dL
Your meter comes preset with a high alert level of 250 mg/dL and a low alert level of
70 mg/dL. You can
Accept
or
Change
these levels.
NOTE: Alerts can only be set outside your selected Target Range(s). For additional
information, you may contact Customer Service. Contact information for Customer
Service is on the back cover.
23. Select
Accept
to keep the preset alert levels. If you
wish to change these alert levels, press
Change
.
24. If you selected
Change
, press the
or
button to
select your High Alert level. This can be set between
126 – 360 mg/dL. Press
OK
.
25. Press the
or
button to select your Low Alert
level. This can be set between 54 – 99 mg/dL.
Press
OK
.
NOTE: Press and hold the
or
button to scroll through the numbers faster.
HIGH AND LOW ALERTS
High:
250
mg/dL
Low: 70
mg/dL
OK
HIGH AND LOW ALERTS
High: 251
mg/dL
Low:
70
mg/dL
OK
26. The next screen confirms your choices. Press
Accept
to confirm your Alert settings.
Alerts are set.
Accept
Change
High: 251
mg/dL
Low: 69
mg/dL
WARNING
Talk to your health care professional before setting any High or Low Alerts on
your meter.
High and Low Alerts
High and Low Alerts
The High and Low Alert feature tells you when your test result is above or below the settings
you choose. Results above High are marked High Blood Sugar. Results below Low are
marked Low Blood Sugar. Alerts appear as large orange numbers.
85587269_CntrNextLINK_2_4_UG_EN_FpBp_v4.indd 11
11/18/16 9:03 AM
GETTING ST
AR
TED
10
Automatically send
results to the Pump?
Always
Ask me
Never
SEND OPTIONS
OK
Send Options set.
Meter will always
send results.
Meter Send Options
18. After the meter and pump are connected, you set your Send Options. This controls
how your meter sends blood glucose readings to your MiniMed insulin pump.
Your options are:
Always
Meter will always send results
Ask Me
Meter will ask you before sending results
Never
Meter will never send results
Press the
Send Option that is best for you.
21. Press
OK
.
OK
DATE/TIME
Date / Time is set
by Pump.
10:30 AM | 10/13/11
AutoLog is Off.
Accept
Turn On
AUTOLOG
Meter
Send Options
Your choice can be changed later using Setup (see
page 42).
19. Press
OK
.
Date and Time Format
In this step, you select how the date and time are displayed on your meter. If you are not
connected to a pump (e.g., if you pressed
Skip
in Step 5 of Initial Setup), you are asked to
accept or change the displayed date, followed by the time.
NOTE: Your pump automatically controls the date and time. If they need to be
changed on your pump, see your MiniMed insulin pump user guide. The date
format you choose on the meter applies to the meter only.
Month/Day/Year
Day.Month.Year
DATE FORMAT
SELECT
20. The
Date Format
screen appears on your meter.
Choose your date format.
AutoLog
The AutoLog feature lets you mark your test result as
Fasting
Before Meal
After Meal
No Mark
Your meter comes preset with AutoLog turned OFF.
22. When the AutoLog screen appears, press
Accept
to
keep AutoLog OFF. Or, to activate AutoLog, select
Turn On
.
85587269_CntrNextLINK_2_4_UG_EN_FpBp_v4.indd 10
11/18/16 9:03 AM
85587269_CntrNextLINK_2_4_UG_EN_FpBp_v5_UnMaskedPlaced.pdf:14


