


Setup
AD12-64(PCI), AD12-16(PCI)
6
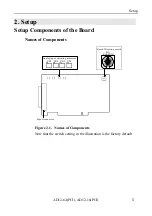
Setting on Board Jumpers and Switch
Setting the Board ID
If you install two or more same type boards into one personal
computer, set their respective board IDs to distinguish them.
Assign a different value to each of the boards. The board IDs
can be set from 0 to F to identify up to sixteen boards.
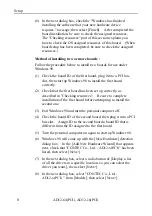
Setting procedure
To set the board ID, use the rotary switch. Turn the SW1 knob to
set the board ID as shown below.
Figure 2.2. Board ID Setting (SW1)
Installing the Board on Your PC and Turning
the Power On
Make sure first that the main unit of your PC is off, then disconnect
the power plug from the outlet of the equipment. Plug the board
into a PCI expansion slot in the PC. When plugging the board,
follow the relevant instructions in the manual for the PC. Make
sure that the board has been plugged correctly, connect the power
plug to the outlet of the equipment, then turn on the main unit of the
PC. Even when you use an I/O expansion unit, install the board in
the same way.
Содержание AD12-16(PCI)
Страница 1: ...AD12 64 PCI AD12 16 PCI 64 16 Channel Analog to Digital Input Board for PCI User s Guide...
Страница 59: ...Functions and Operating Procedures AD12 64 PCI AD12 16 PCI 52 Input ports Table 4 4 Input port list...
Страница 61: ...Functions and Operating Procedures AD12 64 PCI AD12 16 PCI 54...
Страница 67: ...Calibration Procedures AD12 64 PCI AD12 16 PCI 60...
Страница 71: ...System Reference AD12 64 PCI AD12 16 PCI 64...
Страница 74: ...Index AD12 64 PCI AD12 16 PCI...
Страница 75: ...A 46 068 LZJ3711 021011 991104...


