Installation Manual
Connect
2
Car Anywhere GSM Kit
www.connect
2
car.com
17
Step 3:
Position all the accessories in their most suitable positions and extend their wires to the central
point where the device is to be mounted.
Step 4:
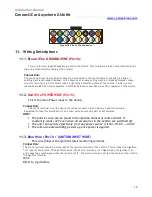
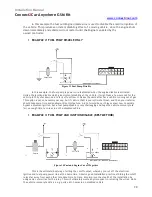
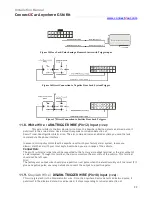
Link the wires from the 16-pin connectors to their appropriate harnesses in the vehicle ensuring
that the connections are firm. (Don’t forget to insulate every wire connection properly). Follow the detailed
wire explanations further in the manual to get descriptive details of each wire function.
Step 5:
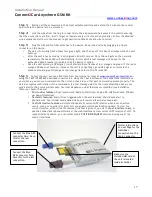
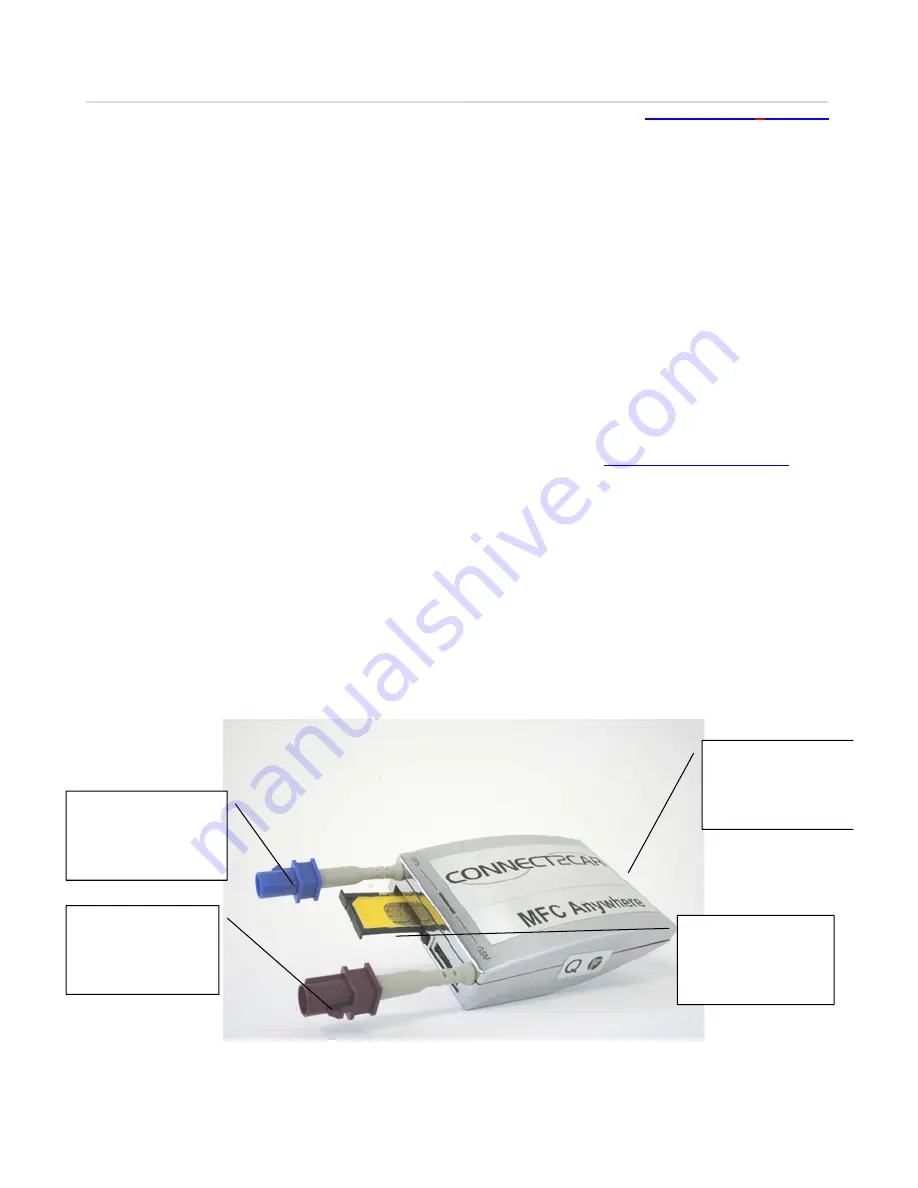
Plug the GPS and the GSM antennas to the device. Power the device by plugging the 16-pin
connector on the device.
•
The unit will initially flash a short 1sec green light, and then go off for about 2 minutes while the unit
boots up.
•
After the unit is has booted up, a solid green LED will come on. Once the unit gets on the network
successfully the Green LED will start flashing. At this point a text message will be sent to the
Authorized phone number to indicate that the device is online.
•
Once the unit picks up a GPS signal, it will start multiple flashes of red, orange and green. If the red or
orange LED does not come on, it means the unit is not getting a good GPS signal, so relocate the
antenna accordingly until you get a red/orange flash for valid GPS reception.
Step 6:
To test the unit, you can either test from the internet account at
www.connect2car.com/track
or
using the TEXT INTERFACE described in section 2.4. Using the Text interface or the Connect2Car software on
your phone, you can send commands to the unit and check to see that each command executes properly. The
unit also replies confirmation of the commands via a text message alert to the user authorized phone, or an
email alert to the users email account. Your test depends on what features are installed (see installation
features, chapter 9 above)
•
Test control features:
Door lock/unlock, Remote Start/Stop, Engine kill disable/enable, Window
up/down(if installed)
•
Test alert features:
Alarm/Siren triggered when the unit is armed, should send alert to
phone/email. Door/trunk/hood opened when unit is armed should also send alert.
•
Test GPS location features:
Unit should update its current GPS location when ever an action
occurs, such as a command or alert or if you enable continuous location update. To view the
current location, either click the internet link that is given to you via the
text interface reply
, or
use the Connect2Car phone software or the web interface to view current GPS location of unit. To
request instant position, you can either send a
POSITION REQUEST
command using any of the
control interfaces.
Make sure the
included SIM card of
the unit is located
inside its holder
Connect the Blue GPS
connector here. Save
this for the last
connection.
Connect the Blue
GPS connector here.
Save this for the last
connection.
Follow instructions
on next Page for the
individual
connections on the
16pin connector.


