ENGLISH
27
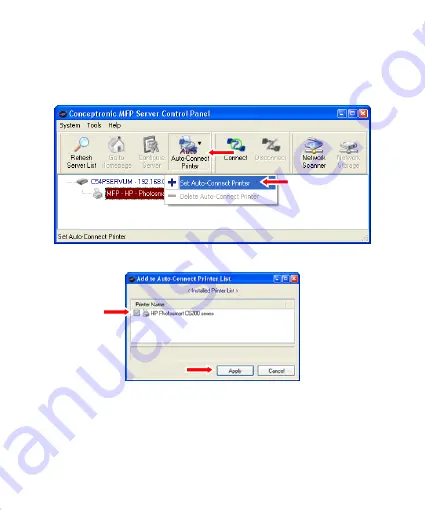
To enable the auto connect feature on your computer(s), follow the steps below:
A.
Open the MFP Server Control Panel by clicking on the system tray icon.
B.
Click the button “
Auto-Connect Printer
” and select “
Set Auto-Connect Printer
”.
C.
Check the checkbox in front of your printer and click “
Apply
”.
The MFP Server Control Panel will now connect automatically to your printer when a print or
fax command is received.


