


8
Quick Setup
Your access point is preconfigured in a secured setup and ready for use right
out of the box. The following instructions will help you install your access
point and customize your settings.
II-1. Initial Setup
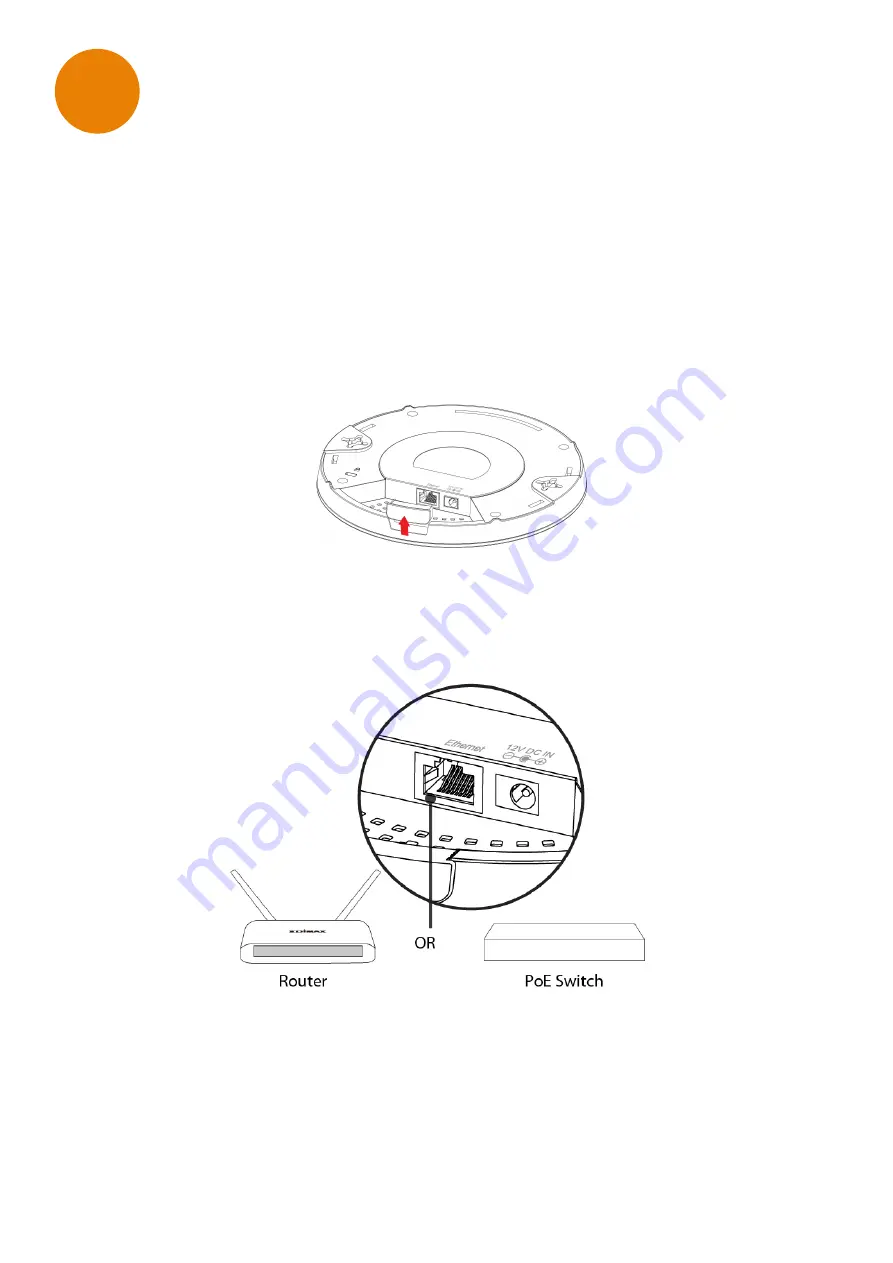
1.
If you need to, remove the cap from the underside of the access point.
This creates extra space for your cables to pass through.
2.
Connect a router or PoE switch to the access point’s
LAN
port using an
Ethernet cable.
II