9
Chapter 2 Installation
2.1 Hardware
Installation
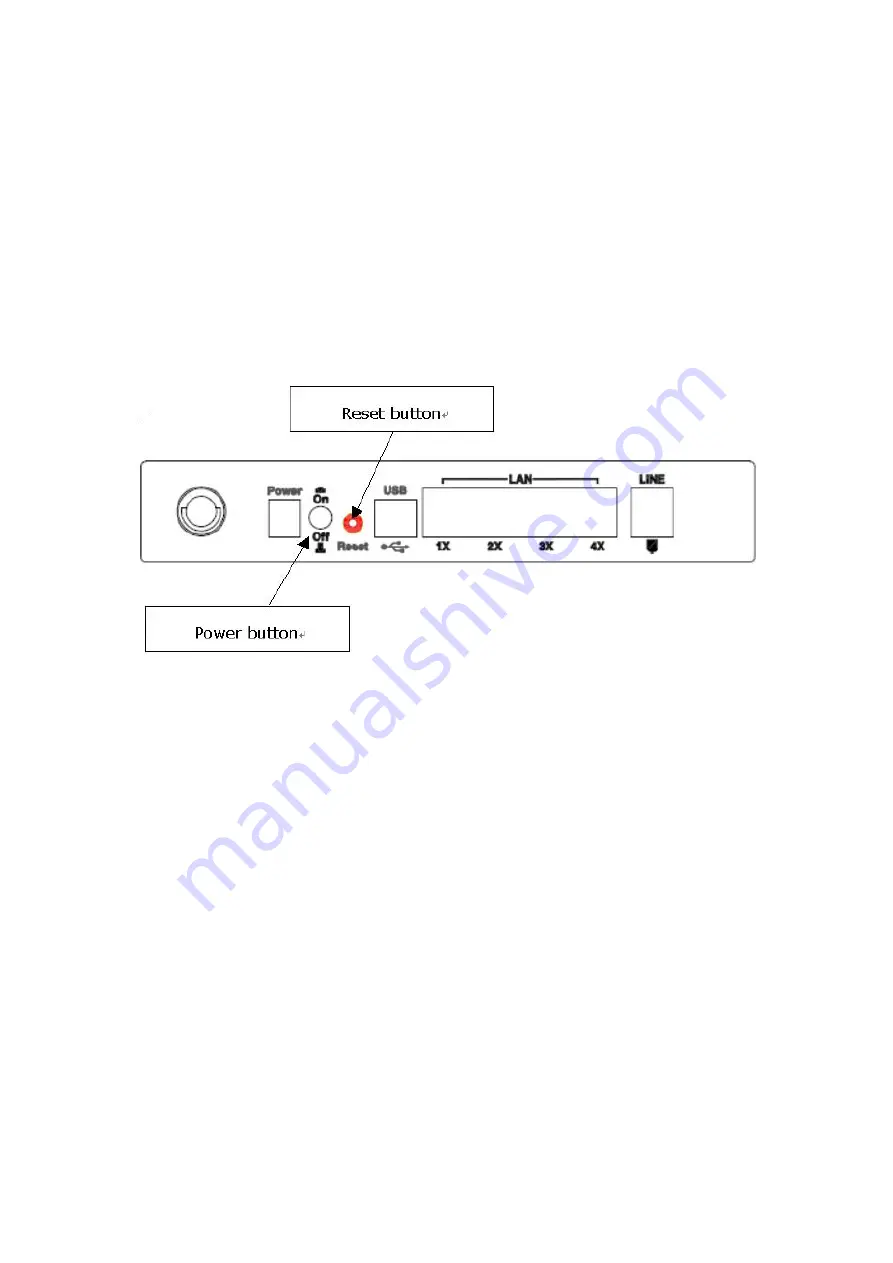
In the rear panel, there is a reset button. To load the factory default settings, hold
the reset button down for at least
5 seconds.
Follow the instructions below to complete the hardware connections.
Connection to LINE port
If you wish to connect both the router and a telephone, connect the LINE port to a
POTS splitter with a RJ11 connection cable.
Connection to LAN port
To connect to a hub or PC, use a RJ45 cable. You can connect the router to up to four
LAN devices. The ports are auto-sensing MDI/X and either straight-through cable
or crossover cable can be used.
Connection to USB port
Connect the USB port to a PC with a standard USB cable.
Содержание CT-5361T
Страница 1: ...CT 5361T Wireless ADSL2 Router User s Manual Version A3 5 December 25 2007 261056 038 ...
Страница 7: ...6 1 2 Application The following diagram depicts the application of the device on a wireless network ...
Страница 14: ...13 STEP 5 Installation is complete ...
Страница 18: ...17 STEP 6 When the screen displays as below click the NEXT button ...
Страница 19: ...18 STEP 7 Click the Finish button when the screen displays as below STEP 8 Installation is complete ...
Страница 23: ...22 Shown here is the Device Info screen for your reference ...
Страница 35: ...34 4 2 7 DHCP Click DHCP to display the DHCP information ...
Страница 56: ...55 This screenshot is for Bridge encapsulation ...
Страница 112: ...111 ...
Страница 131: ...130 Certifications FCC Part 15 class B FCC Part 68 CE Note Specifications are subject to change without notice ...


