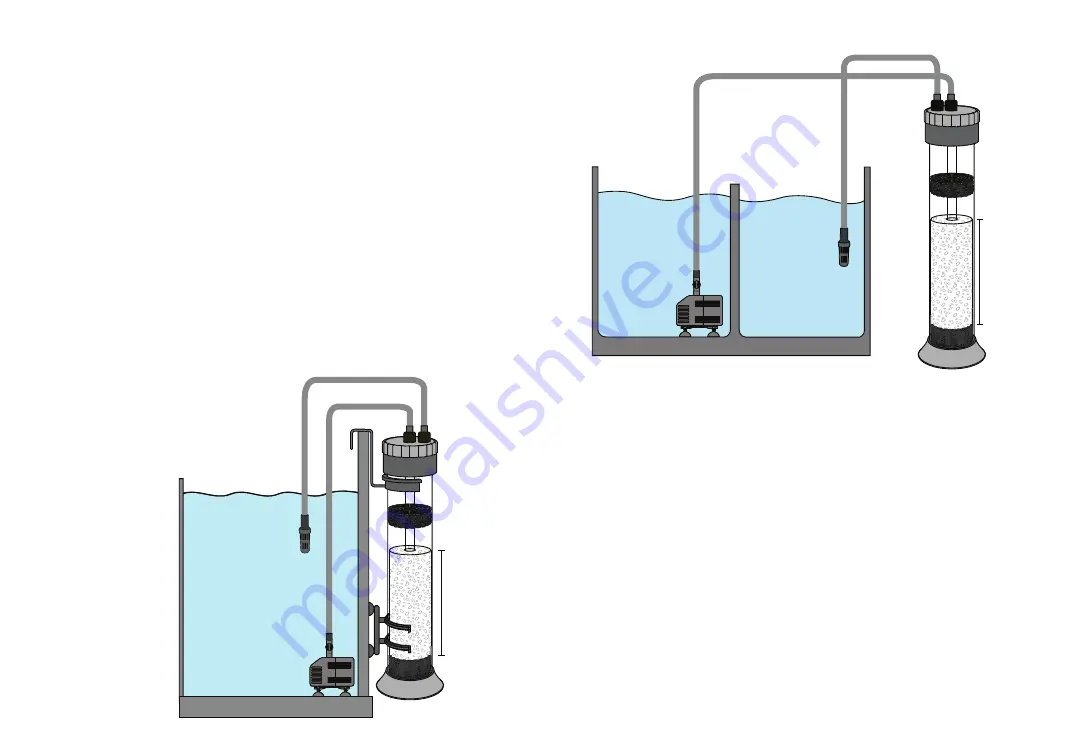
INSTALLATION
1. Choose a desired location for Poly reactor.
2. Place pump in desired location.
3. Secure the pump and connect a piece of tubing from the pump to the center
barbed fitting (IN) secure the tubing with the compression nut.
(NOTE: 6ft.
tubing provided is cut to fit for output tubing and intake tube.)
4. Connect discharge tubing to the output of the poly reactor and secure the tubing
with compression nut.
5. Connect the sediment discharge filter to the end of the output tubing.
6. Secure the output tubing and sediment discharge filter with suction cups.
7. Unlatch lid and remove lid
8. Remove the top media sponge and media strainer.
9. Add desired media
(follow manufactures guidelines for media requirements
for a given aquarium size. flow rate and precautions.)
10. Replace media sponge and media strainer.
11. Verify the O-ring is clean and free of all media. A small amount of silicone
lubricant can be used to ensure a good seal.
12. Replace lid press directly down so that the down tube against with
the barbed fitting (IN).
13. Secure with latches.
14. Plug pump into a GFCI outlet.
SETUP DIAGRAM
A) HANG ON TANK
MAINTENANCE
1. Routine maintenance is required to ensure the maximum performance and the
longevity of the ViaAqua
®
water pump.
2. For proper operation of the water pump: clean the pump, impeller and intake
strainers every three weeks. Failure to do so will cause premature failure of
the pump.
3. Basic maintenance of the ViaAqua
®
pump:
a) Disconnect the water pump from the power supply prior to removing the pump
from the aquarium.
b) Remove either the prefilter or intake filter strainer. Rinse out prefilter sponge of
all debris.
c) Remove the impeller cover.
d) Once the impeller cover is removed, slide both the impeller and shaft out of
the main body of the pump and clean well. Do not use any soap or detergents
during cleaning.
e) After the impeller and shaft are cleaned, use a small brush to clean inside of the
motor housing .
f) Reassemble above parts and your ViaAqua
®
pump is ready to use. Make sure
the bushing is reassembled properly. Failure to do so will cause permanent
damage to the pump.
Sump
Pump
Intake tube
Output tube
Maximum
10in media
(not included)
Maximum
10in media
(not included)
Pump
Intake tube
Output tube
Aquarium
B) SUMP


