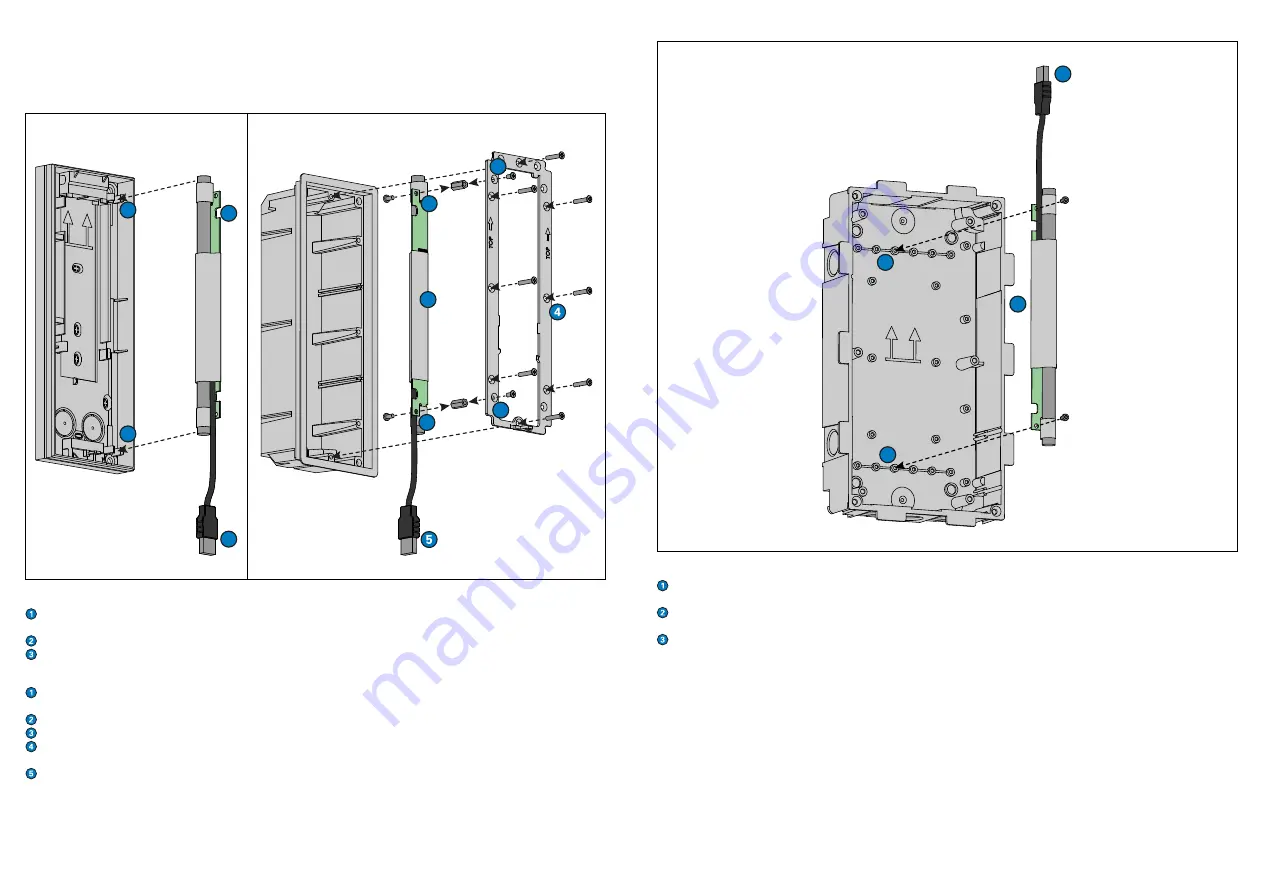
Mounting within the surface mount box ID5 SH
Make sure the AFIL-USB is in the correct position (USB cable is pointing down and the PCB is on the
right side).
Clip the AFIL-USB into the holder on the right-hand side within the surface mount box ID5 SH.
Connect the USB cable to a free USB port at the Intercom station.
Mounting within the flush mount box ID5 FB
Make sure the AFIL-USB is in the correct position (USB cable is pointing down and the PCB is
pointing at the mounting frame).
Fix the two spacers on the AFIL-USB using the two oval-head screws (both in extent of supply).
Fix the AFIL-USB on the mounting frame using the two countersunk screws (in extent of supply).
Mount the mounting frame to the flush mount box ID5 FB as described in the short reference
“ D-BZ-ID5 FB”.
Connect the USB cable to a free USB port at the Intercom station.
Mounting within the mounting box WSSH 50
Make sure the AFIL-USB is in the correct position (USB cable is pointing up and the PCB is pointing
to the mounting box WSSH 50).
Fix the AFIL-USB on the top and bottom of the third screw boss (counted from the left) in the
mounting box WSSH 50 using the two mounting screws (in extent of supply).
Connect the USB cable to a free USB port at the Intercom station.
Mounting with an ID5 TD
Mounting with a WS 300V
1
3
2
2
1
2
2
3
3
1
3
2
2
Audio induction loop kit AFIL-USB
With the AFIL-USB, an Intercom station can easily and quickly be equipped with an induction loop
amplifier module. For this, only a free USB port is required at the Intercom station. Thanks to its
compact size, the AFIL-USB fits easily into a flush or surface mounting box.
Surface mount box ID5 SH
Mounting box WSSH 50
Flush mount box ID5 FB


