


54
6-2. Video backup onto USB flash memory
Video can be captured and archived onto the USB stick or hard drive while playing back recorded video.
In playback mode, press the BACKUP button to launch the archiving function.
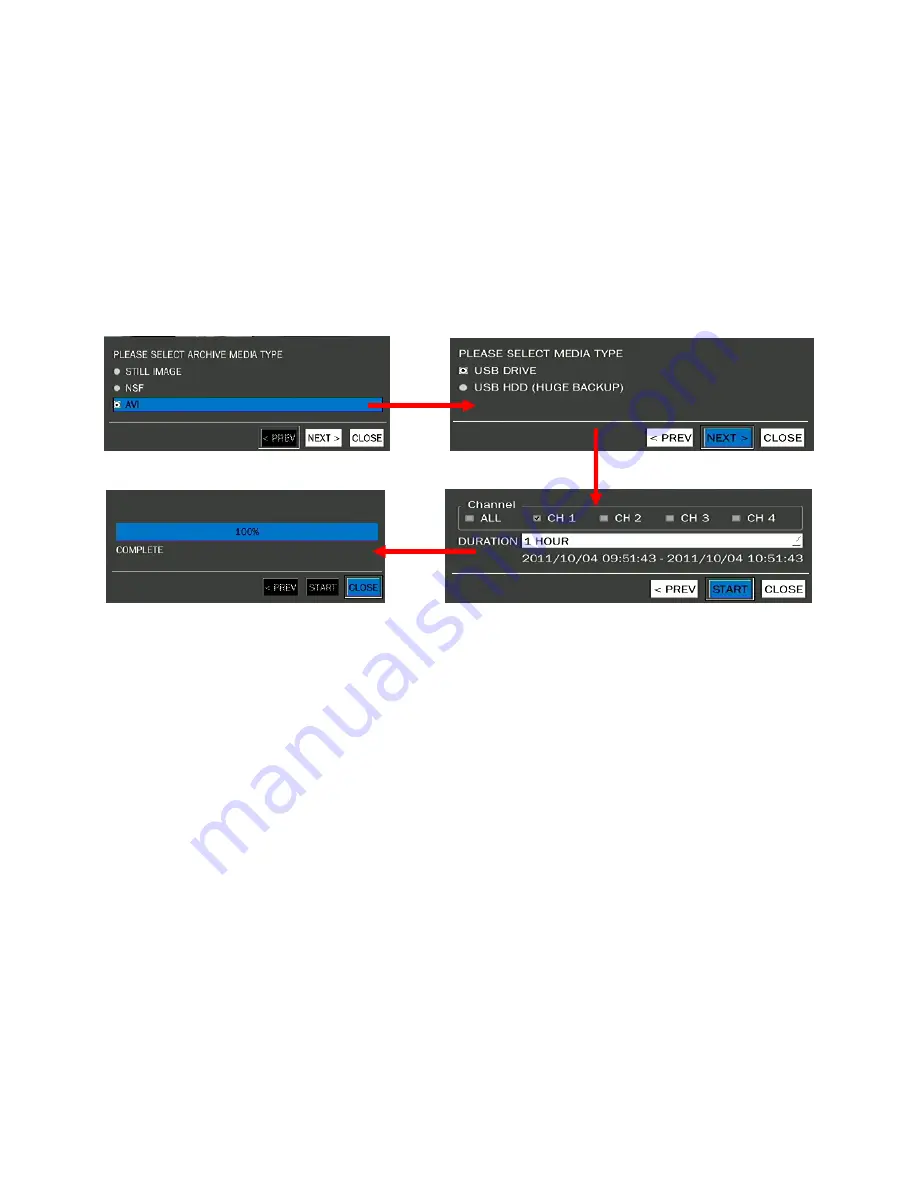
1. When you press BACKUP button, the DVR will ask whether to archive a Still Image or Video clip.
2. If the user selects VIDEO, the DVR will ask for the media. To use the huge backup, the external
USB HDD has to be mounted.
3. After selecting the media, the DVR will ask for the channel and the setting of the archiving duration.
If the huge Backup is selected, the duration is from 1 hour to 24 hours.
4. After selecting the channel and setting of the duration, the system will start to archive the data to
the selected media.
Figure 6.2.1. Video Archiving and Backup Screen
The DVR will convert the corresponding portion of the video into an AVI file.
6-3. Transferring still images or video from the ARCHIVE list
The stored data onto hard drive will be found in the ARCHIVE list in SEARCH window.
User can back up still images or video into the storage device from the ARCHIVE list.
1. Select the date to begin searching and navigate through the days using the mouse or the control button
(
◀
▲
▶
▼
) on the remote control.
2. Once you have selected the date, the list of stored data will be opened.
3. Use the mouse or the control button (
◀
▲
▶
▼
) on the remote control to scroll through the on-screen
listings.
4. Select a list of stored events that happened previous to or after the current selection.
5. Once the desired event has been double-clicked, you can view the still image or the first frame of the
selected video.
6. Press the BACKUP button to launch the archiving function in playback mode.
7. Press the ESC key or a right button of mouse to return to the SEARCH window.
Содержание HX-800E
Страница 43: ...43 3 Setup Saving Setup To preserve the setup values that you have changed select YES...
Страница 69: ...69 8 6 4 OSD You can select the OSD to be display 8 6 5 Language You can select a language to be display...
Страница 72: ...72 8 7 2 RECORD 8 7 3 DEVICE...
Страница 73: ...73 8 7 4 STORAGE 8 7 5 SYSTEM...