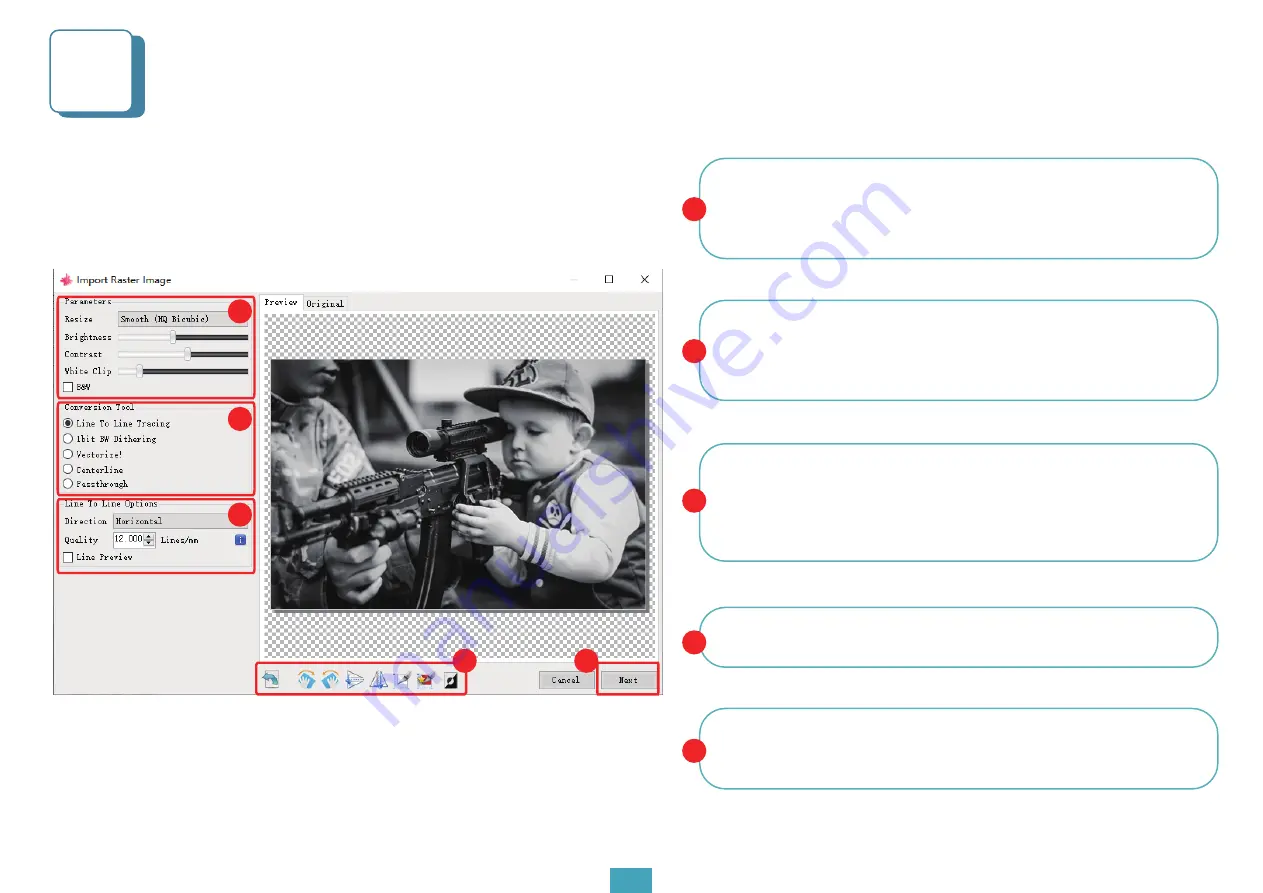
Setting parameters 1
1. Please carefully set the engraving parameters
5
LaserGRBL can adjust the brightness, contrast, and other attributes
of the target image. When the parameters are adjusted, you can
see the actual effect in the preview window on the right and can
try to adjust it to what you think is satisfactory.
07
1
1
The engraving mode is usually selected as "progressive tracking"
and "1bit jitter". 1-bit jitter is more suitable for engraving grayscale
images. If you want to cut, please select vector or centerline
engraving mode and choose no fill.
2
Engraving quality essentially refers to the line width of the laser
scan. This parameter depends primarily on the size of the laser
spot of the engraver. The Z1 engraver applies a square spot of
.08mm. Therefore, the recommended engraving quality range is
8-20 (commonly 12).
3
At the bottom of the preview window, you can also rotate, mirror,
and cut the image.
4
After completing the above settings, click next to enter the
engraving speed, engraving energy, engraving speed to set the
size of the engraving
5
2
3
4
5
Содержание COMGO Z1 LaserGRBL
Страница 1: ...User Manual V1 1 COMGO Z1 LaserGRBL Beginner s Guide ...
Страница 13: ...Engraving Parameters 6 01 11 ...
Страница 14: ...Engraving Parameters 6 01 12 ...


