INSTALLATION GUIDE FOR SR-1910
SR-1910 QI
Copyright - refer to title page
Page 34
ENU Status : 1-1-1
Switch
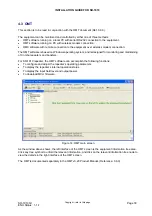
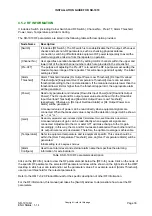
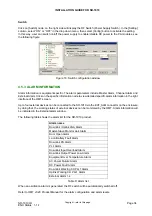
Click on [Switch] node, on the right side will display the RF Switch (Power Supply Switch). In the [Setting]
column, select “ON” or “OFF” in the drop down menu, then select [Config] button to activate the setting.
In this way, user can switch on/off the power supply to enable/disable DC power to the PA modules, see
the following figure.
Figure 16: Switch configuration window
4.5.3 ALARM INFORMATION
Alarm information is equipment specific. The alarm parameters include Master Alarm, Channel Alarm and
External Alarm. Click on the specific information node to view detailed specific alarm information in the right
interface of the OMT screen.
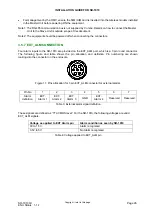
Up to four external devices can be connected to the SR-1910 via the EXT_ALM connector on the enclosure,
by doing that, the working status of external devices can be monitored by the OMT. Alarm information will
be indicated in the External alarm window.
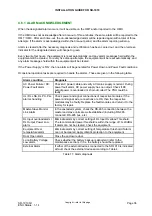
The following table shows the alarm list for the SR-1910 product.
Alarm name
Downlink / Uplink LNA Alarm
Master-Slave Monitor Link Alarm
Door Open Alarm
Li-ion Battery Fault Alarm
Downlink PA Alarm
PLL Alarm
Downlink Input Overload Alarm
Downlink Output Power Low Alarm
Equipment Over Temperature Alarm
AC Power Failure Alarm
DC Power Fault Alarm
Downlink Working CH PLL1 Alarm
Uplink Working CH PLL1 Alarm
External Alarm 1-4
Table 9: Alarm list
When an oscillation alarm is generated, the RF switch will be automatically switched off.
Refer to OMT v3.20 Product Manual for the alarm configuration and alarm levels.


