Page
29
of
40
SoniQ i
On selecting the
Add Job
option, the
Open
window appears and follow the above-mentioned steps to add more
jobs.
Note
: To delete the selected job,
click
on the
Delete job
icon on the
Quick Access Toolbar
.
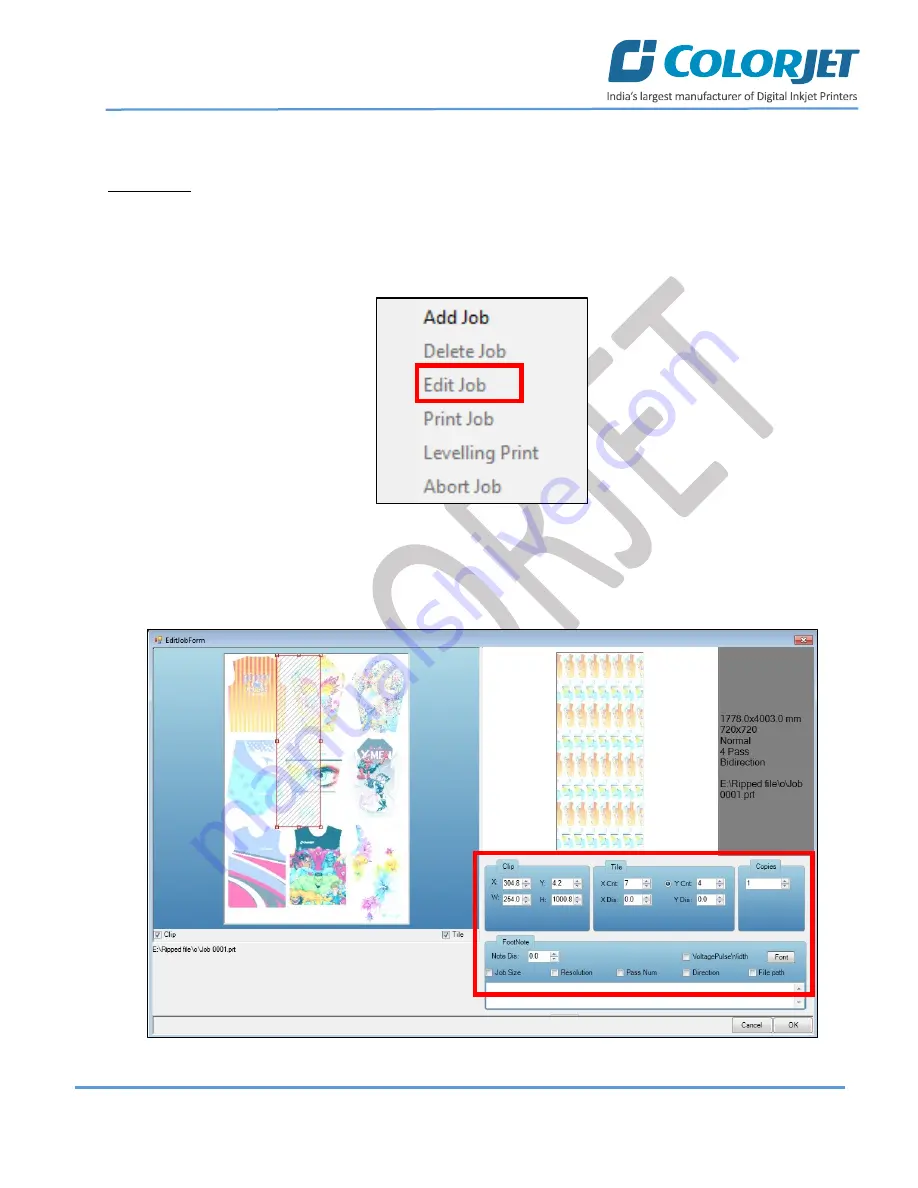
Editing Job
Follow these steps to edit the selected job:
Step 1
:
Select
the job for which details you want to edit from the
Job List
area and right click.
Step 2
:
Select
on the
Edit
option from the context menu, as shown below:
Fig 40: Selecting the Edit Job Option
Step 3
:
Select
the desired checkbox in front of the Clip, Reverse Print, and Tile options. Clicking on any option will
enable its related parameters on the right pane and you can edit them as per the requirements. In our case, we
have selected the
Clip
checkbox
Fig 41: Displaying the Edit Job Form Window


