Page
31
of
42
SoniQ HQ Plus
Step 3
:
Select
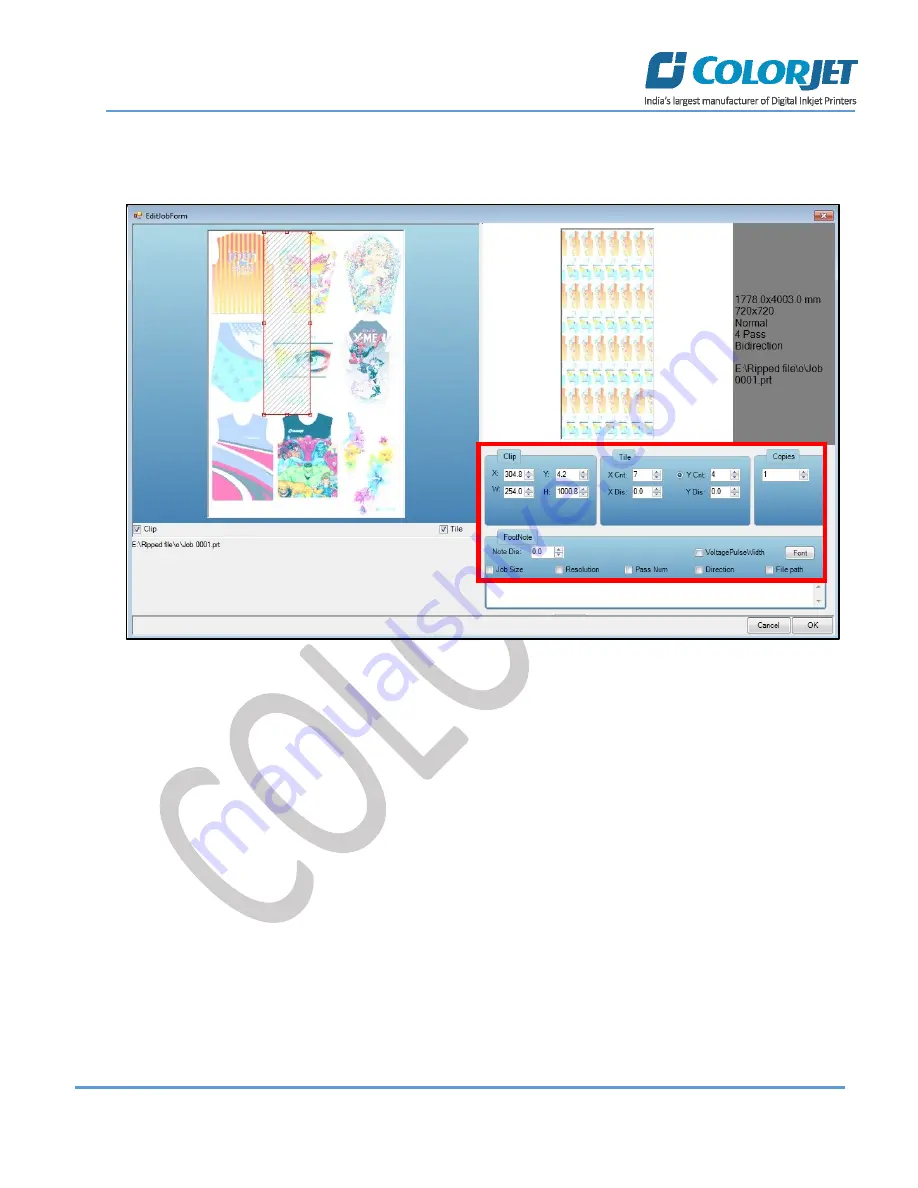
the desired checkbox in front of the Clip, Reverse Print, and Tile options. Clicking on any option will
enable its related parameters on the right pane and you can edit them as per the requirements. In our case, we
have selected the
Clip
checkbox
Fig 41: Displaying the Edit Job Form Window
Clip
: By enabling this, a portion of the image can be selected by dragging the image preview. And its height and
width can be adjusted. Also, the crop margins can be adjusted in x and y direction.
Tile:
By enabling this, desired number of counts in x and y directions can be printed. Also, the distance between
each count can be adjusted.
Copies:
Feeding any number of copies will repeat the prints in Y direction. Careful, the Print will stop and restart
after each copy.
Foot note:
You can add footnote printing with each printed image. Parameters required can be selected.
Step 5
: After making the desired changes,
click
on the
OK
button to apply the settings (Refer to Fig 41).
Содержание S4427
Страница 1: ......
Страница 21: ...Page 20 of 42 SoniQ HQ Plus Password Screen Refer to Fig 21 About Screen Fig 22 Displaying the About Us Screen...
Страница 42: ......


