manualshive.com logo in svg
background image

5

EN

G

LIS

H

Operating Instructions
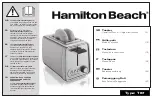
Toasting

1.  Make sure that the lever is in the up position.
2.  Plug the toaster into an earthed socket (230 V AC).
3.  Place bread into slots.
4.  Choose the desired browning level, 1 (lightest) to 7 (darkest) by turning the 

browning control knob. Experiment until you find the best setting.

5.  To start toasting, depress the lever until it locks. The lever will only lock into 

place if the toaster is connected to a power point.

6.  The toaster automatically turns itself off when the toast is ready, and the slices 

pop up. The toasting process can be stopped manually at any time by pressing 
the cancel button.

7.  Make sure that the lever is in the up position before unplugging the toaster.

NB:

 If only one slice is toasted it will be browned more than it would be if two slices 

are toasted at the same time.

Defrosting

Follow steps 1-5 above and then press the defrost button.

Reheating

Previously toasted bread can be reheated by following steps 1-5 above and then 
pressing the reheat button. The toast will then be warmed for a short while before 
the toaster automatically shuts off. Keep an eye on the toast to make sure that it 
does not burn.

Care and Maintenance

Always disconnect the appliance from the wall socket before cleaning. Never  
immerse the toaster into water or other liquid, clean it using a soft cloth slightly 
moistened with a mild detergent. Avoid solvents and abrasive cleaning agents. 
Empty the crumb tray regularly.

Disposal

Follow local ordinances when disposing of this product. If you are unsure about the 
disposal of this product contact your municipality.

Specifications

Power supply 


230 V AC, 50 Hz

Power   


1400 W

Mains lead: 


100 cm

Содержание 131817-UK

Страница 1: ...Toaster Br drost Br drister Leiv npaahdin Ver 200803 English 3 Svenska 6 Norsk 9 Suomi 12 18 4084 131817 UK Art No Model No...

Страница 2: ......

Страница 3: ...e never place the toaster close to or under flammable material such as curtains Always unplug the appliance from the wall socket before cleaning Dry the toaster using a soft moist cloth Never immerse...

Страница 4: ...mb tray Before using the toaster for the first time Operate the toaster on maximum setting without bread in a well ventilated area a couple of times because it can emit a strange odour when new This i...

Страница 5: ...ed it will be browned more than it would be if two slices are toasted at the same time Defrosting Follow steps 1 5 above and then press the defrost button Reheating Previously toasted bread can be reh...

Страница 6: ...osten i n rheten av eller under br nnbart material som t ex en gardin Drag alltid n tsladden ur v gguttaget f re reng ring Torka av br drosten med en fuktig trasa S nk aldrig ned br drosten i vatten T...

Страница 7: ...knapp REHEAT 7 Avst ngningsknapp CANCEL 8 Smulbricka F re f rsta anv ndning K r br drosten p h gsta effekt utan br d i ett v l ventilerat utrymme ett par g nger eftersom den kan avge viss lukt n r den...

Страница 8: ...s ur Anm Rostning av endast ett br d ger m rkare f rg n vid rostning av tv br d Upptining F lj steg 1 5 ovan och tryck sedan p upptiningsknappen DEFROST teruppv rmning Tidigare rostat br d kan v rmas...

Страница 9: ...aldri br dristeren plasseres i n rheten av eller under brennbart materiale som f eks gardiner etc Trekk alltid st pselet ut fra str muttaket ved rengj ring T rk av br dristeren med en fuktig klut Sen...

Страница 10: ...oppvarmingsknapp Reheat 7 Av knapp Cancel 8 Smuleskuff F r f rste gangs bruk Kj r br dristeren p h yeste effekt uten br d i et godt ventilert lokale et par ganger ettersom den kan avgi en viss lukt n...

Страница 11: ...t br d gir m rkere farge enn risting av to br d Opptining F lg trinn 1 5 over og trykk deretter p opptiningsknappen DEFROST Gjenoppvarming Tidligere ristet br d kan varmes opp igjen ved f lge trinn 1...

Страница 12: ...l sijoita leiv npaahdinta palavien materiaalien esim verhojen l heisyyteen N in est t tulipalon vaaran Irrota pistoke pistorasiasta ennen laitteen puhdistamista Kuivaa leiv npaahdin kostutetulla liin...

Страница 13: ...keytyspainike Cancel 8 Murutarjotin Ennen ensimm ist k ytt kertaa K yt leiv npaahdinta muutaman kerran t ydell teholla hyvin tuuletetussa tilassa Leiv npaahtimesta saattaa tulla hajua ensimm isill k y...

Страница 14: ...orasiasta Huom Yksi leip paahtuu tummemmaksi kuin kaksi leip paahdettuna yht aikaa Sulatus Suorita kohdat 1 5 yll ja paina sen j lkeen sulatuspainiketta DEFROST Uudelleenl mmitt minen Aiemmin paahdett...

Страница 15: ......

Страница 16: ...kundesenter clasohlson no INTERNETT www clasohlson no POST Clas Ohlson AS Postboks 485 Sentrum 0105 OSLO SUOMI ASIAKASPALVELU Puh 020 111 2222 Faksi 020 111 2221 S hk posti info clasohlson fi Interne...

Отзывы: