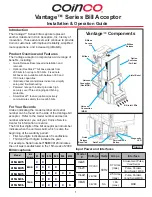
2
1 2 3 4 5 6 7 8
ON
ON
OFF
OFF
Note: There are no switches on MDB only models.
Switch 1
Switch 2
Switch 3
4 Pulse/$ 1 Pulse/$
Switch 4
Switch 5
Serial Pulse
Switches 6 - 8
Reserved
ON
OFF
Always
Enabled
Host
Enabled
1 2 3 4 5 6 7 8
ON
ON
OFF
OFF
Option / Dip Switch Settin
gs
Note: There are no switches on MDB only models.
Switch 1
Switch 2
Pulse Timing
50
/ 50mS
150
/ 150mS
Custom
(default is 200/200mS)
Parallel
(C
redit Line) VL Models Only
Switch 3
4 Pulse/$ 1 Pulse/$
Switch 4
Switch 5
Serial Pulse
Switches 6 - 8
Reserved
ON
OFF
Always
Enabled
Host
Enabled
ON
ON
OFF
OFF
Unpacking the Bill Acceptor
After removing the bill acceptor from the shipping
carton, inspect it for possible damage. If the unit is
damaged, notify the shipping company immediately.
The consignee (person or company receiving the unit)
can fi le a claim against the carrier for shipping
damage. We recommend you keep the original
carton and packaging materials to reuse if you need
to transport or ship the bill acceptor in the future.
If the bill acceptor is being stored or used as a spare,
always keep it in its shipping carton when not in use.
This will keep it clean and offer the best protection for
the unit
Option Switch Settings
See Figure 2.
This step is not necessary for MDB
applications.
Installing the Bill Acceptor
1.
Remove power from the host machine.
DO NOT connect the bill acceptor harness to
the machine with power connected.
2. Install the bill acceptor into the host machine
using the mounting studs and hardware in the
machine. To simplify installation, see
Figure 3.
3. Install / connect the proper interface harness
to the host machine.
4. Restore power to the machine.
5. The illuminated bill inlet will begin to fl ash and
the stacker motor will cycle upon power-up. If
this does not occur, check the wiring harness
connections and make sure power is applied.
6. Check the Vantage diagnostic LED on the back
of the unit
Figure 1
to verify it is green and ON
continuously. If it is not, you can troubleshoot
based on the status shown on the billbox decal or
Figure 8.
7. With the vend price set below one dollar, insert
a one dollar bill.
8. Verify credit has been established.
9. Check the bill box to see that the one dollar bill
was properly stacked.
Figure 3
1.
2.
3.
Quick Release
Bezel Operation
Push Firmly to
Release Bezel
1.
Push firmly on Quick Release Tabs using
a screwdriver tip. Tabs will move towards
bezel and latch.
2.
3.
Figure 2
NOTE: Power MUST be reset for
revised switch settings to take effect.
ON
OFF
ON
OFF
Once both tabs are latched, the bill
acceptor will separate from the bezel.
To reattach, push bill acceptor body firmly
onto bezel until locks.


