EN
G
LI
S
H
6
Exercise 5 – Three-dimensional effects
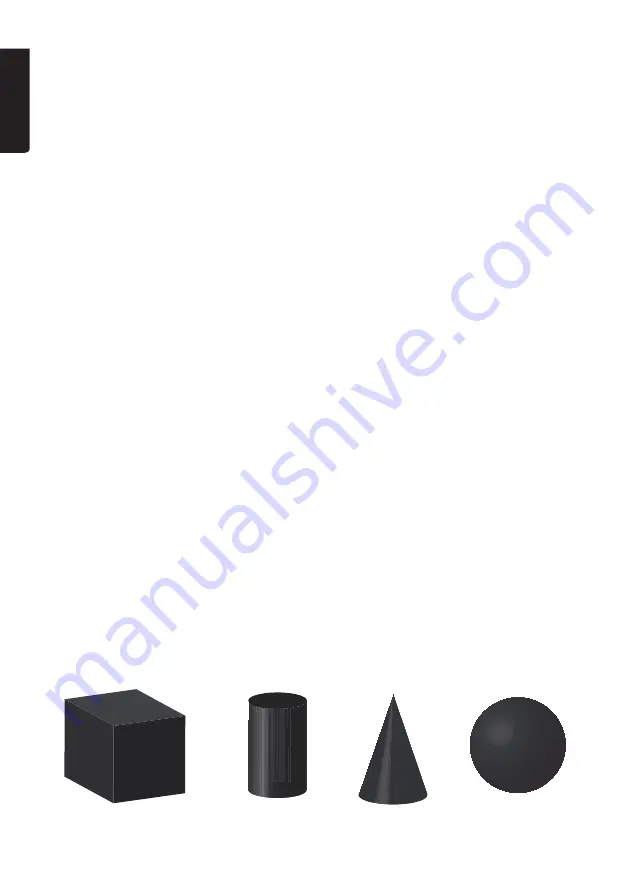
By practising with these basic shapes you can learn how and in what order to shade.
These shapes and their combinations cover everything you will ever come across.
In this exercise, imagine that the light is always approaching from the upper left at
a 45° angle. Make the figures about twice as large as those in the image.
Cubes
Draw a cube on the paper twice the size as the one below. Cut a mask for each
edge and tape it down. Now remove the mask at the edge furthest from the light
source. Shade (as in Exercise 4) from the upper left down toward the lower right.
Spray another coat as needed. Now re-mask the finished side and do the same for
the other sides until you have achieved the desired result.
Cylinder
First, study how the light varies on the cylinder surface and how the flat surface
on top contrasts with the curved surface. Form the mask to match the curved
line. Cover the top first and shade the cylinder. Now cover the cylinder and shade
the top. To obtain the same hue on both surfaces requires much practise.
Cones
Begin by cutting a mask in the form of a cone. Start shading from above and
sweep towards the base of the cone. Do the same for the other side of the cone
until you have achieved the three-dimensional effect shown in the figure.
Spheres
Cut a disc out of the masking material and use the material with a hole in it as
a shading mask and the disc as a mask. Now shade the work surface until the sphere
appears three-dimensionally.
Note:
Do not apply too much paint. Spray preferably a thin layer first and let dry.
Then spray another layer, and so on. This takes time but is worth it.
Cube
Cone
Cylinder
Sphere


