


XPEED Indoor Series WWW.CNBTEC.COM
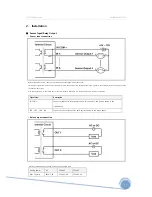
3. Operation
⊙
Check Points before Operation
• Before power is applied, please check the cables carefully.
• The camera ID of the controller must be identical to that of the target camera.
The camera ID can be checked by reading DIP switches of the camera.
• If your controller supports multi-protocols, the protocol must be changed to match to that of the camera.
• If you changed camera protocol by changing DIP switches, the change will be effective after you reboot the camera.
• Since the operation method can be different for each controller available, refer to the manual for your controller if camera can not be
controlled properly. The operation of this manual is based on the standard Pelco Controller.
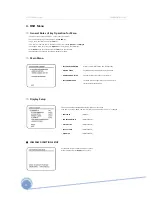
⊙
Preset and Pattern Function Pre-Check
• Check how to operate preset and pattern function with controller or DVR in advance to operate camera function fully when using controller or
DVR.
• Refer to the following table when using standard Pelco protocol controller.
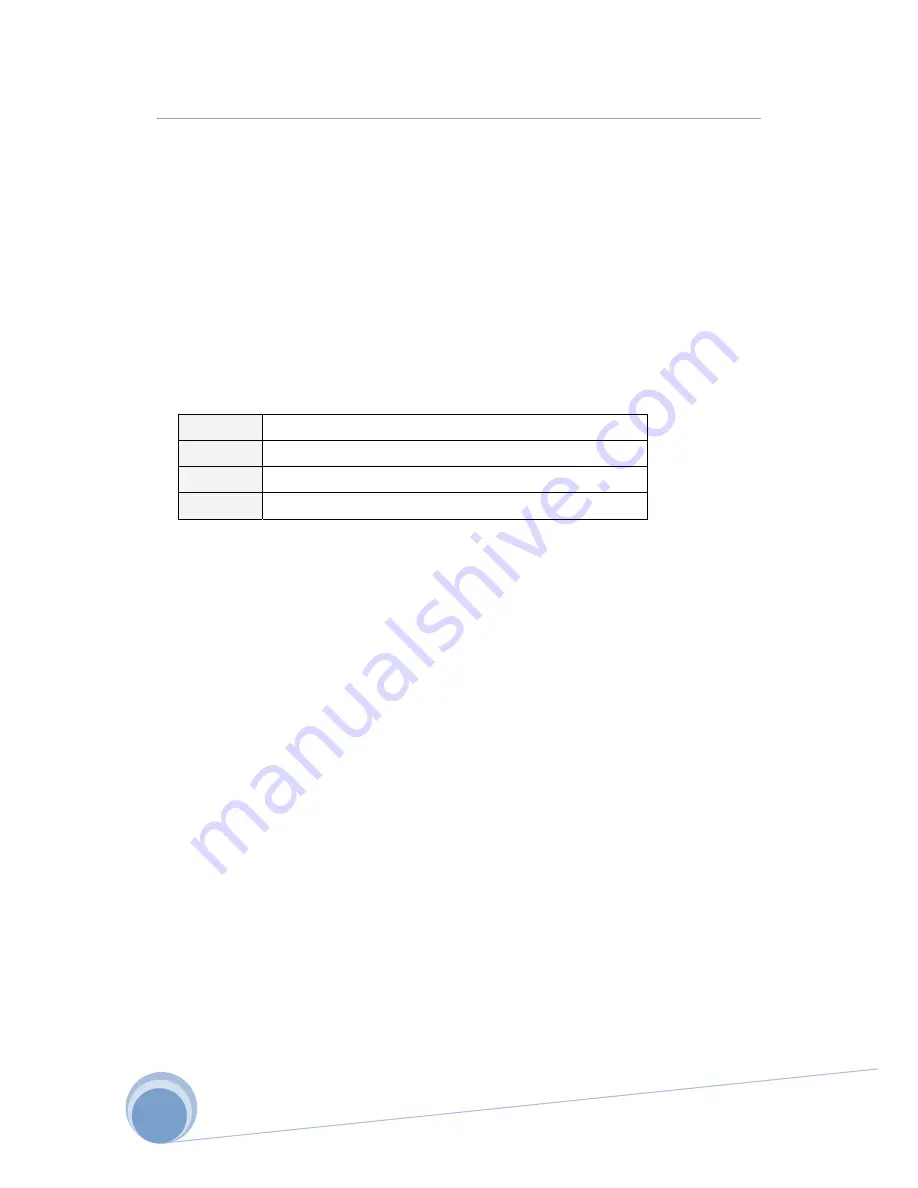
<Go Preset>
Input[Preset Number] and press [Preset] button shortly.
<Set Preset>
Input[Preset Number] and press [Preset] button for more than 2 seconds.
<Run Pattern> Input[Pattern number] and press [Pattern] button shortly.
<Set Pattern>
Input[Preset Number] and press [Pattern] button for more than 2 seconds.
• If controller or DVR has no pattern button or function, use shortcut keys with preset numbers. For more information, refer to “Reserved Preset”
in this manual.
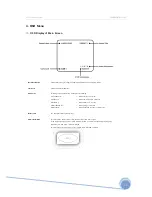
⊙
Starting OSD Menu
• Function : Using the OSD menu, Preset, Pattern, Swing, Group and Alarm I/O function can be configured for each application.
• Enter Menu : <Go Preset> [95]
⊙
Reserved Preset
• Description Some Preset numbers are reserved to special functions.
• Function 1. <Go Preset> [95] : Enters into OSD menu
2. <Go Preset> [131-134] : Runs pattern function 1~4
3. <Go Preset> [141~148] : Runs Swing Function 1~8
4. <Go Preset> [151~158] : Runs Group Function 1~8
16
Содержание XPEED Indoor Series
Страница 1: ...www cnbtec com XPEED Indoor Series Ver 1 0 INSTALLATION AND OPERATION MANUAL 3810 0251A_110119...
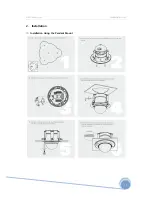
Страница 10: ...XPEED Indoor Series WWW CNBTEC COM 2 Installation Installation Using the Wall Mount 10...
Страница 11: ...XPEED Indoor Series WWW CNBTEC COM 2 Installation Installation Using the Pendant Mount 11...
Страница 12: ...XPEED Indoor Series WWW CNBTEC COM 2 Installation Installation using the Pendant Mount 12...
Страница 13: ...XPEED Indoor Series WWW CNBTEC COM 2 Installation Installation using the Wall Mount 13...
Страница 37: ...XPEED Indoor Series WWW CNBTEC COM 5 Specifications Dimensional Drawings Unit mm 37...
Страница 38: ...XPEED Indoor Series WWW CNBTEC COM 5 Specifications Dimensional Drawings Unit mm 38...
Страница 39: ...XPEED Indoor Series WWW CNBTEC COM MEMO 39...