3. Daymark meNU eDitor
1.
2.
3.
4.
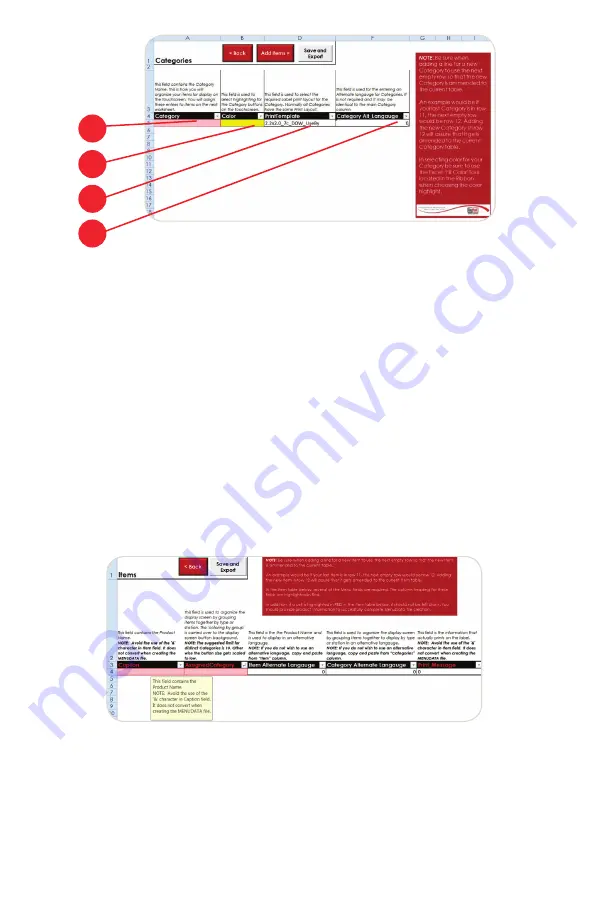
3. The fi rst step in preparing your Menu for the 9700 printer is to creating the Catego-
ries used to organize your Menu items.
1. Category - This fi eld contains the Category Name. This is how you will
organize your items for display on the touchscreen. You will assign these
entries to items on the Item worksheet.
2. Color - This fi eld is used to select highlighting for the Category buttons on
the touchscreen.
3. Print Template - This fi eld is used to select the required Label print layout for
the Category. Normally all Categories have the same Print Layout. Select
the desired Print Template from the dropdown in this column.
4. Category Alt_Langauge - This fi eld is used for the entering an Alternate
language for Categories. It is not required and It will auto-fi ll with the infor-
mation entered in the Category column so it may be identical to the main
Category column.
4. On the ITEM worksheet the user will enter the Menu Items and the appropriate infor-
mation regarding things such as hold times, the label Print Message,etc.
5. Once all Category, Menu Items, and appropriate information have been added to
the spreadsheet, select the ‘SAVE and EXPORT’ button. Selecting this button causes
two things to occur. First, it saves the spreadsheet in its current state for future edit-
ing. Second, the spreadsheet data will be ‘Exported’ to an XML formatted fi le titled,
‘MENUDATA.xml’. This fi le will be used to update the current Menu Data on the
9700 printer via the ‘Menu Data Update USB Instructions outlined in the next section.
36.


