background image

CLOUD ELECTRONICS LIMITED

1    Introduction

The CDI-S100 is an optional module that fits inside the CX462 Audio System Controller to allow serial
control of:

w

Music Source select, Level control and Muting

w

Individual Microphone Muting

w

Master Microphone Level and Muting

2    Installation

The CDI-S100 should be configured before being installed (see section 3 for configuration details).  The
CDI-S100 is supplied with two 25mm hex spacers and a 9-pin sub-D plug.  The module is connected to
the CX462 main board via a connector located at the rear of the mixer, close to the output terminals.  The
connector is marked 'CON 7'. 

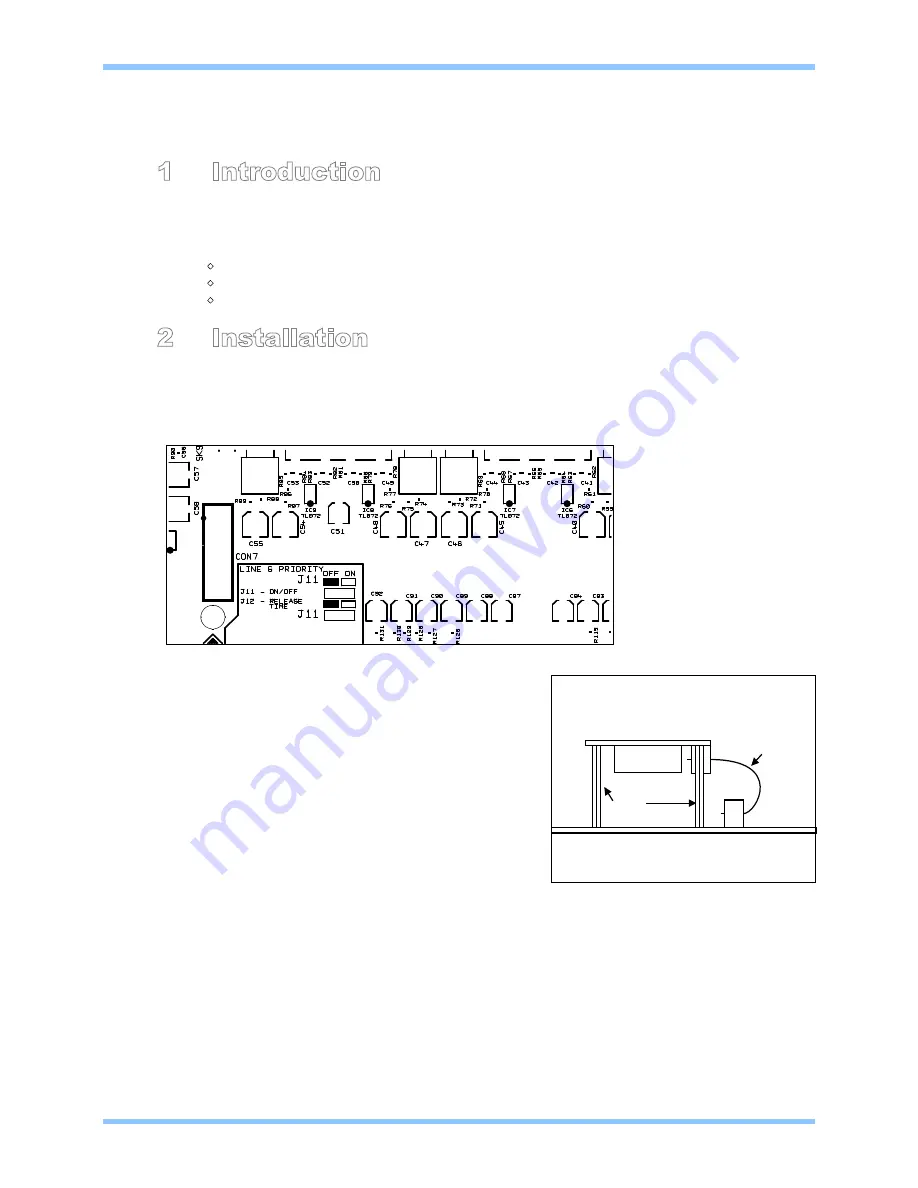
Location of CON7 on CX462

Instructions:

1.

Disconnect mains supply from CX462.

2.

Remove top panel from CX462.

3.

Remove the panel that blocks the serial interface 
terminal space when no interface module is installed.

4.

Locate connector CON7 (16-pin box header)

5.

Remove M3 screw adjacent to CON7 and M3 screw 
next to C96. Keep to one side.

6.

Remove hex spacers from 9-pin sub-D socket.

7.

Screw 25mm hex spacers into screw holes in step 5.

8.

Connect ribbon cable attached to module to CON7 
terminal. 

9.

Place module in an inverted position over the spacers, 
making sure to line up the interface socket and 
spacers with their respective holes.

10.

Use M3 screws, saved from step 5, to firmly affix the module to spacers.

11.

Reattach hex spacers to the 9-pin sub-D socket through holes in rear panel.

12.

Check and set internal jumpers J7-10 to configure the modules effect on music signals (see 
section 4.2).

13.

Check and set the internal jumpers J1-4 to configure the modules effect on microphone muting 
(see section 4.1).

14.

Fit the top panel back on to the CX462, using the original screws.

15.

Set rear panel 'REMOTE TYPE' switch to 'DIGITAL' position.

16.

Set front panel 'LOCAL/REMOTE' switch to 'REMOTE'.

1

CDI-S100 Serial Interface Card

Setup And Installation Guide

VCA MODULE

CX462 MAIN PCB

CROSS SECTION VIEW FROM FRONT OF CX462 TOWARDS REAR PANEL

RIBBON CABLE

SPACERS

Содержание CDI-S100

Страница 1: ...CDI S100 Installation Setup Guide Version 1 CDI S100 SERIAL INTERFACE CARD Cloud Electronics Limited Copyright Cloud Electronics Limited 2003 Clearly Better Sound...

Страница 2: ...LIMITED CDI S100 Installation and Setup Guide Cloud Electronics Limited 140 Staniforth Road Sheffield S9 3HF England Phone 44 0 114 244 7051 Fax 44 0 114 242 5462 E mail technical cloud co uk WebSite...

Страница 3: ...CX462 Configuration 3 4 1 Microphone Access controls 3 4 2 Music source select and volume 3 5 Cloud SP v1 Communications protocol 3 5 1 Message Structure 3 5 2 The Destination Field 4 5 3 The Command...

Страница 4: ...M3 screw adjacent to CON7 and M3 screw next to C96 Keep to one side 6 Remove hex spacers from 9 pin sub D socket 7 Screw 25mm hex spacers into screw holes in step 5 8 Connect ribbon cable attached to...

Страница 5: ...the CDI S100 changes the communications mode between hardware handshaking software handshaking and no handshaking modes Hardware handshaking utilises the two dedicated lines Clear To Send CTS and Requ...

Страница 6: ...e music controls between forced analogue and switchable controls AN and SW positions respectively The controls must be switchable to allow the CDI S100 to control them as any other setting will effect...

Страница 7: ...se is just to set the mute or open state The other commands set a parameter for the source or level on a particular channel Three command types are available to do this Absolute A Up U and Down D For...

Страница 8: ...will set the default settings This message sets the default music level to 10dB below the maximum music level 5 6 Data Formats To provide for a broad range of controllers the CDI S100 will accept two...

Страница 9: ...rce commands a lower case absolute message type is always returned 5 9 Example commands 1 Absolute Music Level We would like to set the music level on a unit to 0dBu In order to do this we need to rec...

Страница 10: ...dialog box Click the Settings tab on and press the ASCII Setup button to open the Ascii setup dialog box Set the checkbox labelled Echo typed characters locally Close the Ascii setup and the Properti...

Страница 11: ...Notes...

Отзывы: