Dear Customer,
we wish you a lot of pleasure with your new
Cloer Barbecue Grill 6789. By buying the new
grill you have decided on a quality product
combining technology, high functionality and
modern design.
Your new Cloer Barbecue Grill will make your
barbecue evening a carefree event. Enjoy your
meal!
Your company Cloer
Before using the first time
Remove all packaging parts and, if applicable,
stickers, not the identification plate.
Before using the first time, clean the grilling
surface by means of a soft cloth.
Safety instructions for operation
The appliance meets the
requirements of the applicable
EC directives.
ATTENTION! Grilling surface,
power cover as well as lid get
extremely hot in operation. There
is the danger of burns and fire!
Only touch the lid at the heat-
isolated handles.
Never cover the grilling surface with aluminium
foil.
Do not put saucepans or pans on it, as the heat
development can cause deterioration of the
non-stick coating.
Never put baking paper and inflammable
materials on the grilling surface.
The immense
heat can cause fire!
Never let the grill unattended while in
operation.
Keep it well away from swimming/paddling
pools, sprinklers, and hoses.
Do not place the grill next to inflammable
objects.
Route the cable so it doesn’t overhang, and can’t
be tripped over or caught.
Use oven gloves if necessary.
Never use the grill without the drip tray.
ATTENTION! Even at the lowest
setting of the thermostat (level 1
or lower) the appliance is already
in operation. Unplug the power
plug to switch off the appliance
completely.
During the very first heating up the appliance
can cause slight smoke. After some minutes,
however, smoking will stop again.
ATTENTION! Do not use charcoal
or similar combustibles as well as
so-called grill lighters for the
·
·
·
·
·
·
·
·
·
·
·
·
11
EN
Barbecue Grill!
ATTENTION!
Always unplug
appliance when not in use and
before cleaning!
Setup
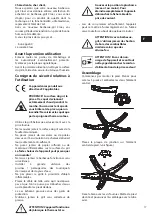
Plug the base together at the start. For this,
take the 5 feet and insert them into the central
element:
Place the connection plate on the central ele-
ment of the base. (See figure)
Fasten this with the supplied screws. Put the
base aside and continue with the steel tube.


